Tutorial 4: Create a Particle System with Flow#
Flow emitters and particle systems#
With a particle system you can spawn particles that emit flow. This tutorial goes over the steps you need to take to set up a particle system that runs flow.
Video Tutorial: Particles and Flow#
Video Authored in Create 103
Create a basic particle system#
First, create a source for the particle system emitter.
1. Go to Create->Shapes-> and select Sphere
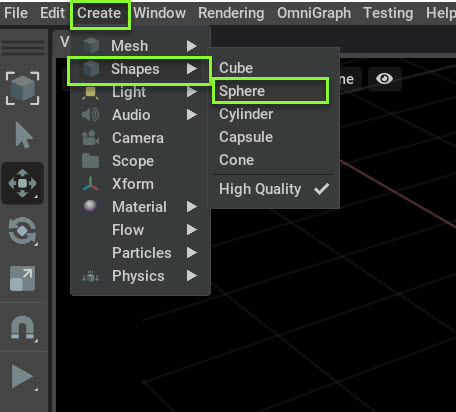
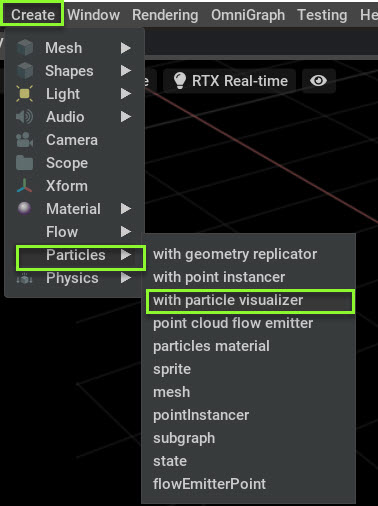
For this example, we don’t need to have a particle visual so we’ll select the particle visualizer. We’ll go over how to hide the particles in a later step.
Note
If you want the particle to have a display (example: a particle spark) select the geometry replicator.
2. With the sphere selected, go to Create-> Particle-> and select with Particle Visualizer.
Now you have a particle visualizer using the sphere as a source.
3. Turn off visualization of the sphere by clicking on the eye in Stage-> World-> Sphere.
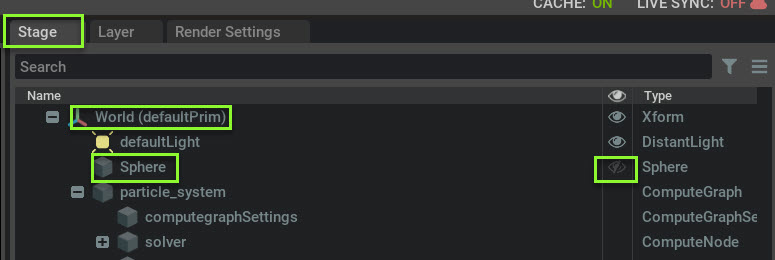
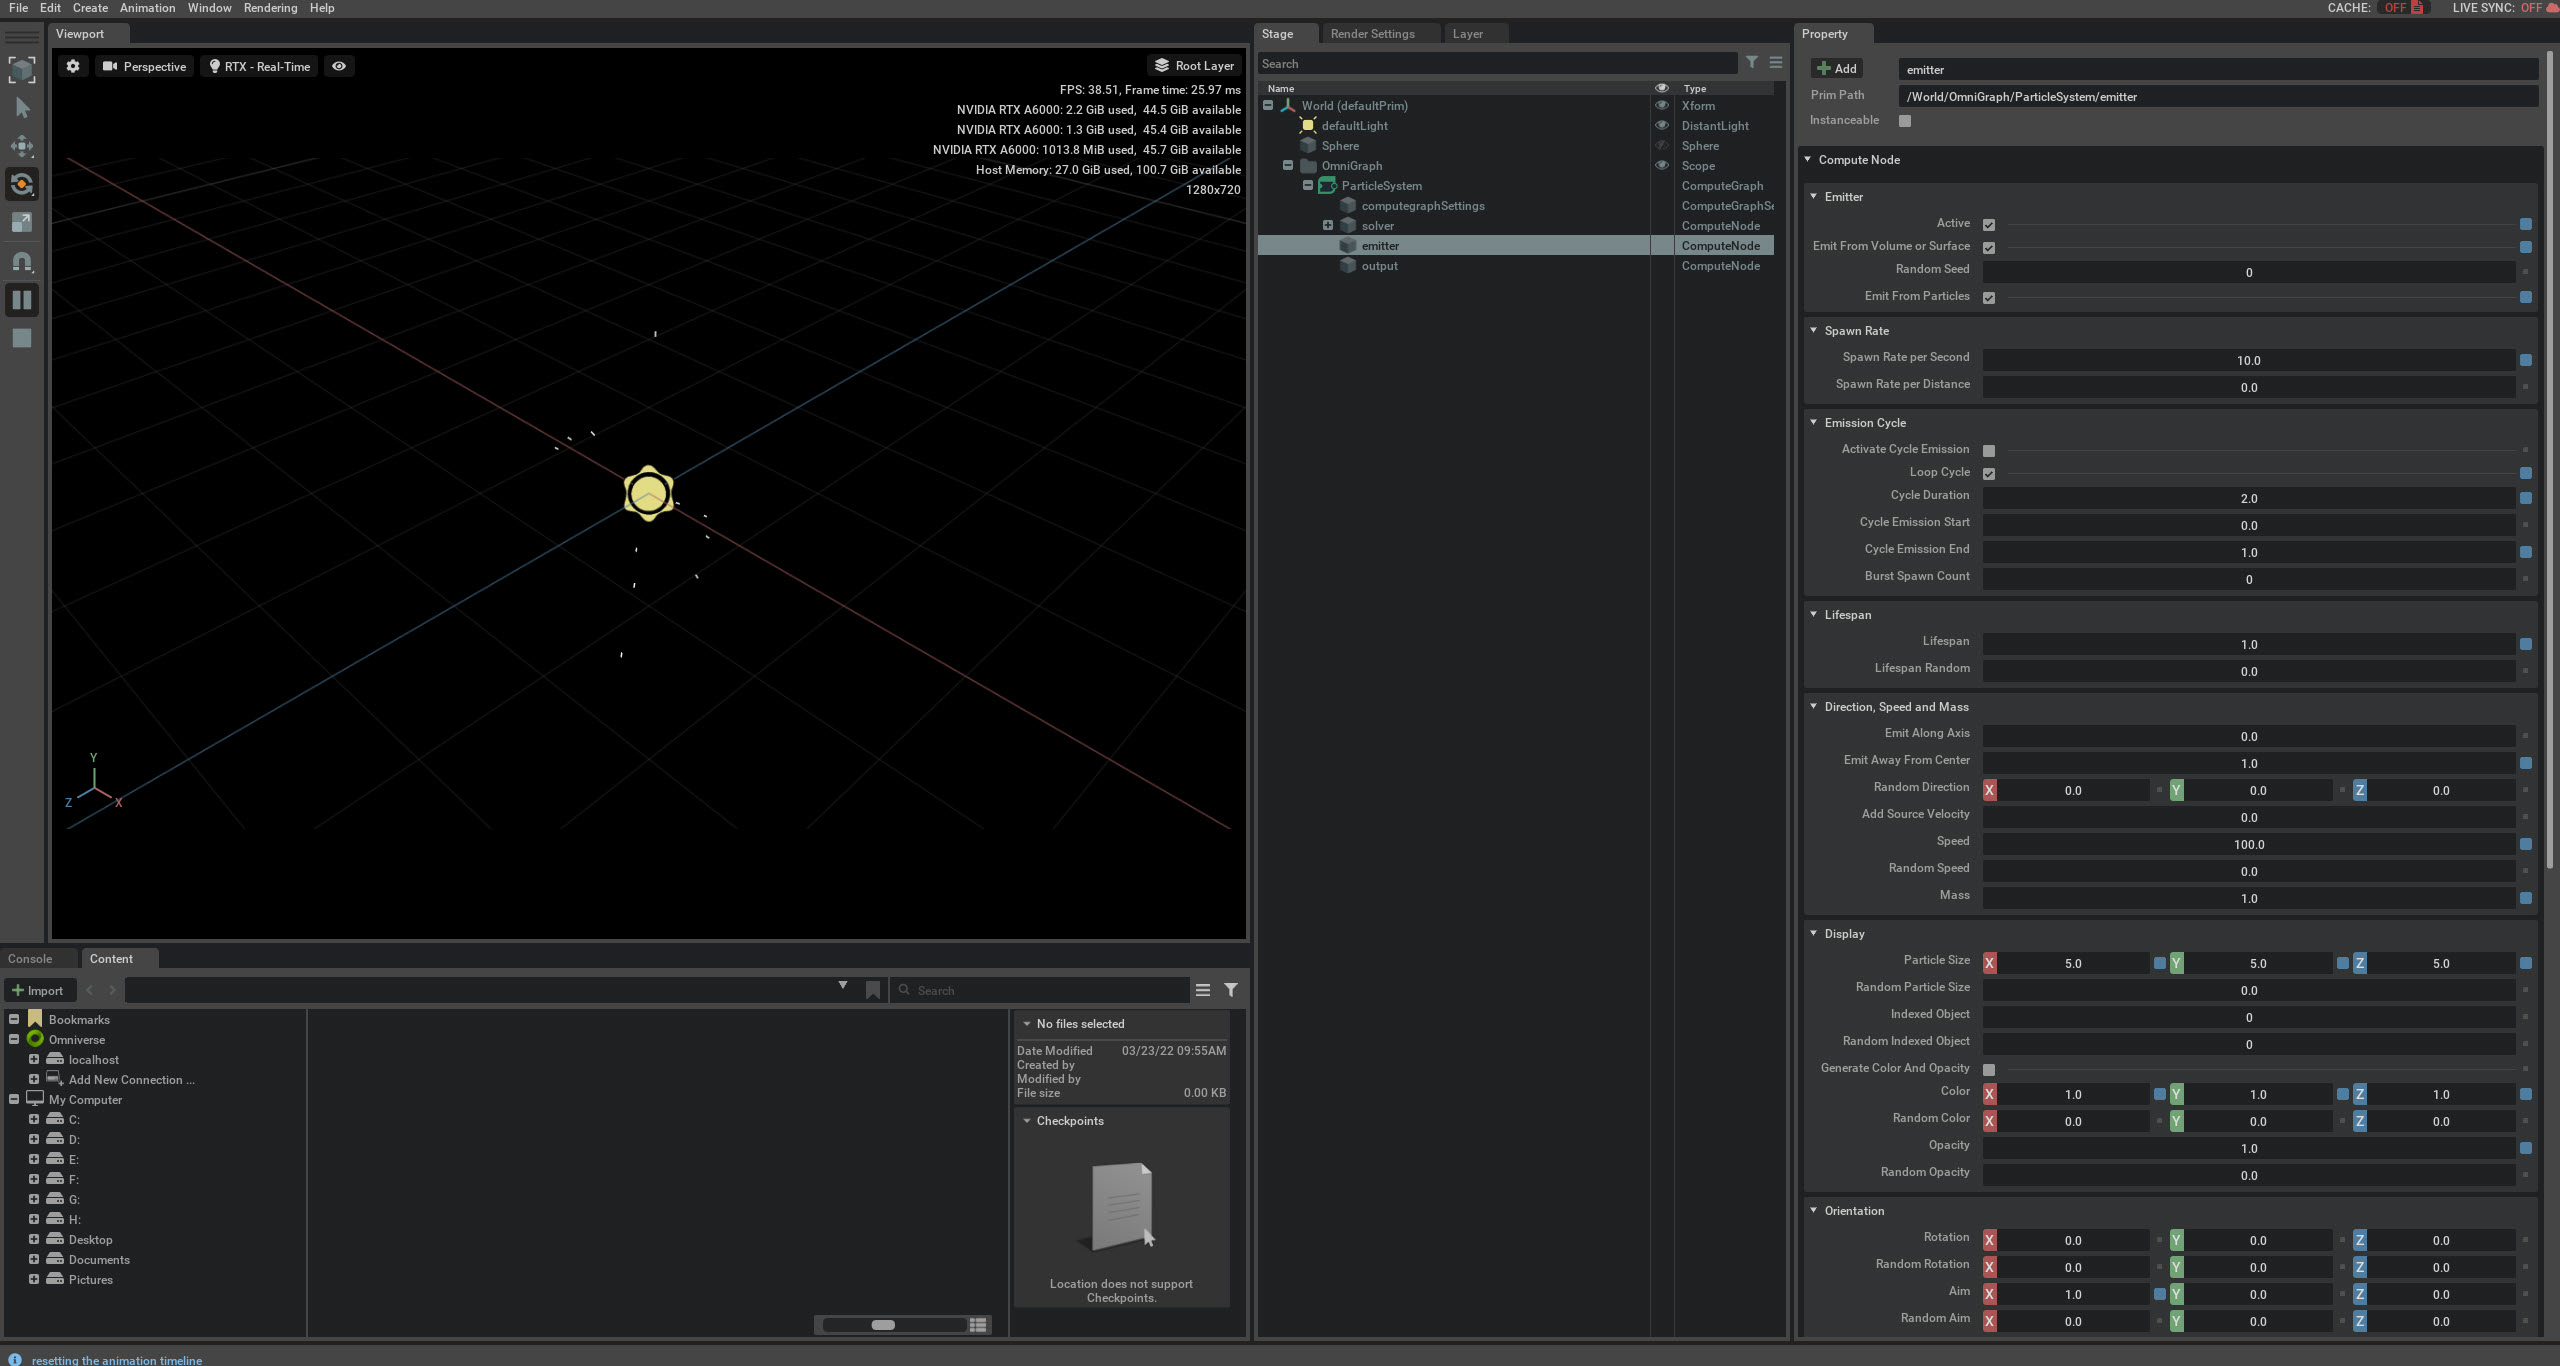
Your source is invisible and you’ll only see particles emitted in space. Your particle system should look something like this:
Create a Flow preset#
Next we need to create a flow simulation that the particles can drive. You’ll need to open the flow Presets window.
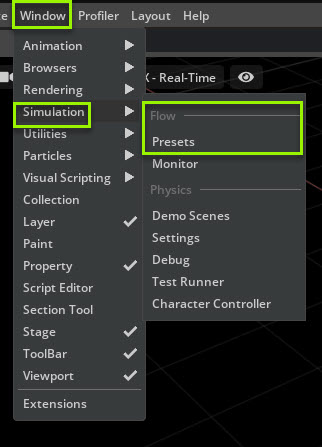
1. Go to Window -> Simuation -> Flow and select Presets
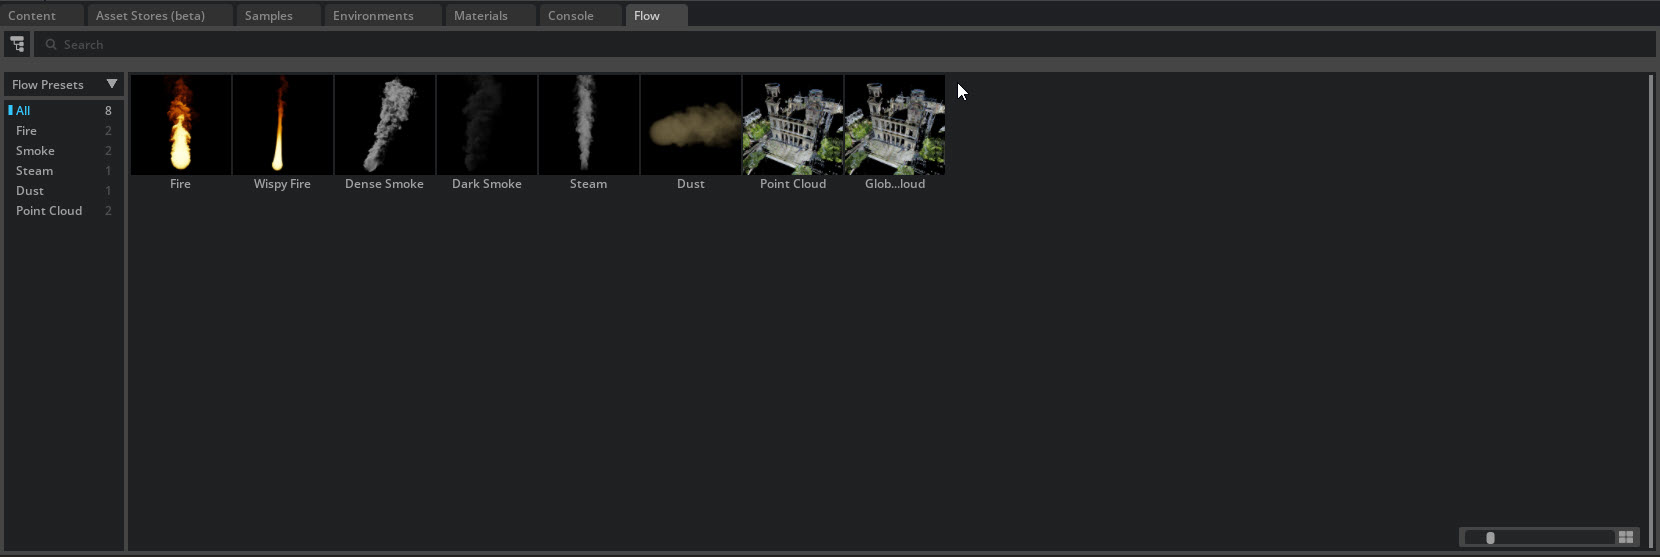
A flow Presets window will appear.
2. Select the World Transform.
Note
Flow emitters will be added as a child to whatever you have selected. For this tutorial make sure you have the world selected.
3. Left click drag **the *Fire* preset into the Viewport or **double click the Fire Preset.
This will create a flow simulation with a flowEmitterSphere.
You will not be able to see the flow simulation unless you click play.
To enable the flow emitter to play at all times go to Stage -> World -> flowSimulate and go to Property and select forceSimulate.
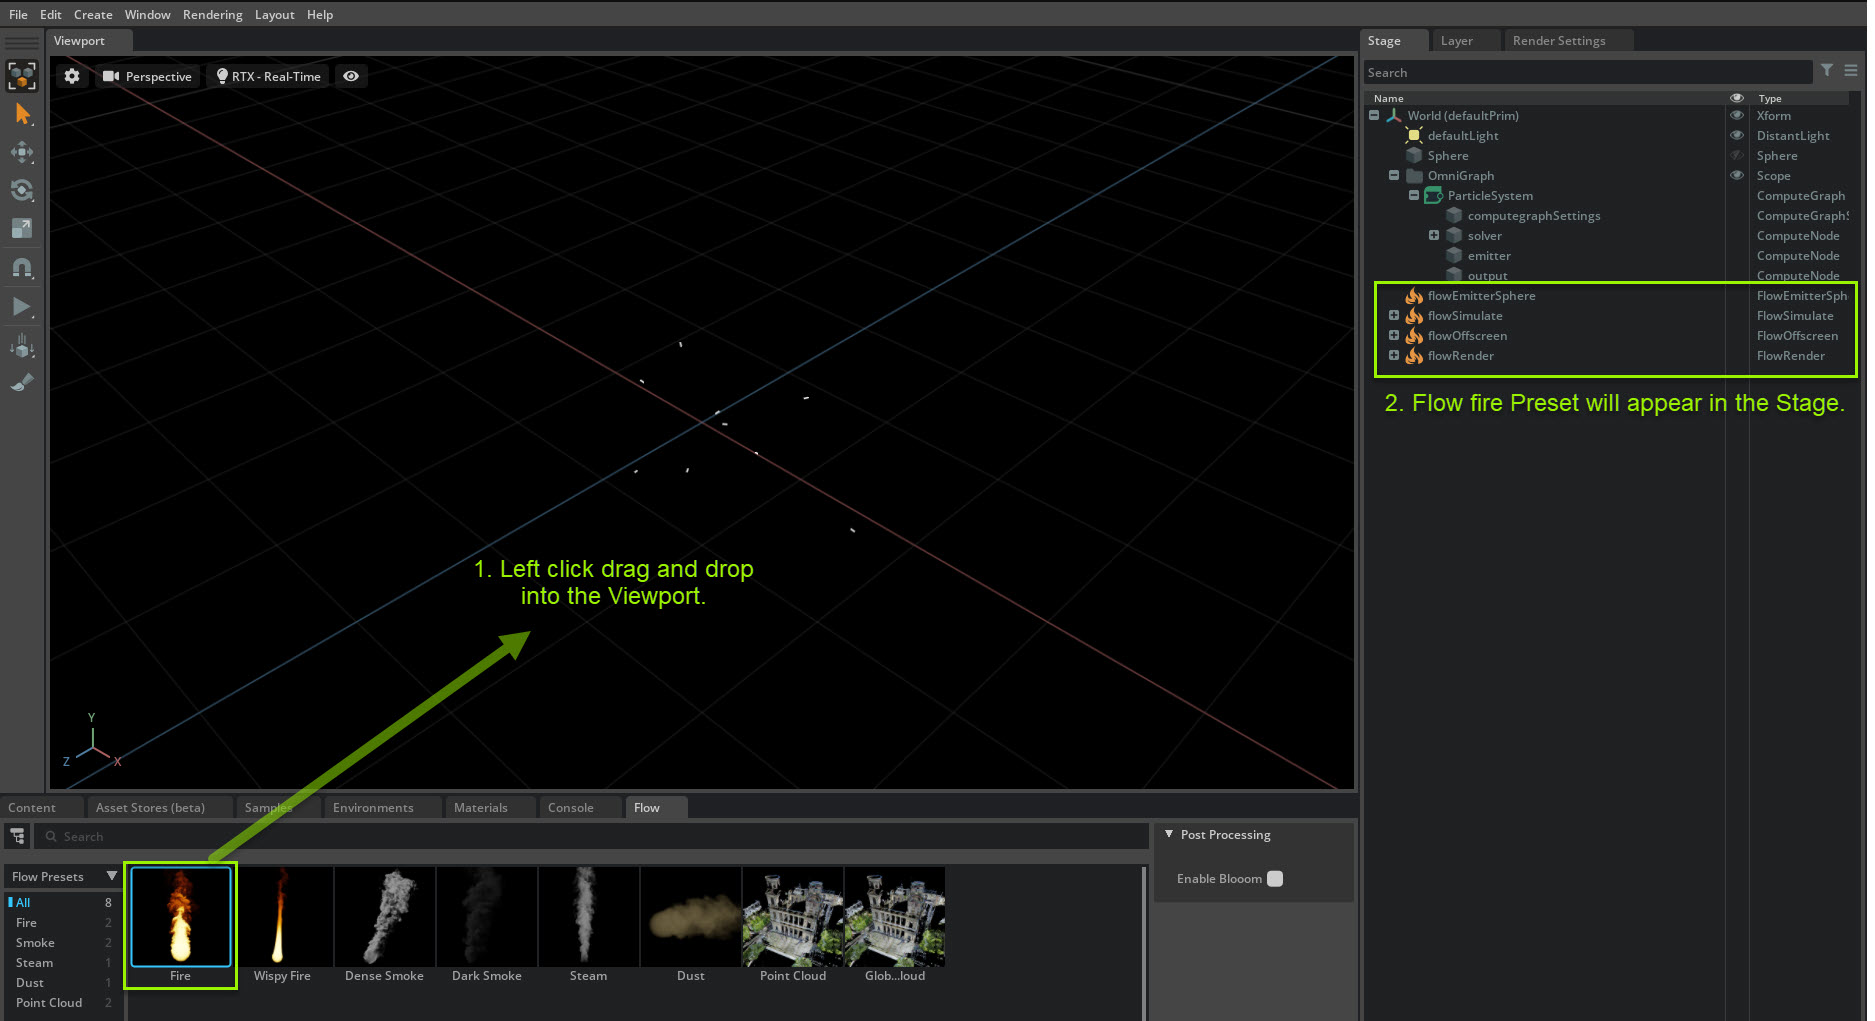
Now you have the flow simulate and the particle system set up. Next we need to link the two simulations together and create a Flow emitter.
Create a Flow Cloud point emitter#
Next we need to make a Point cloud Flow Emitter and a point emitter. This will allow particles to influence the flow emission.
1. First go to the Stage and select World-> OmniGraph -> Particle System-> Solver
2. Then control click World-> flow Simulate
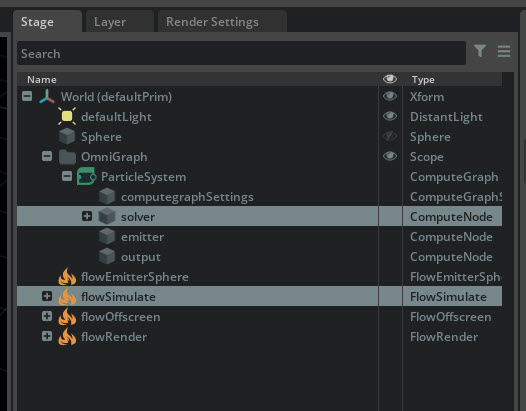
3. With both of selected go to Create-> Particles and select point cloud flow emitter.
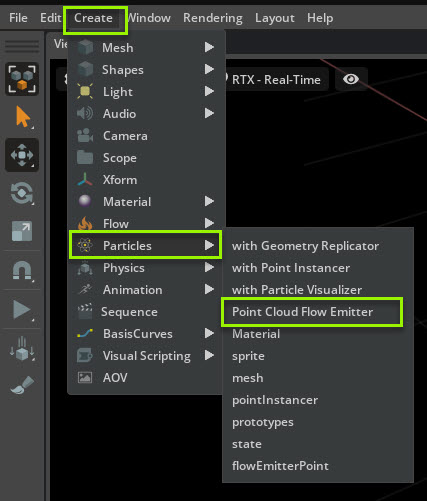
A flow_emitter will be created in the particle system and a flow emitter point will be created in World.
The flow emitter serves as a bridge between the particle and the flow emitter point.
The flow emitter point carries some of the parameters that are normally in the flow emitter sphere.
Note
If flow emissions are not following the particles check the layers match the flow emitter point and the other flow entries. All layers must match to work.
Delete the flow emitter sphere in Stage-> World -> flowEmitterSphere, unless you’d like to keep it.
Now that the particle and flow are connected, we’ll be doing some tweaks to the particle to make it move in an upward direction. We’ll also be removing the particle visualization from the points.
Emitter Tweaks#
First we’ll turn off the visualization for the particle.
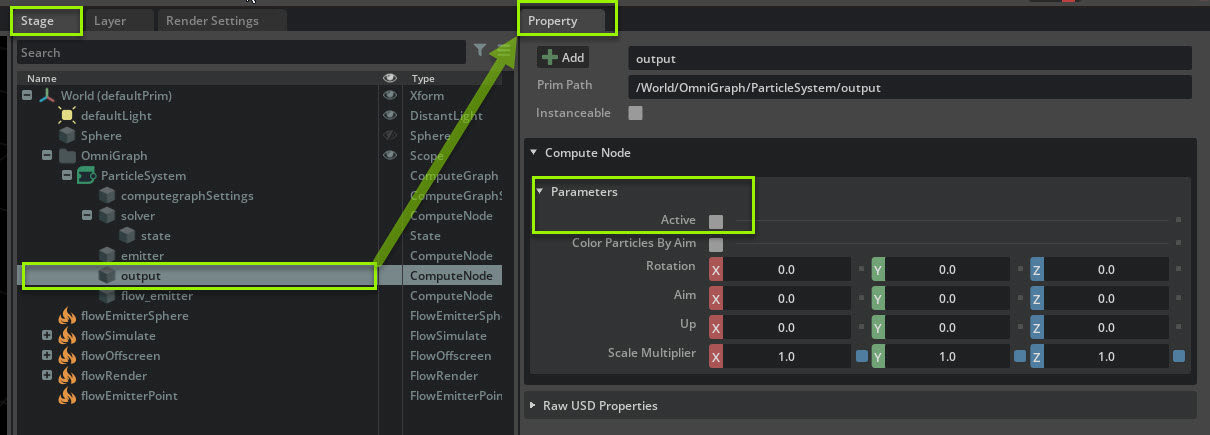
1. To turn off the particle visualizer output display go to Stage-> World-> OmniGraph -> particle system and select Output.
2. In Property-> parameters click on the Active Toggle to disable the visualization.
Next we’ll change the behavior of the particles and source.
Emitter Changes: We’ll be changing the way the particles are emitted from the source.
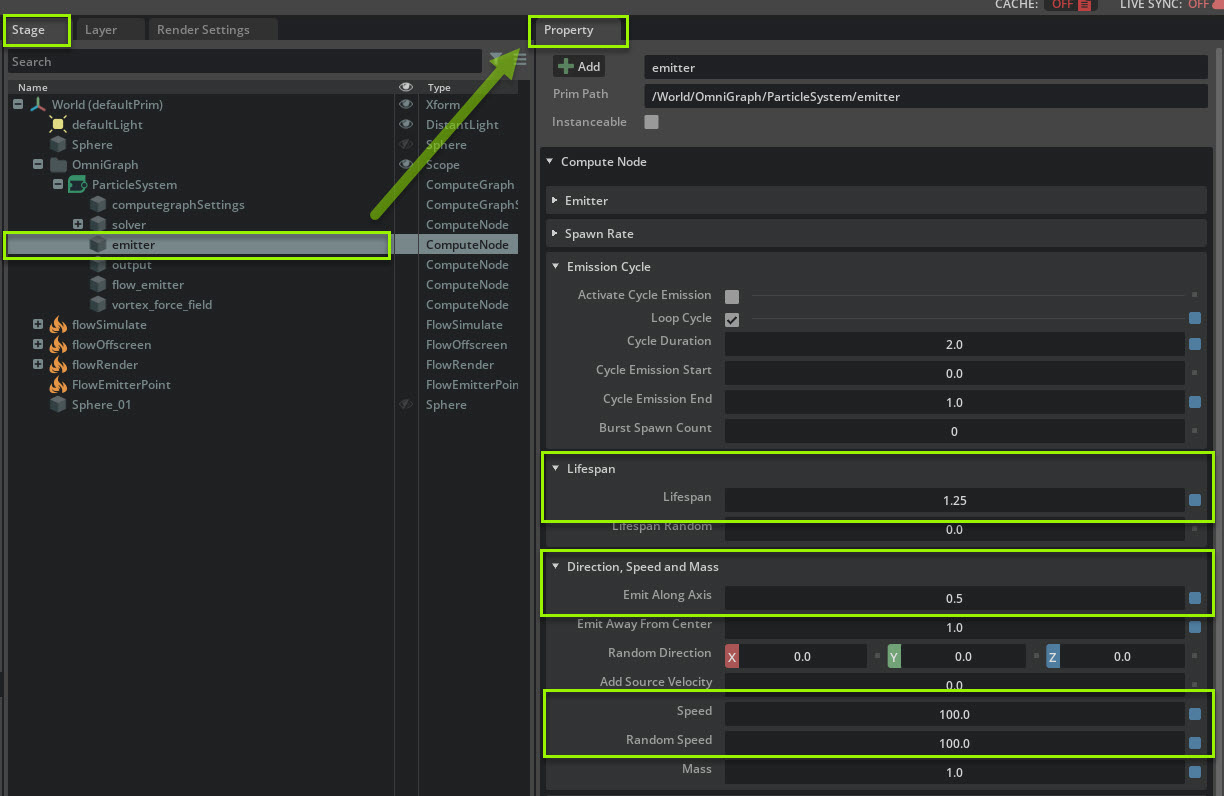
1. Go to Stage-> world -> Particle system and select the emitter. In the emitter change the following parameters:
Lifespan -> Lifespan 1.25
Direction, Speed and Mass-> Emit Along Axis 1.25
Direction, Speed and Mass -> Speed 100
Direction, Speed and Mass -> Random Speed 100
I want the particles to move upward so we’ll need to make some changes to the source.
Source Changes
Go to the sphere and rotate its axis
1. Go to Stage-> World and select the sphere
2. In Property go to Rotate and rotate the z axis to 90.
3. in Scale change x, y ans z to .1.
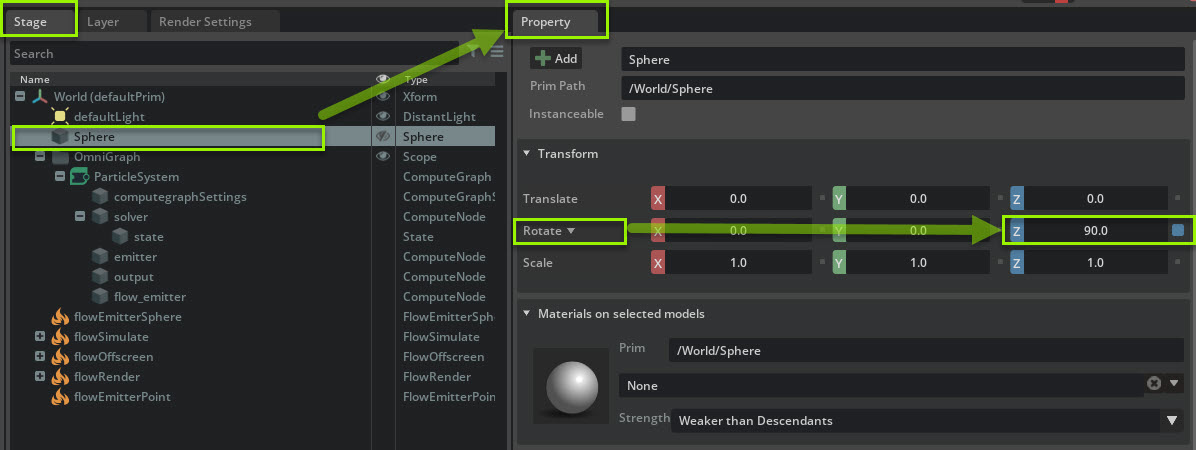
This rotates the source so the points and flow are moving in an upward direction. Next I want to start tweaking the flow emissions. Lets start by adding more fuel to the fire.
Flow Emission Changes:
1. Go to Stage-> World -> and select flowEmitterPoint
2. Go to Property and change the following parameters:
Flow-> Fuel: 20
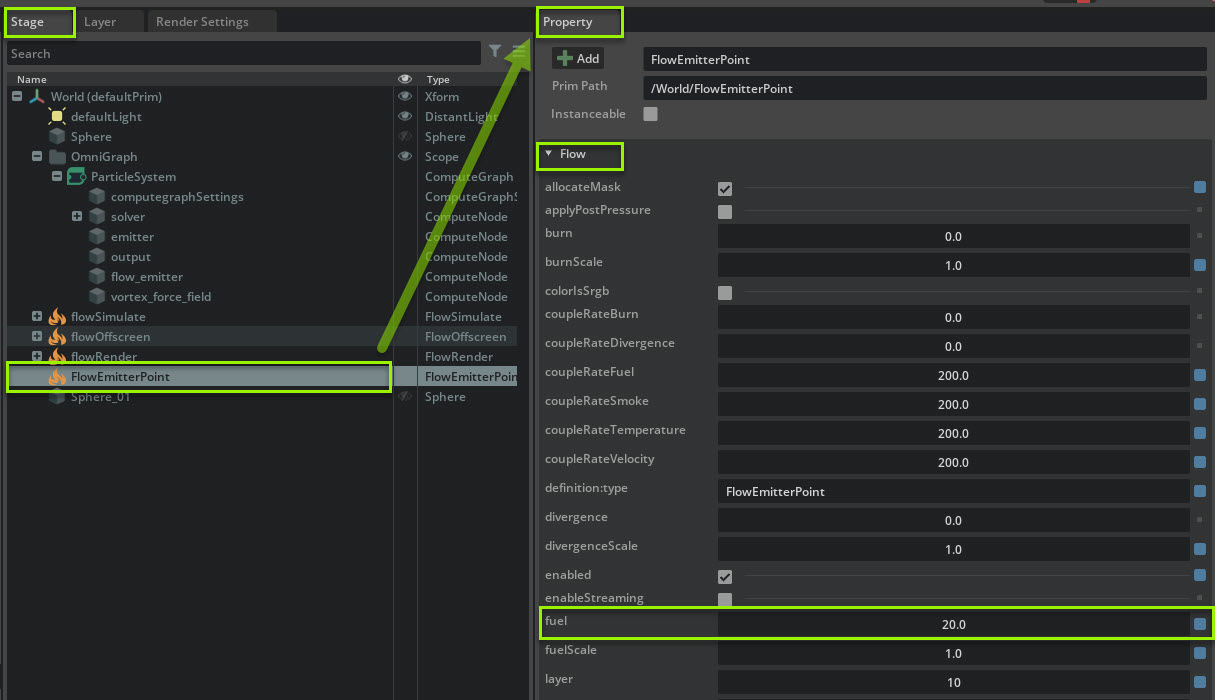
Now lets change the way the flow emission burns.
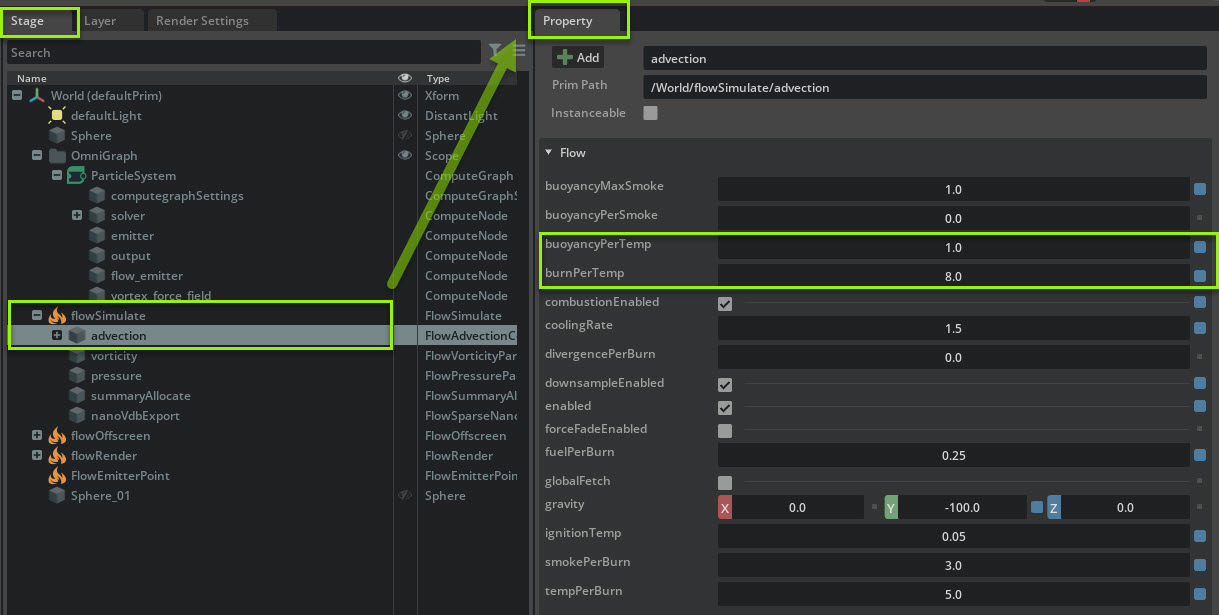
3. Go to Stage-> World -> FlowSimulate and select Advection
4. Go to Property and change the following parameters
Flow->bouyanceyPerTep: 1
Flow->burnPerTemp: 8
Particle Editor Setup#
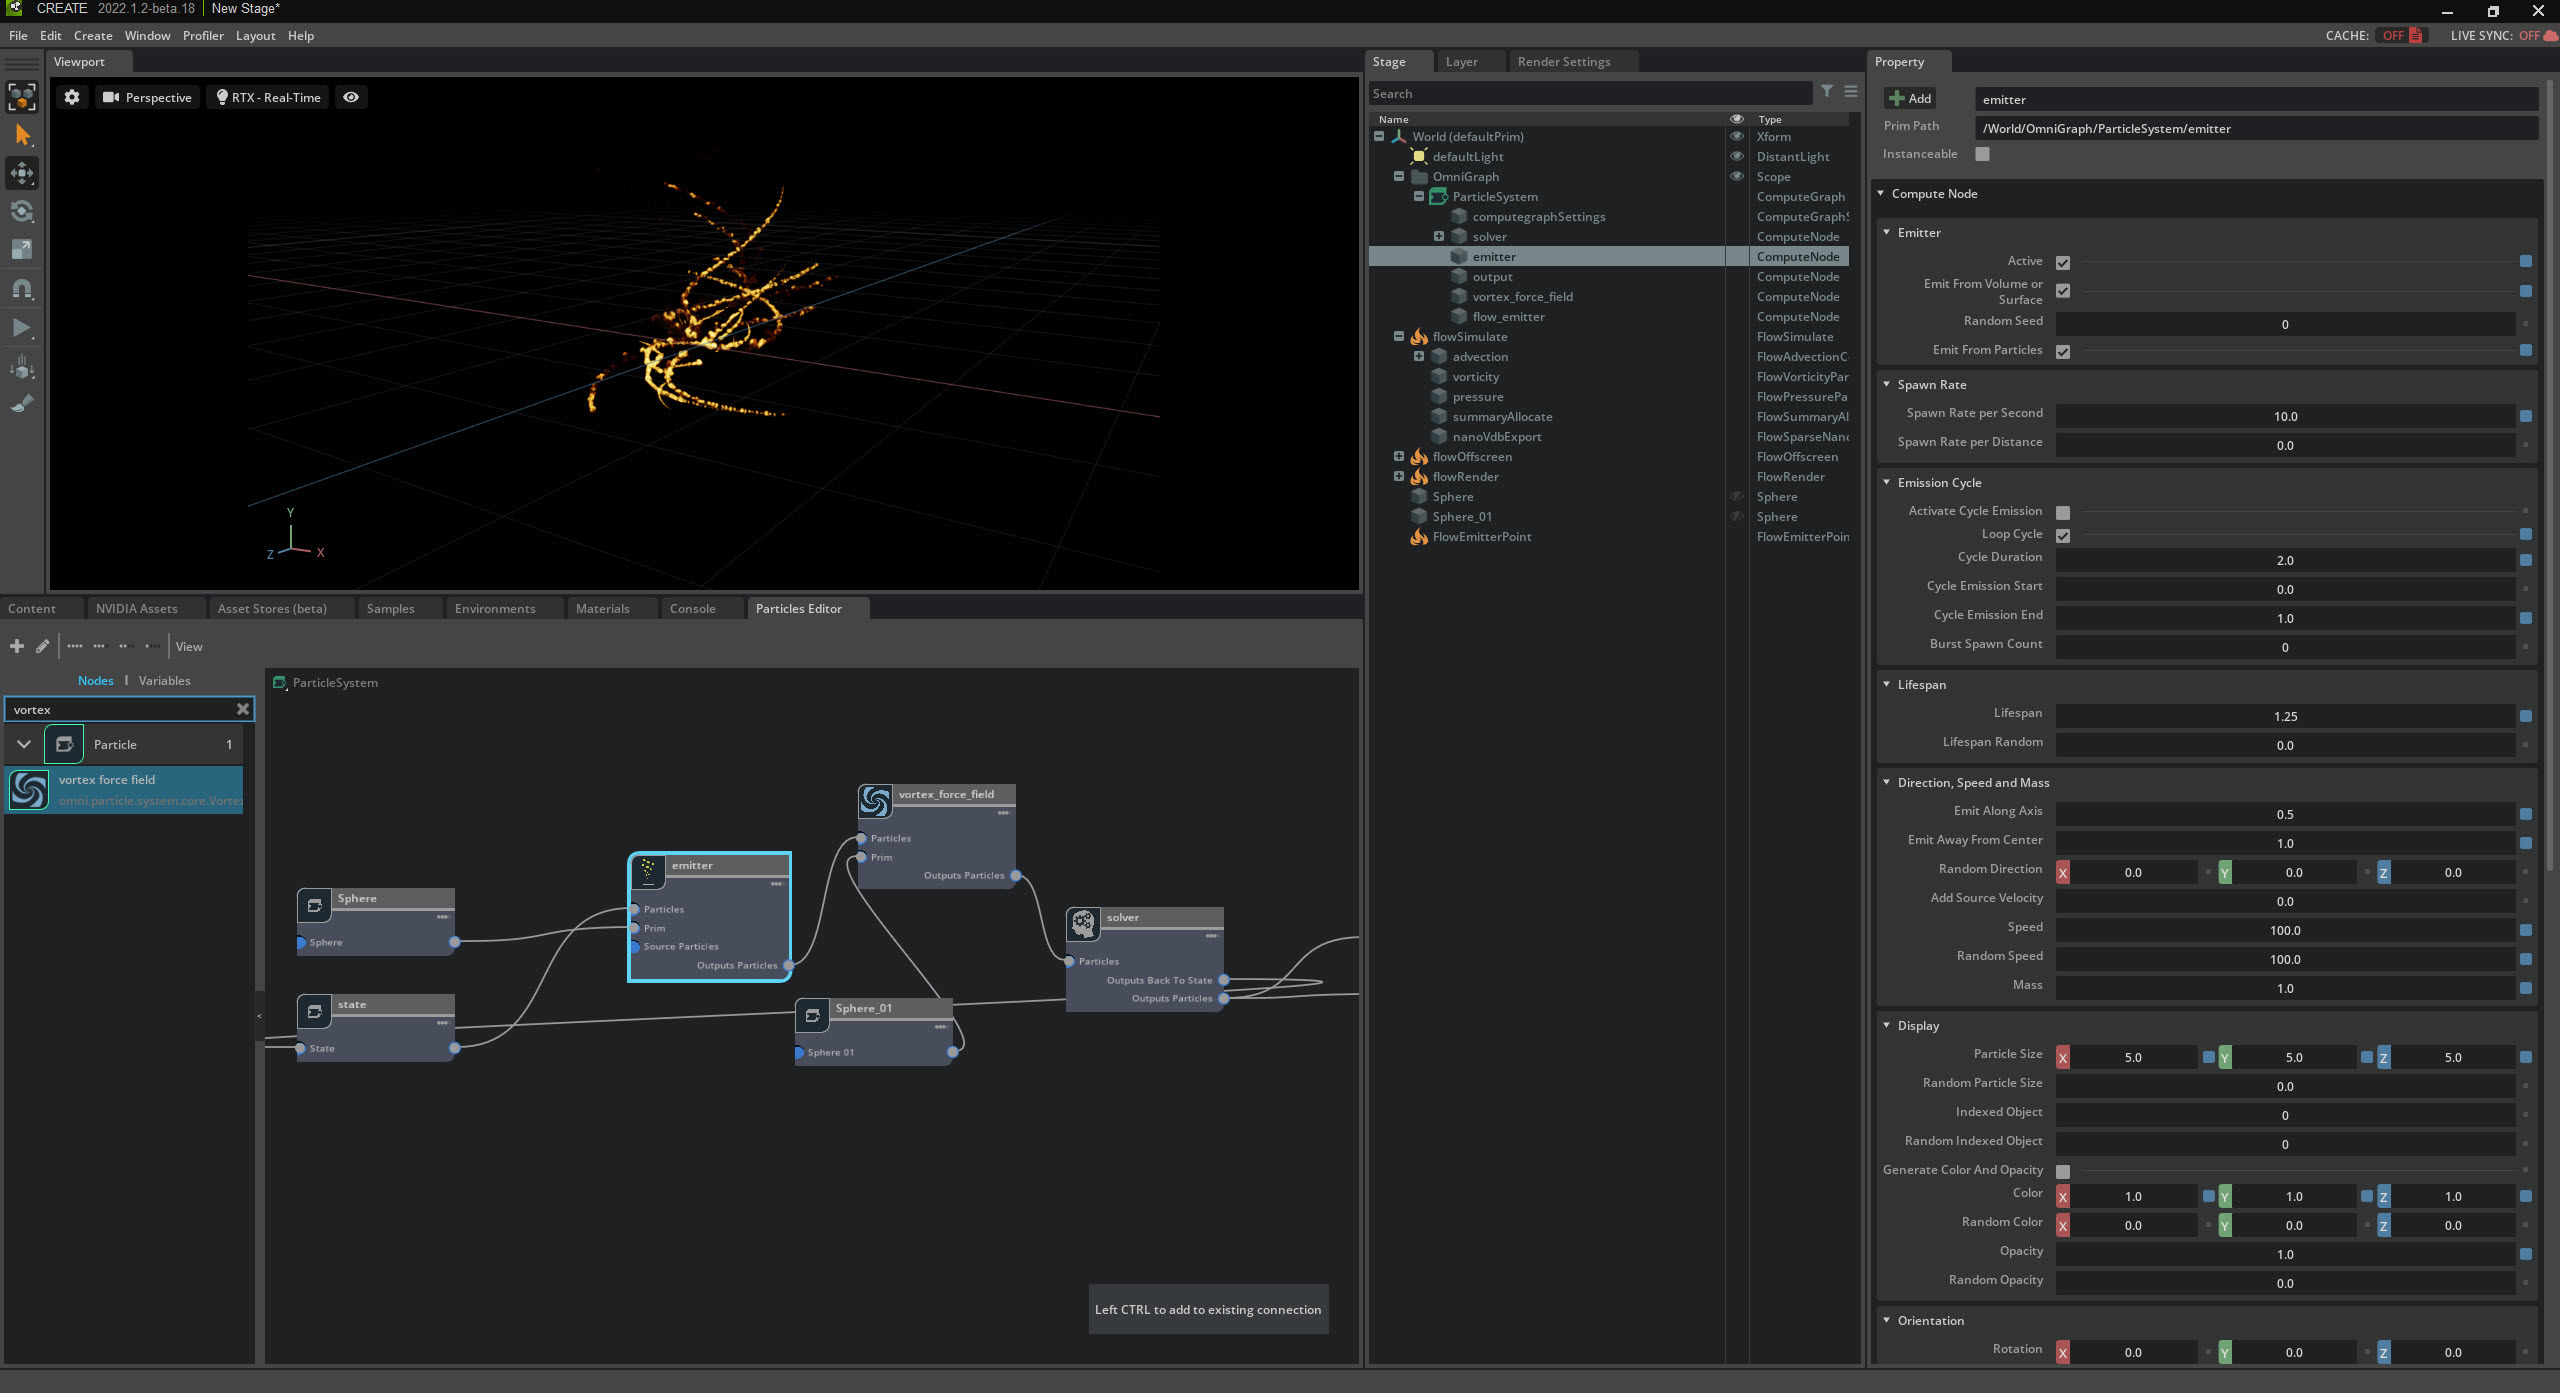
If you open the Particles Editor, you can see how the nodes have been connected.
Open the particle Graph Editor. Go to Window -> Particles and click Editor.
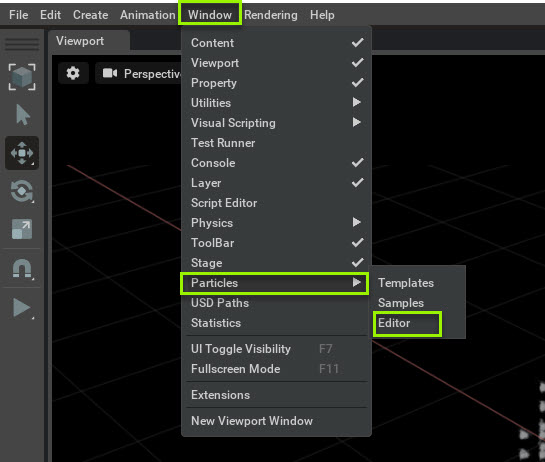
The Particles Editor will appear in the same frame as the Content window in a Tab.
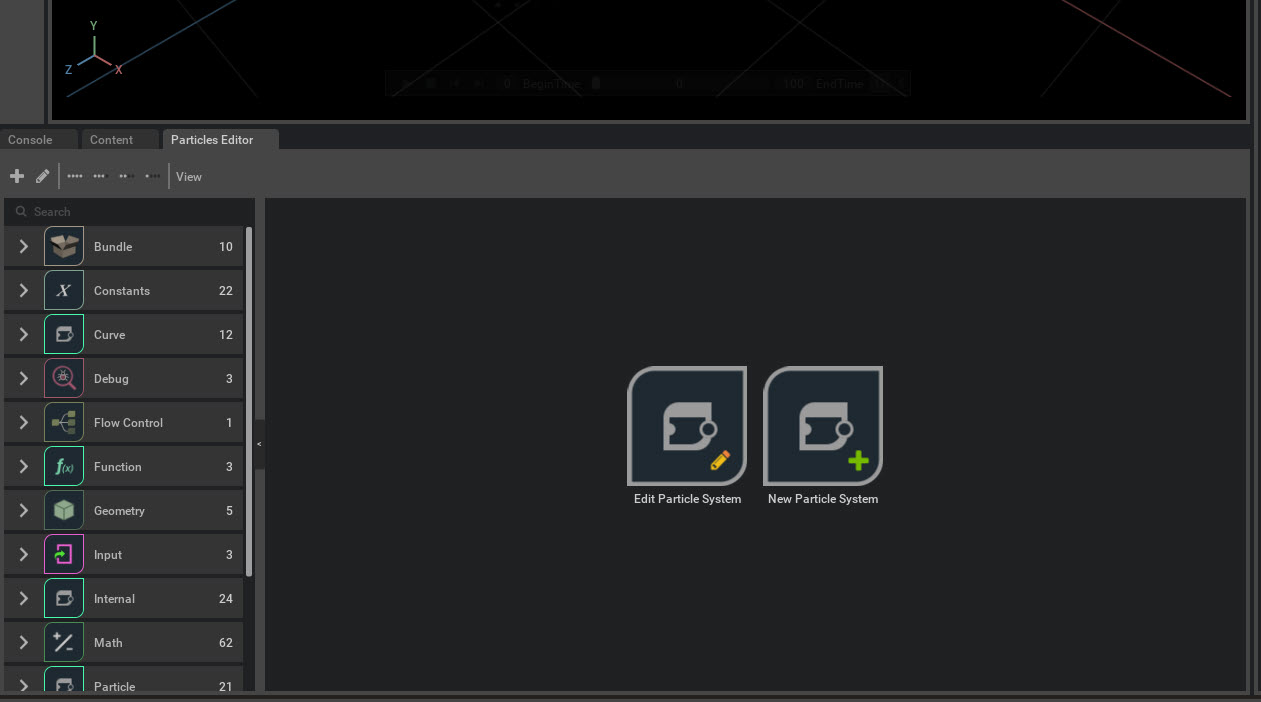
To view the particle system, left click on the Edit Particle System button.
A Select Graph To Open window will appear. Left click on the /world/Omnigraph/particleSystem button to open the particle system.

From here we’re going to be adding a vortex field .
Particles Editor Vortex Field Setup#
in this section we’re going to add a vortex field and its source to the particle system. Go back to Particles Editor Tab.
1. In the Particle Editor, go to the search bar and search for vortex.
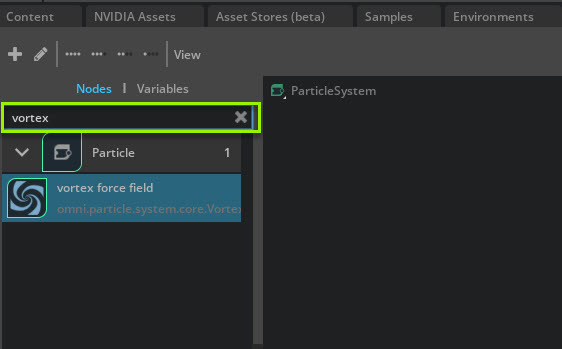
2. Left click drag and drop the Vortex Force Field node from the Node menu into the graph window. A vortex force field node will appear.
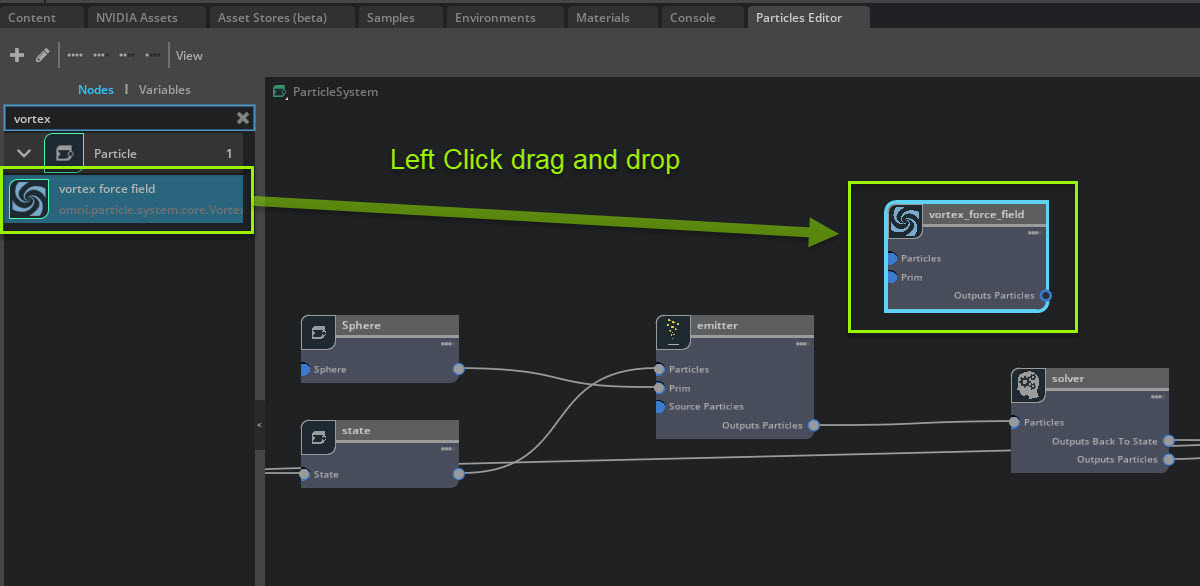
3. Connect vortex force field to the particle system.
Note
Fields must be connected before the solver.
4. Left click drag from the Emitter Node’s outputs particles pin to the vortex force field Node’s particles pin.
5. Left click drag the vortex force field Node’s outputs particles pin to the Solver Node’s particles pin.
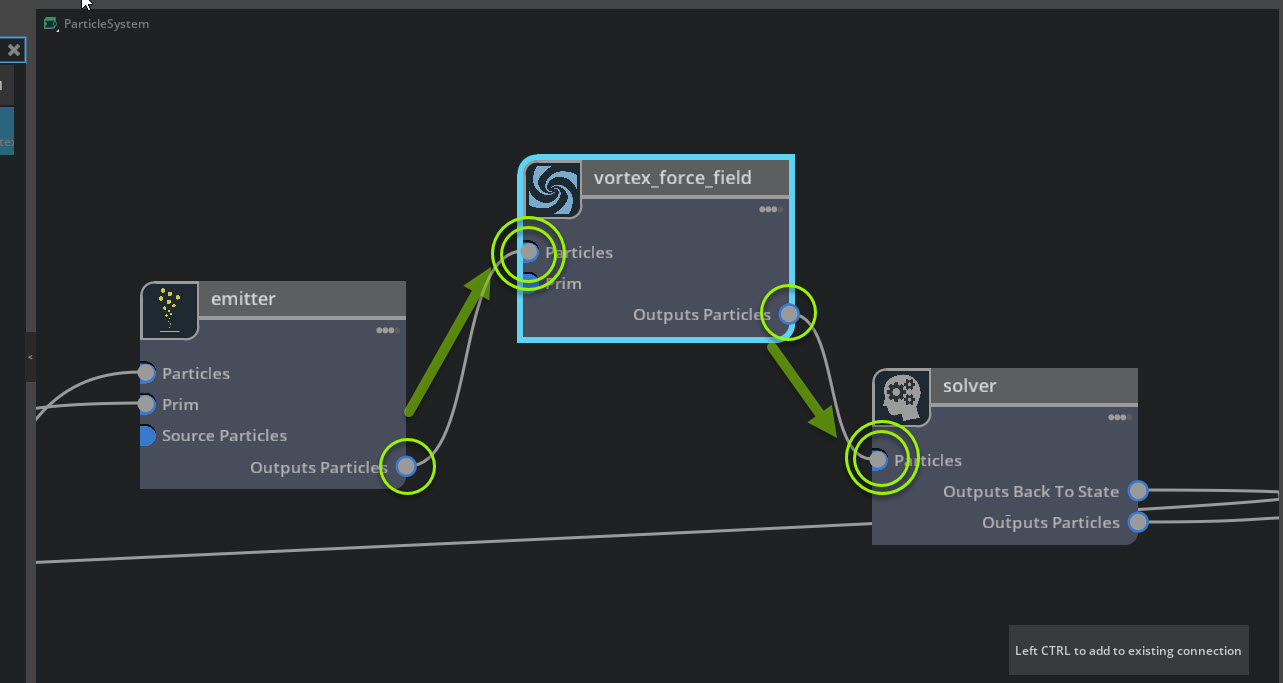
Now the Vortex force field is connected to the particle system, but the particles aren’t being affected yet.
A field source is required for the fields node’s area of influence to affect the particles.
Create a Source for the Vortex Field#
To use a field you need to give it its own source to act as a volume of influence. Using sources as a volume for fields is a constant no matter what field you use.
1. Go to Create->Shapes-> and select Sphere

This will create Sphere_01.
2. Select the sphere_01 and make the following changes in Property:
Geometry -> Radius 500
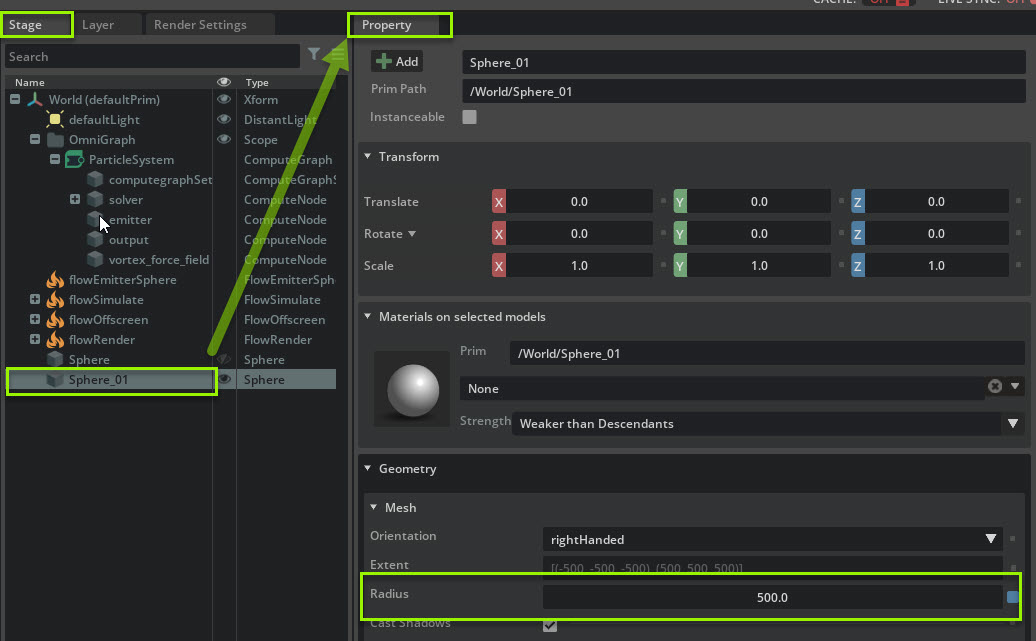
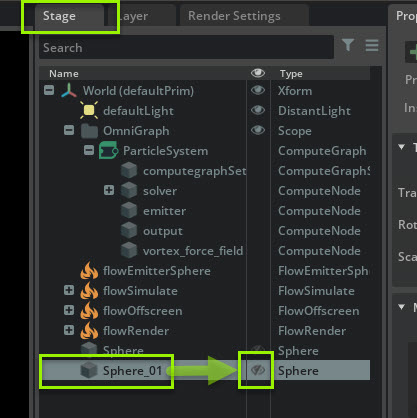
then turn visibility off by toggling the Eye icon in Stage -> World -> Sphere_01
Connect the Source to the Vortex Field#
Next you need to connect the source to the field.
1. Go to Stage -> World and Left click select and hold Sphere_01
2. Drag and drop Sphere_01 into the Particle Editor as shown below.
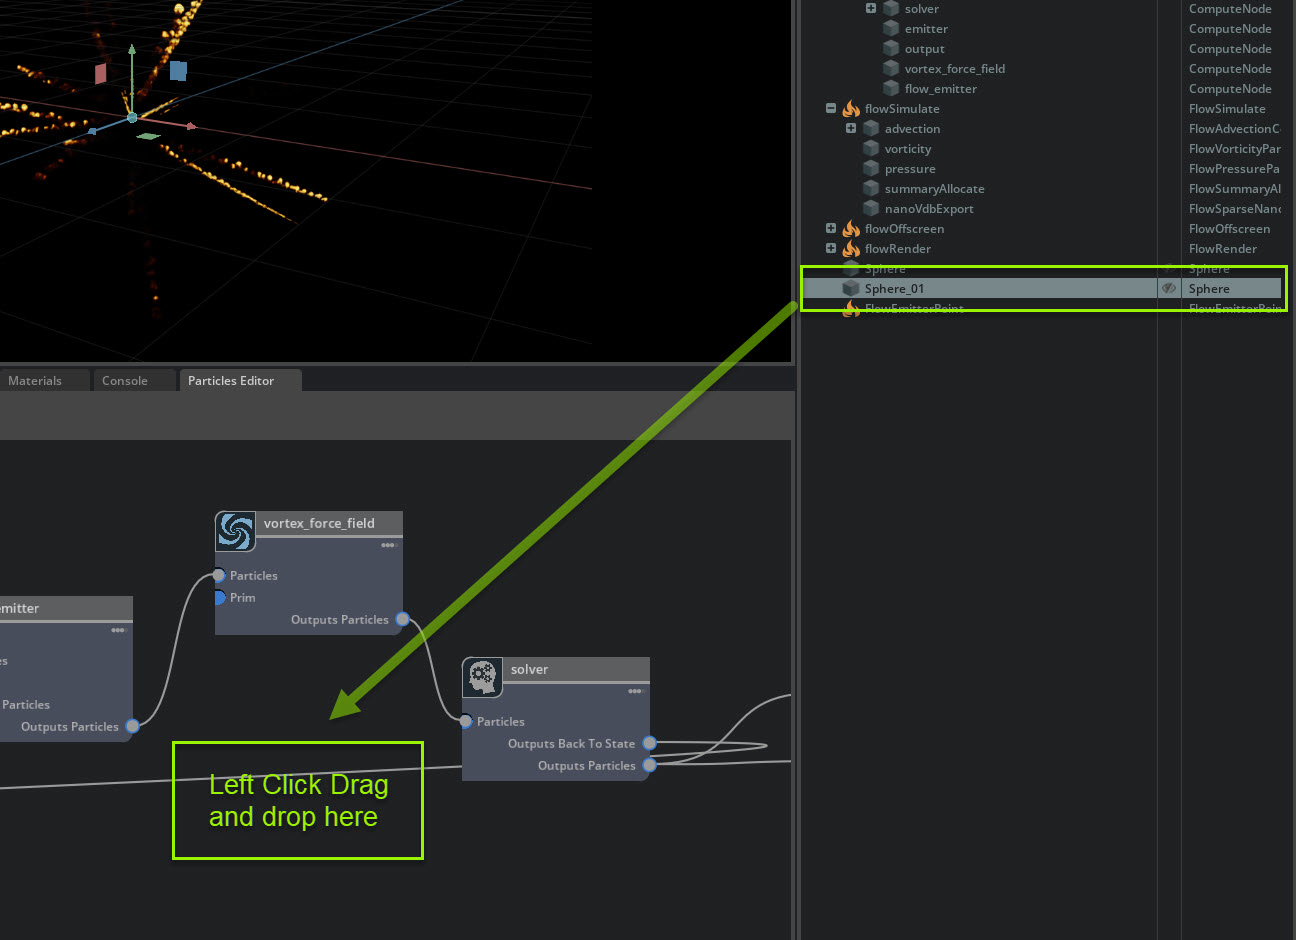
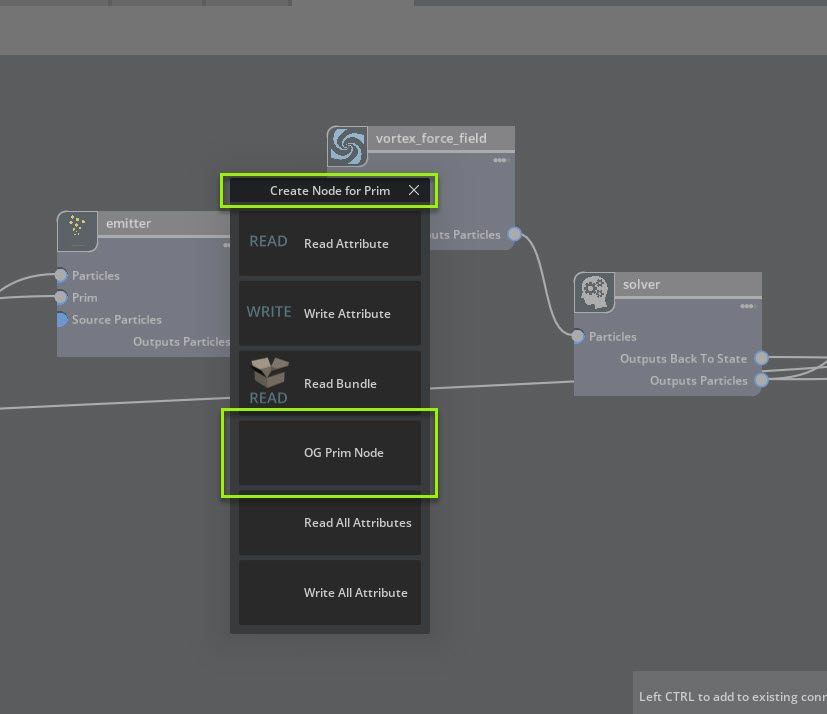
3. A Create Node for Prim window will appear. Left Click on OG prim Node. A sphere_01 prim node will appear in the Particle Editor.
Now connect Sphere_01 to the vortex force field Node..
1. Left click drag from Sphere_01 Node’s exit pin to the Vortex Force Field Node’s prim pin.
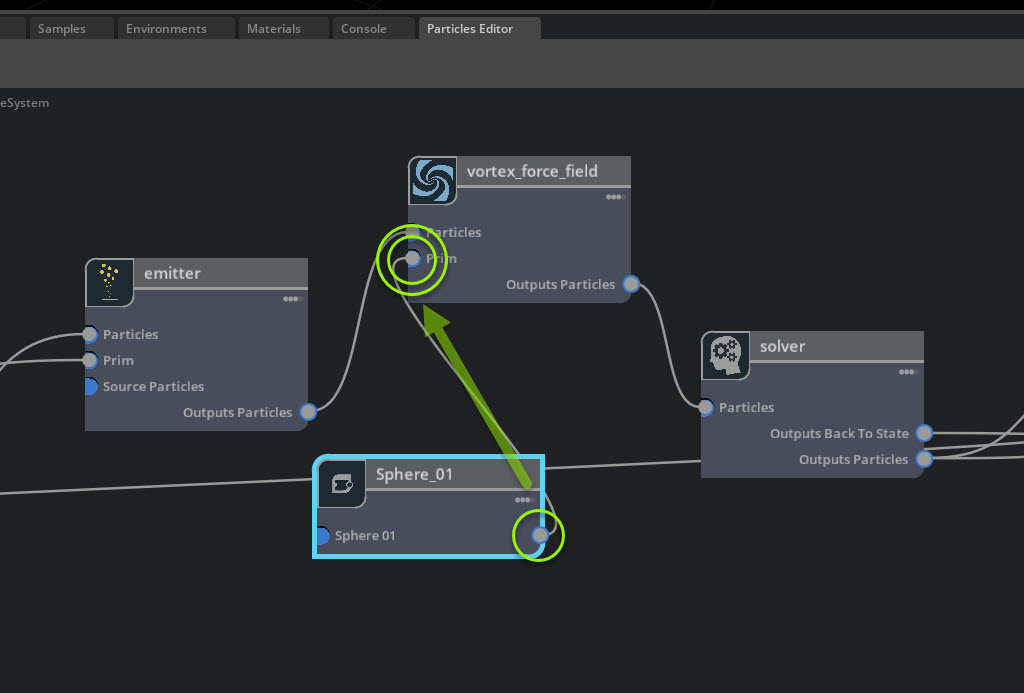
We need to make some parameter changes to see the vortex work
Vortex Field Tweaks#
1. Left click on the vortex force field in the Stage.
2. Change the following parameters in Property:
Vortex Field Settings -> Contain 1
Vortex Field Settings -> Magnitude 450
Vortex Field Settings -> Random Magnitude 150
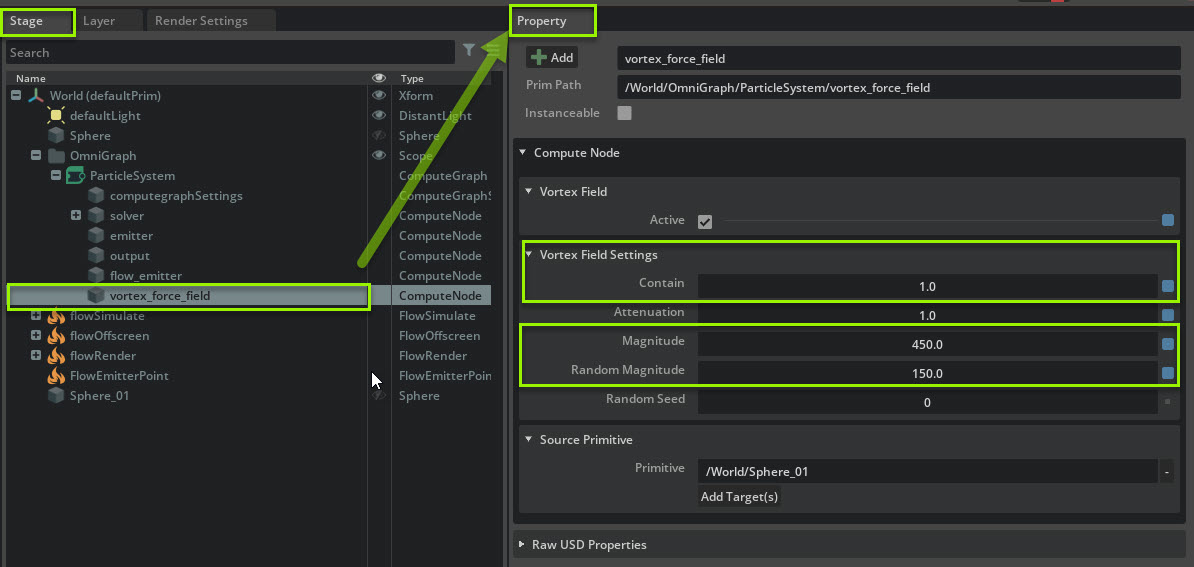
Now the particles will be moving in a spiral.
In this tutorial you created a particle visualizer, and connected flow emission to it. This concludes this tutorial.
