AWS Deployment#
Requirements#
The requirements for running Omniverse Isaac Sim on Amazon Web Services (AWS) are:
An AWS account that is able to launch an EC2 instance with RTX GPU support.
An AWS EC2 Instance with the following specifications:
Instance Type: g4dn.2xlarge or better (for T4) or g5.2xlarge or better (for A10G)
Setup#
Follow these steps to launch an AWS EC2 instance:
Create your Key Pair PEM file by following the nine steps in the Key Pair Guide.
Note
Follow these steps to prevent permission errors when trying to SSH into the AWS instance:
On Linux, use
chmod 400 yourkey.pemas instructed in the link above.On Windows, right-click the
yourkey.pemfile and select Properties:Go to the Security tab and click Advanced.
Click Disable inheritance.
Set ownership of the file to the current user and give full permissions to only that user.
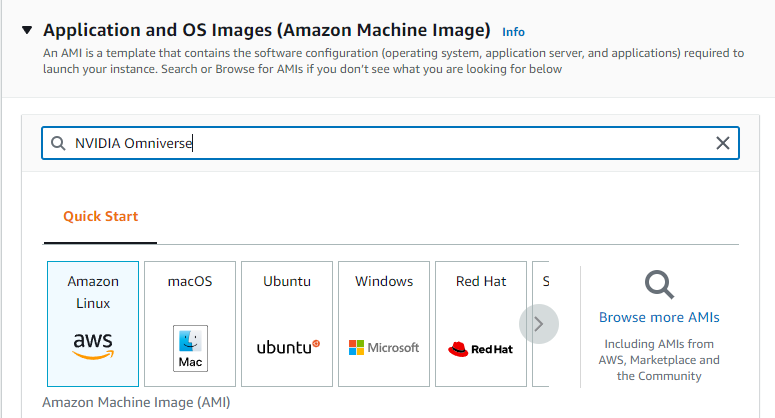
From your AWS EC2 Console, click Launch Instance. Next, go to the Application and OS Images (Amazon Machine Image) section and search for NVIDIA Omniverse.
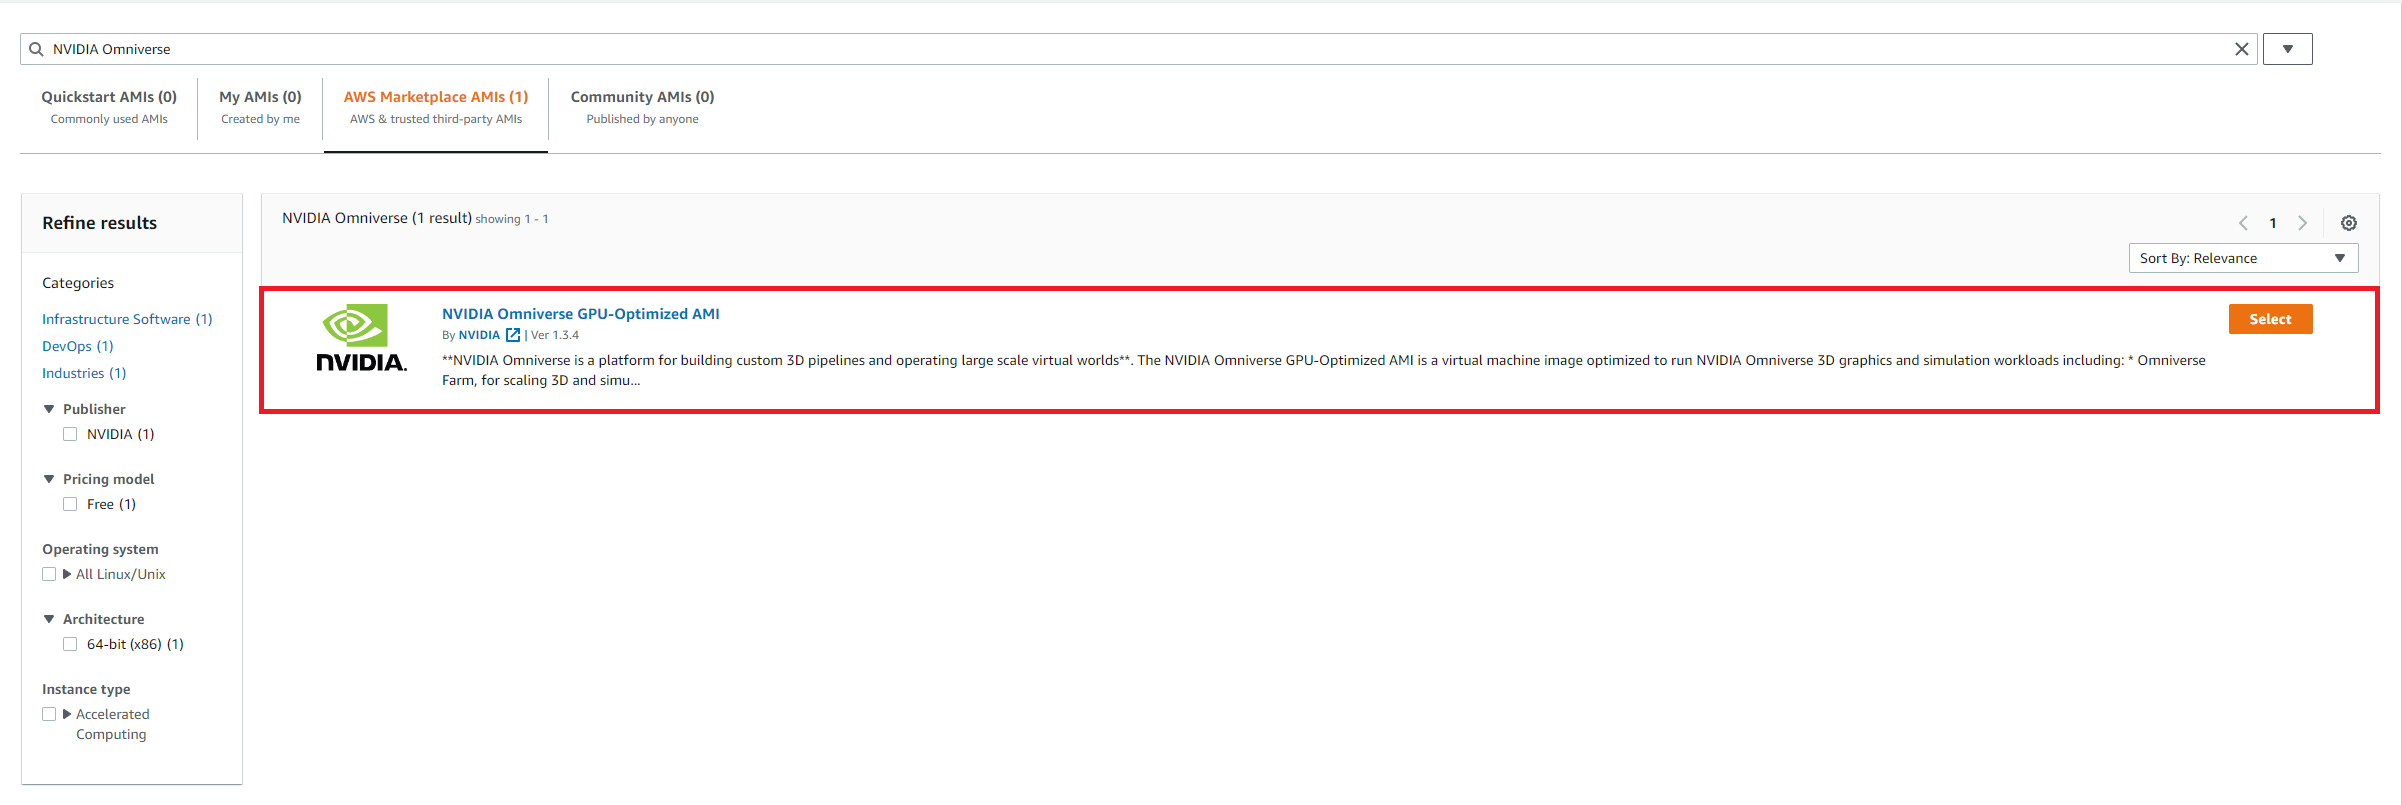
Select “NVIDIA Omniverse GPU-Optimized AMI” from the AWS Marketplace AMIs section.
Note
This AMI may not be visible to Hong Kong, Africa Cape Town, Middle East Bahrain, and Milan zones.
This AMI is based on Ubuntu 20.04.
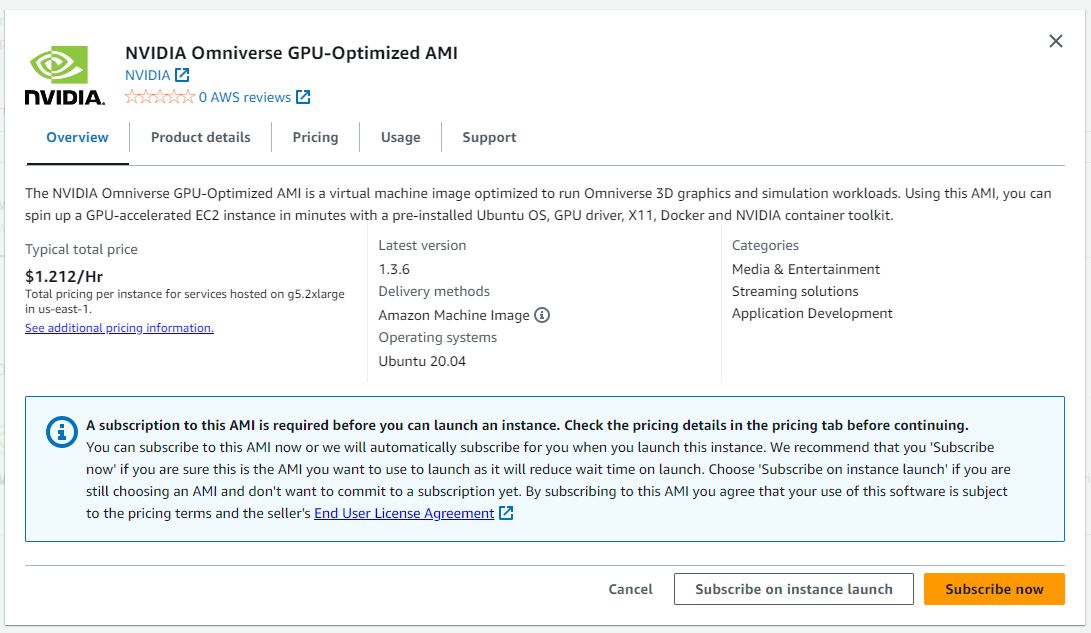
Click “Subscribe now”.
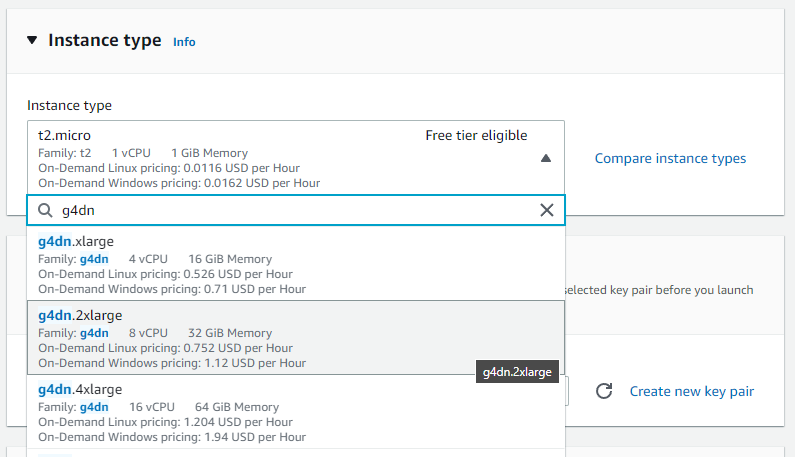
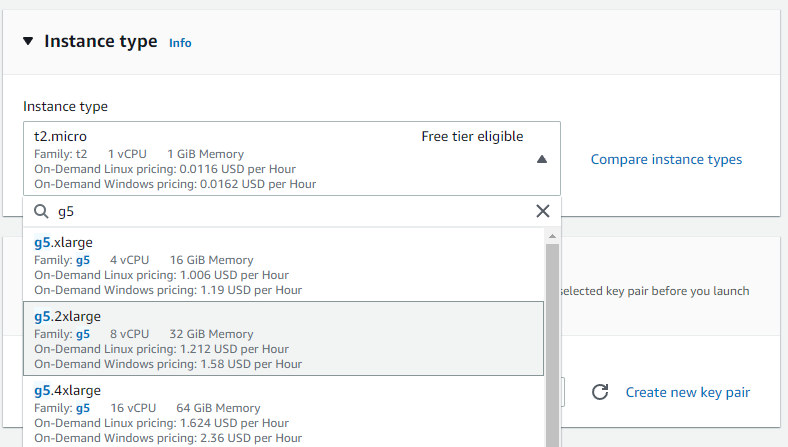
In the Instance type section, click on the instance type to search for a g4dn or g5 instance type.
Note
Select a g4dn.2xlarge or higher instance type for a NVIDIA T4 GPU or g5.2xlarge or higher instance type for a NVIDIA A10G GPU.
The G5 instance may not be available in all regions (for example, us-west-1).
The NVIDIA A10G GPU (g5.2xlarge) is recommended for heavy workloads.
NVIDIA T4:
NVIDIA A10G:
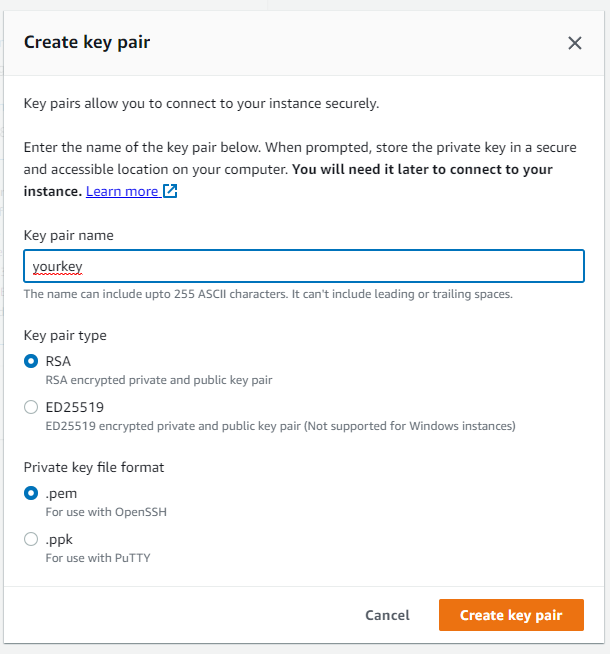
In the Key pair (login) section, click Create new key pair to create a new PEM file or select an existing key pair.
Note
Is it recommended that you secure your instances with a key pair.
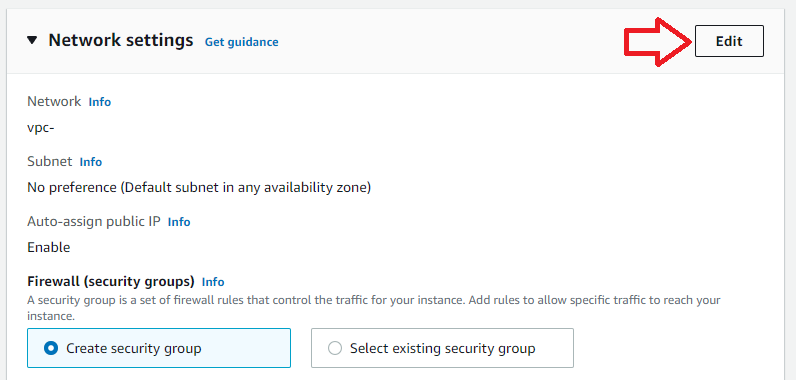
In the Network settings section, click Edit.
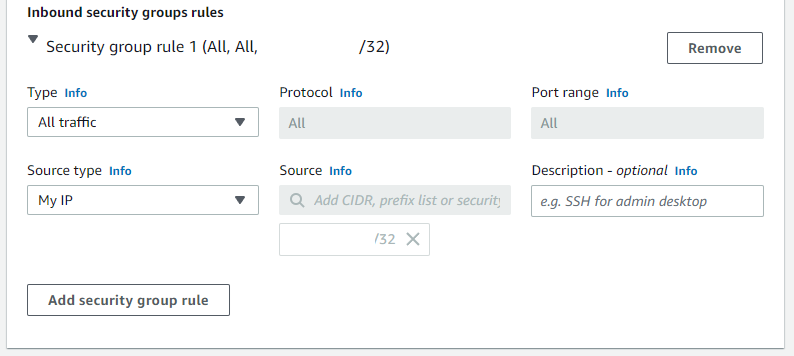
Next, set Inbound security groups rules to All traffic for “Type” and My IP for “Source type”.
Note
This allows the current machine to connect to the instance and livestreaming to the instance.
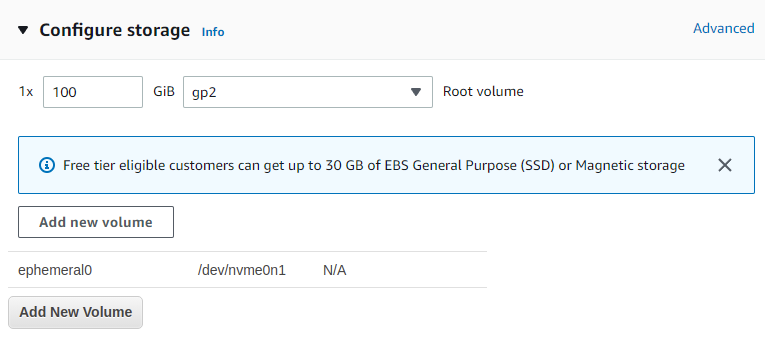
In the Configure storage section, set the Root volume size to 100GB or more.
Note
Isaac Sim can operate on an Instance with 30GB, but you may run out of space when running the Python samples.
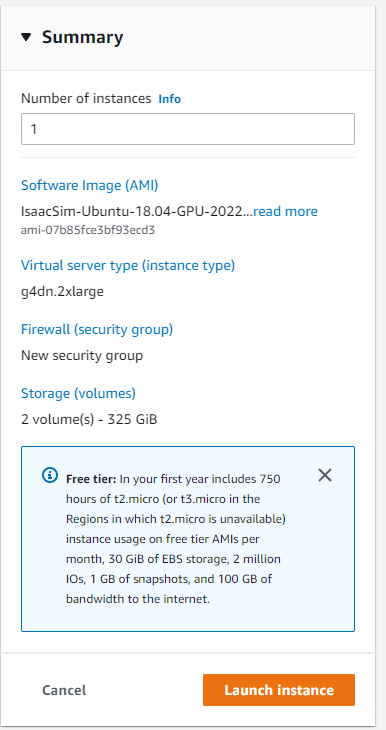
Click Launch Instance.
Note
If you see “You have requested more vCPU capacity than your current vCPU limit”, stop your running instances to free up vCPU usage and try again.
Connect#
In the “Instances” section, click Connect after selected the recently launched instance. Select the SSH client tab to view the instructions to connect.

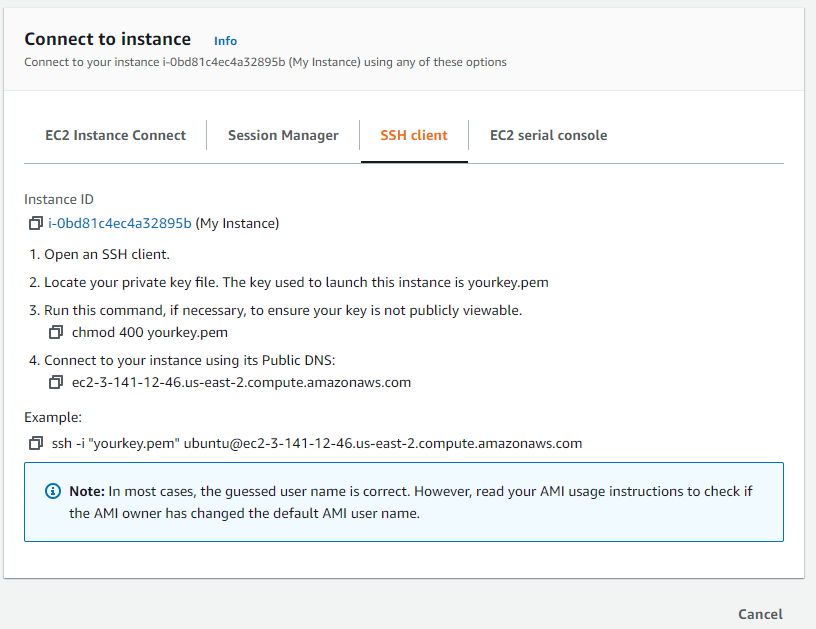
Follow these steps to SSH into the AWS instance using an SSH client:
- As shown above, on Linux or Windows, run this command from where your PEM key folder is.
Replace
ubuntu@ec2-3-141-12-46.us-east-2.compute.amazonaws.comwith your instance:
$ ssh -i "yourkey.pem" ubuntu@ec2-3-141-12-46.us-east-2.compute.amazonaws.com
Note
You can copy the SSH command above then right-click on a Windows terminal to paste it. The terminal may take a few seconds to respond.
You need to use “ubuntu@” instead of “root@”.
On Windows, you can also use Putty to SSH:
Convert your PEM key to a Putty key. See Connecting to Your Linux Instance from Windows Using PuTTY for more details.
Put your instance name in the host name:
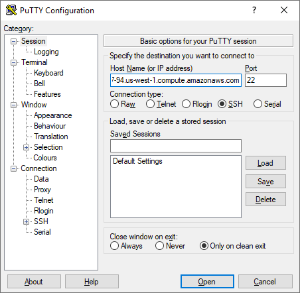
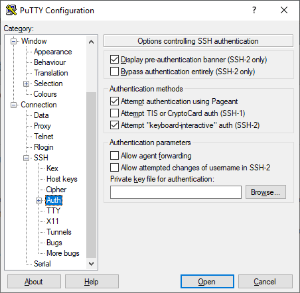
Select SSH/Auth, point Browse to your converted Putty key, then click Open and Yes. You should be able to SSH into the AWS instance now.
Container Deployment#
Connect to the machine via SSH.
Install NVIDIA Driver:
$ sudo apt-get update
$ sudo apt install build-essential -y
$ wget https://us.download.nvidia.com/XFree86/Linux-x86_64/535.129.03/NVIDIA-Linux-x86_64-535.129.03.run
$ chmod +x NVIDIA-Linux-x86_64-535.129.03.run
$ sudo ./NVIDIA-Linux-x86_64-535.129.03.run
Note
This is a temporary step to update the drivers on the AMI. The AMI will be updated soon.
Install the NVIDIA Container Toolkit:
$ sudo apt-get install -y nvidia-container-toolkit
$ sudo systemctl restart docker
$ sudo nvidia-ctk runtime configure --runtime=docker
$ sudo systemctl restart docker
$ docker run --rm --runtime=nvidia --gpus all ubuntu nvidia-smi
Note
This is a temporary step to update the Container Toolkit on the AMI. The AMI will be updated soon.
Version 1.16.2 or later of NVIDIA Container Toolkit is required.
Run the following command to confirm your GPU driver version:
$ nvidia-smiPull the Isaac Sim Container:
$ docker pull nvcr.io/nvidia/isaac-sim:4.2.0
Run the Isaac Sim container with an interactive Bash session:
$ docker run --name isaac-sim --entrypoint bash -it --runtime=nvidia --gpus all -e "ACCEPT_EULA=Y" --rm --network=host \
    -e "PRIVACY_CONSENT=Y" \
    -v ~/docker/isaac-sim/cache/kit:/isaac-sim/kit/cache:rw \
    -v ~/docker/isaac-sim/cache/ov:/root/.cache/ov:rw \
    -v ~/docker/isaac-sim/cache/pip:/root/.cache/pip:rw \
    -v ~/docker/isaac-sim/cache/glcache:/root/.cache/nvidia/GLCache:rw \
    -v ~/docker/isaac-sim/cache/computecache:/root/.nv/ComputeCache:rw \
    -v ~/docker/isaac-sim/logs:/root/.nvidia-omniverse/logs:rw \
    -v ~/docker/isaac-sim/data:/root/.local/share/ov/data:rw \
    -v ~/docker/isaac-sim/documents:/root/Documents:rw \
    nvcr.io/nvidia/isaac-sim:4.2.0
Note
By using the
-e "ACCEPT_EULA=Y"flag, you accept the license agreement of the image found at NVIDIA Omniverse License Agreement.By using the
-e "PRIVACY_CONSENT=Y"flag, you opt-in to the data collection agreement found at Data Collection & Usage. You may opt-out by not setting this flag.The
-e "PRIVACY_USERID=<email>"flag can optionally be set for tagging the session logs.
The Nucleus and Cache installer is no longer available in the Isaac Sim container. The recommended installation of Nucleus is via the Omniverse Launcher. For enterprise users, see Enterprise Nucleus Server.
The Isaac Sim container uses assets in the Cloud if no Nucleus server is available.
When using a separate Nucleus server:
See Problem Connecting to Docker Container to expose all ports of the container to connect to an external Nucleus server.
See Setting the Default Nucleus Server to set the default Nucleus server.
See Setting the Default Username and Password for Connecting to the Nucleus Server to set the default credentials for any Nucleus server.
Start Isaac Sim with native livestream mode:
$ ./runheadless.native.sh -v
Note
Before running a livestream client, make sure that the Isaac Sim app is loaded and ready. It may take a few minutes for Isaac Sim to be completely loaded.
The -v flag is used to show additional logs while the shader cache is warming up.
To confirm this, look out for this line in the terminal window or the logs:
Isaac Sim Headless Native App is loaded.The first time loading Isaac Sim takes about 10 to 15 minutes for the shaders to be cached. Subsequent runs of Isaac Sim takes less than a minute because the shaders are cached and the cache is mounted when the container runs.
See Save Isaac Sim Configs on Local Disk to make Isaac Sim configs and cache persistent when using containers.
Install and launch the Omniverse Streaming Client from the Omniverse Launcher.
Note
Only the Omniverse Streaming Client is supported for the best experience streaming to an AWS EC2 instance over the internet.
See Omniverse Streaming Client for more information about the Omniverse Streaming Client.
Enter the IP address of the machine or instance running the Isaac Sim container and click on the Connect button to begin live streaming.
Proceed to Isaac Sim Interface to begin the first Basic Tutorial.
Note
Some tutorials that use the Content Browser may not work when using the Isaac Sim container with no Nucleus connected.
The Isaac Sim container supports running our Python apps and standalone examples in headless mode only.
The latest NVIDIA drivers may not be fully supported for some features like livestreaming. See Technical Requirements for recommended drivers.
See Isaac Sim Dockerfiles to build your own custom Isaac Sim container.