Using NVIDIA cuOpt#
Learning Objectives#
Demonstrate and provide a reference for the use of NVIDIA cuOpt to solve routing optimization problems in simulation.
Topics include:
Basic interaction with the cuOpt service
Visualization and processing of optimization specific data
Intra-warehouse transport use case demonstration
15-20 Minute Tutorial
Getting Started#
Prerequisites
Access to the NVIDIA cuOpt managed service
Note
Important Update: Changes to Accessing NVIDIA cuOpt
- The process for accessing NVIDIA cuOpt has been updated. NVIDIA cuOpt is now offered as a managed service.
Try cuOpt and request access at https://developer.nvidia.com/cuopt-logistics-optimization.
To complete the tutorial, access to the cuOpt service is required.
Review the Core API Hello World and GUI Tutorial series Isaac Sim Interface.
NVIDIA cuOpt sample extensions are disabled by default. Enable the extensions required for this tutorial from the Extension Manager by searching for
omni.cuopt.examples. Enablingomni.cuopt.exampleswill automatically enableomni.cuopt.serviceandomni.cuopt.visualization
NVIDIA cuOpt Examples#
This tutorial is based around a set of three examples from the omni.cuopt.examples extension.
These examples are arranged in increasing fidelity from simple randomized routing problems
with only basic visualization, to an intra-warehouse transport scenario complete with high fidelity
warehouse assets. Each example leverages supporting extensions in order to interact with the cuOpt service
and visualize optimization data. The code for all examples and supporting extensions is available and
can be extended for use in other applications.
Example Overview#
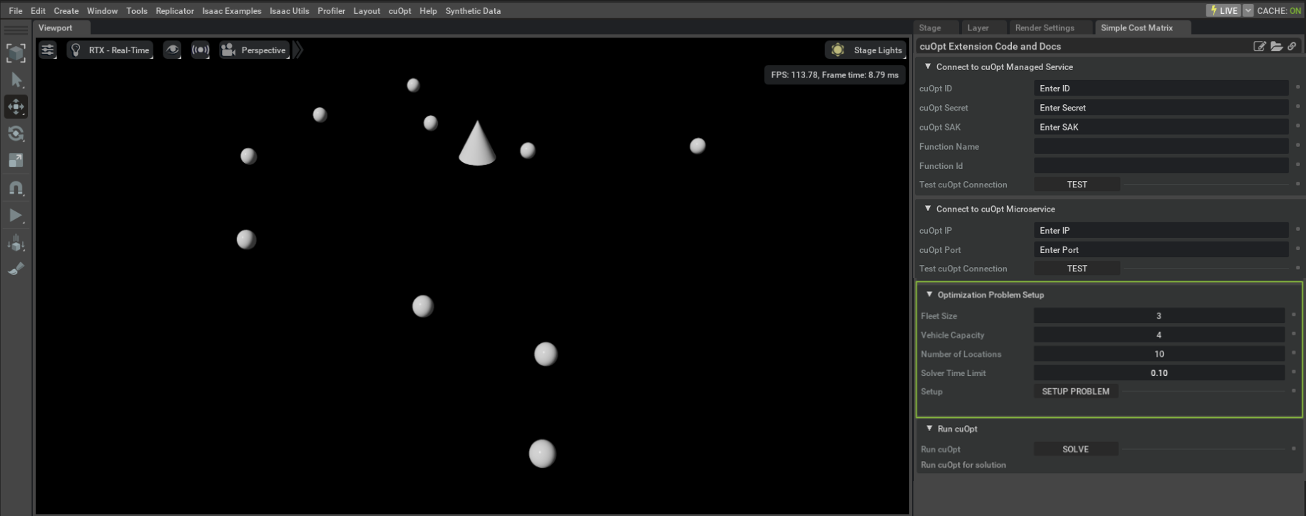
Simple Cost Matrix : A minimal example using simple primitives to represent a depot based fleet routing problem where vehicles start from a depot (Cone) and must fulfill the demand across all locations (Spheres). A cost Matrix representing the cost of travel between locations is created by measuring Euclidean distance between points.
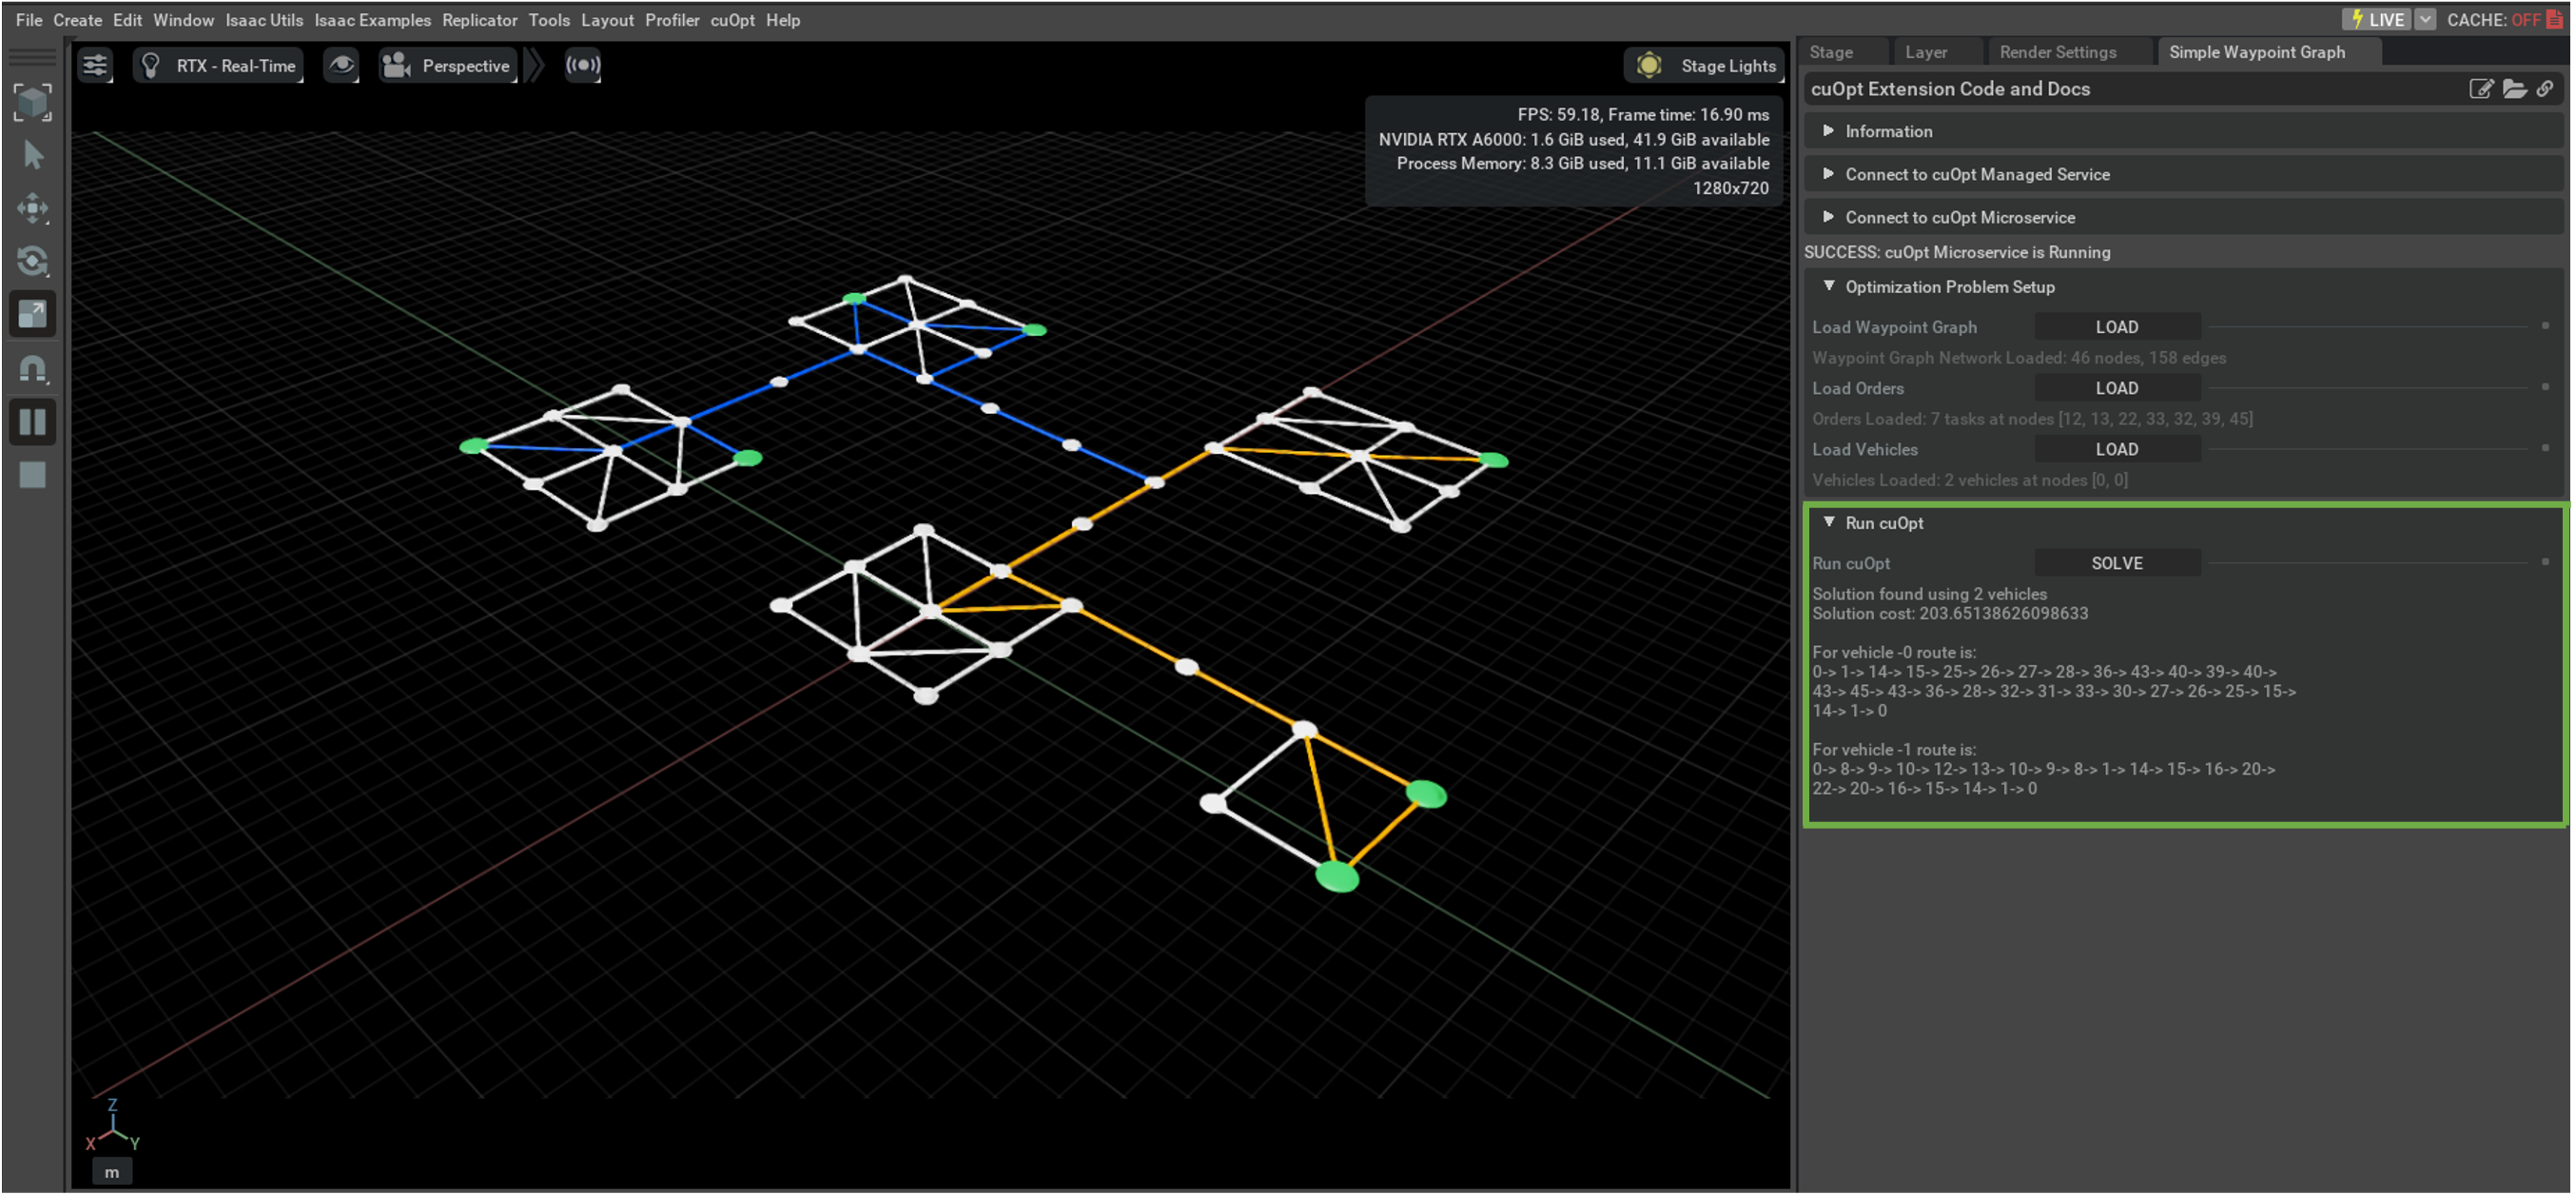
omni.cuopt.serviceis used for communication between scene data and a running cuOpt service instance.Simple Waypoint Graph : cuOpt also supports a weighted waypoint graph representation of the optimization environment, which is the focus of this example. Waypoint graphs are a common representation for interior environments where the cost between locations might not be predetermined and straight line distance is not sufficient. Here the waypoint graph represents the travel network, and target locations (a subset of graph nodes) represent the locations to be visited and the location of the fleet. In addition to using
omni.cuopt.service, utilities from theomni.cuopt.visualizationextension are used to process and display the waypoint graph as well as the resulting optimized routes. The waypoint graph, order data, and vehicle data are all loaded from json files that exist alongside the source code for this example and can be modified as needed.Intra-warehouse Transport Demo : In this example a more complex waypoint graph is generated to represent the transportation network for a warehouse environment. You are able to create and place semantic zones to denote high cost areas of travel to be avoided. In addition to the utilities used in the Simple Waypoint Graph example, additional functionality from the
omni.cuopt.visualizationextension is used to generate the warehouse environment from a json configuration files alongside the source code for the example.
Supporting Extension Overview#
omni.cuopt.service: This extension contains a thin wrapper around the cuOpt service that is used for preprocessing scene data as well as formatting and sending requests to the cuOpt service. This extension also contains utilities for representing the optimization data and formatting text results to be displayed in the UI for the examples.omni.cuopt.visualization: This extension contains utilities for generating scene data including the waypoint graph, semantics zones and the warehouse environment. This extension also contains helper functions for adjusting the weight of graph edges based on proximity to a given semantic zone.
Running cuOpt Examples#
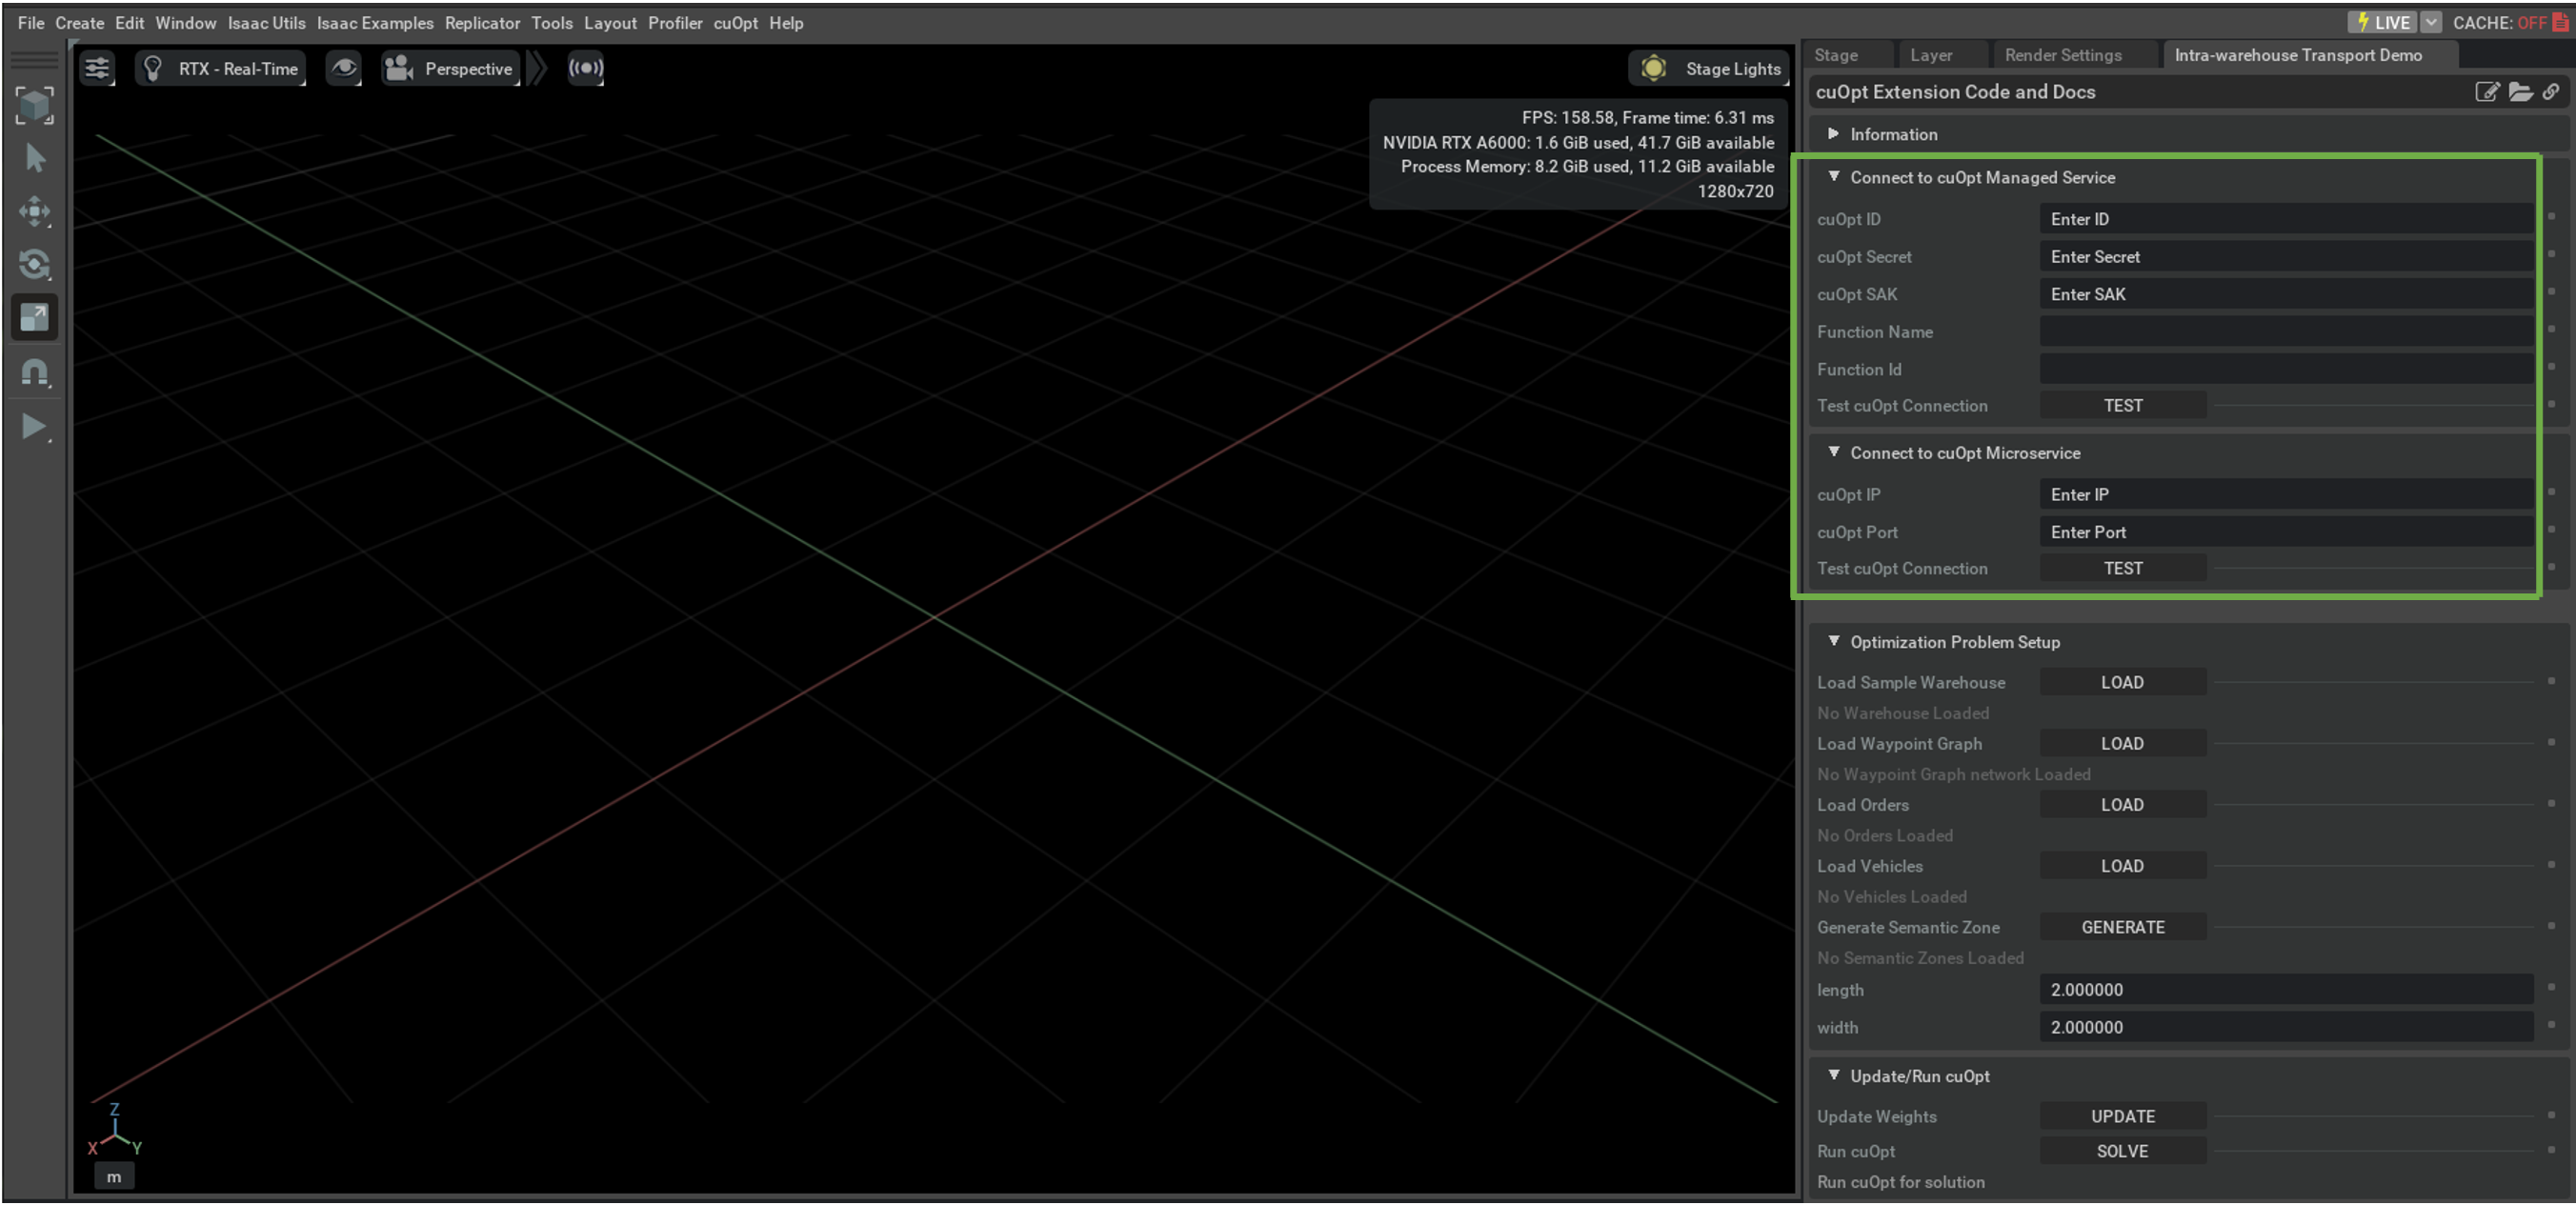
Apply for and receive the required credentials for the NVIDIA cuOpt managed service.
- CuOpt Managed Service: When using cuOpt Managed Service you must have either
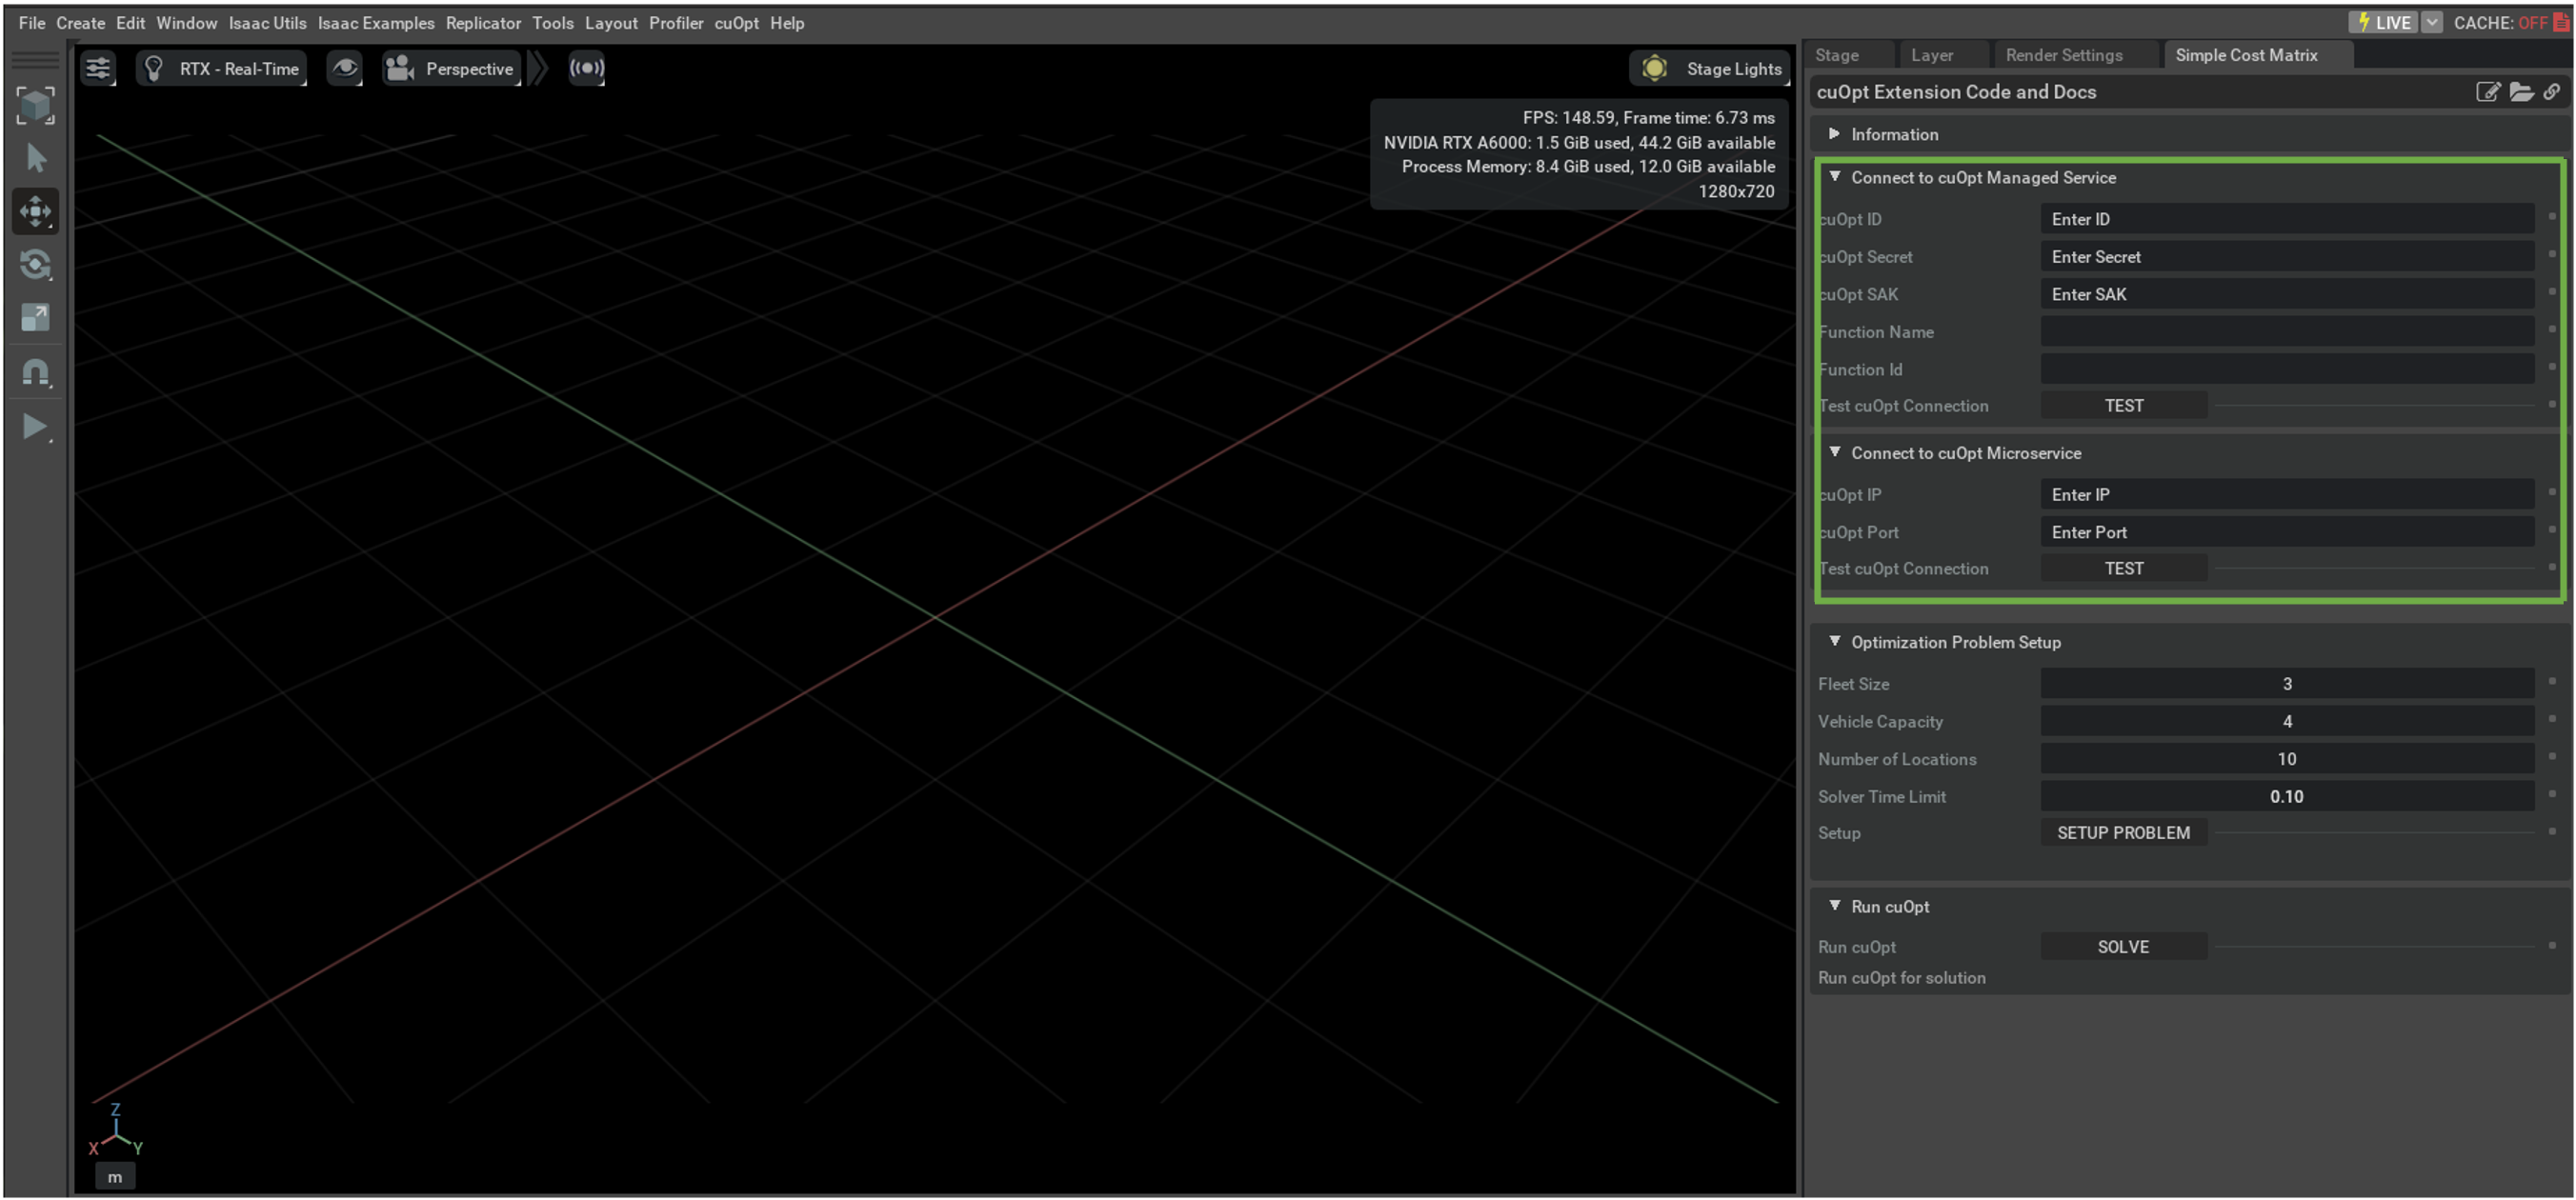
cuOpt SAK, or,cuOpt IDandcuOpt Secret. Refer https://docs.nvidia.com/cuopt/user-guide/mg-server-overview.html cuOpt SAK: The SAK obtained through NGC. Only one of the two authorization methods (
cuOpt SAK, or,cuOpt IDandcuOpt Secret) should be used.cuOpt ID (Deprecated): The client ID obtained during the registration. To be used with
cuOpt Secret.cuOpt Secret (Deprecated): The client secret obtained during the registration. To be used with
cuOpt ID.Function Id (Optional): The unique identifier of the function provided during registration. Needs to be specified, if more than one function is available.
Function Name (Optional): The name of the function provided during registration.
- CuOpt Managed Service: When using cuOpt Managed Service you must have either
CuOpt Microservice: When using cuOpt self-hosted service you must provide the
cuOpt IPandcuOpt Port. See https://docs.nvidia.com/cuopt/user-guide/sh-server-overview.html.
Enable
omni.cuopt.examplesfrom the Extension Manager.
Simple Cost Matrix#
Starting from a New Isaac Sim Session (
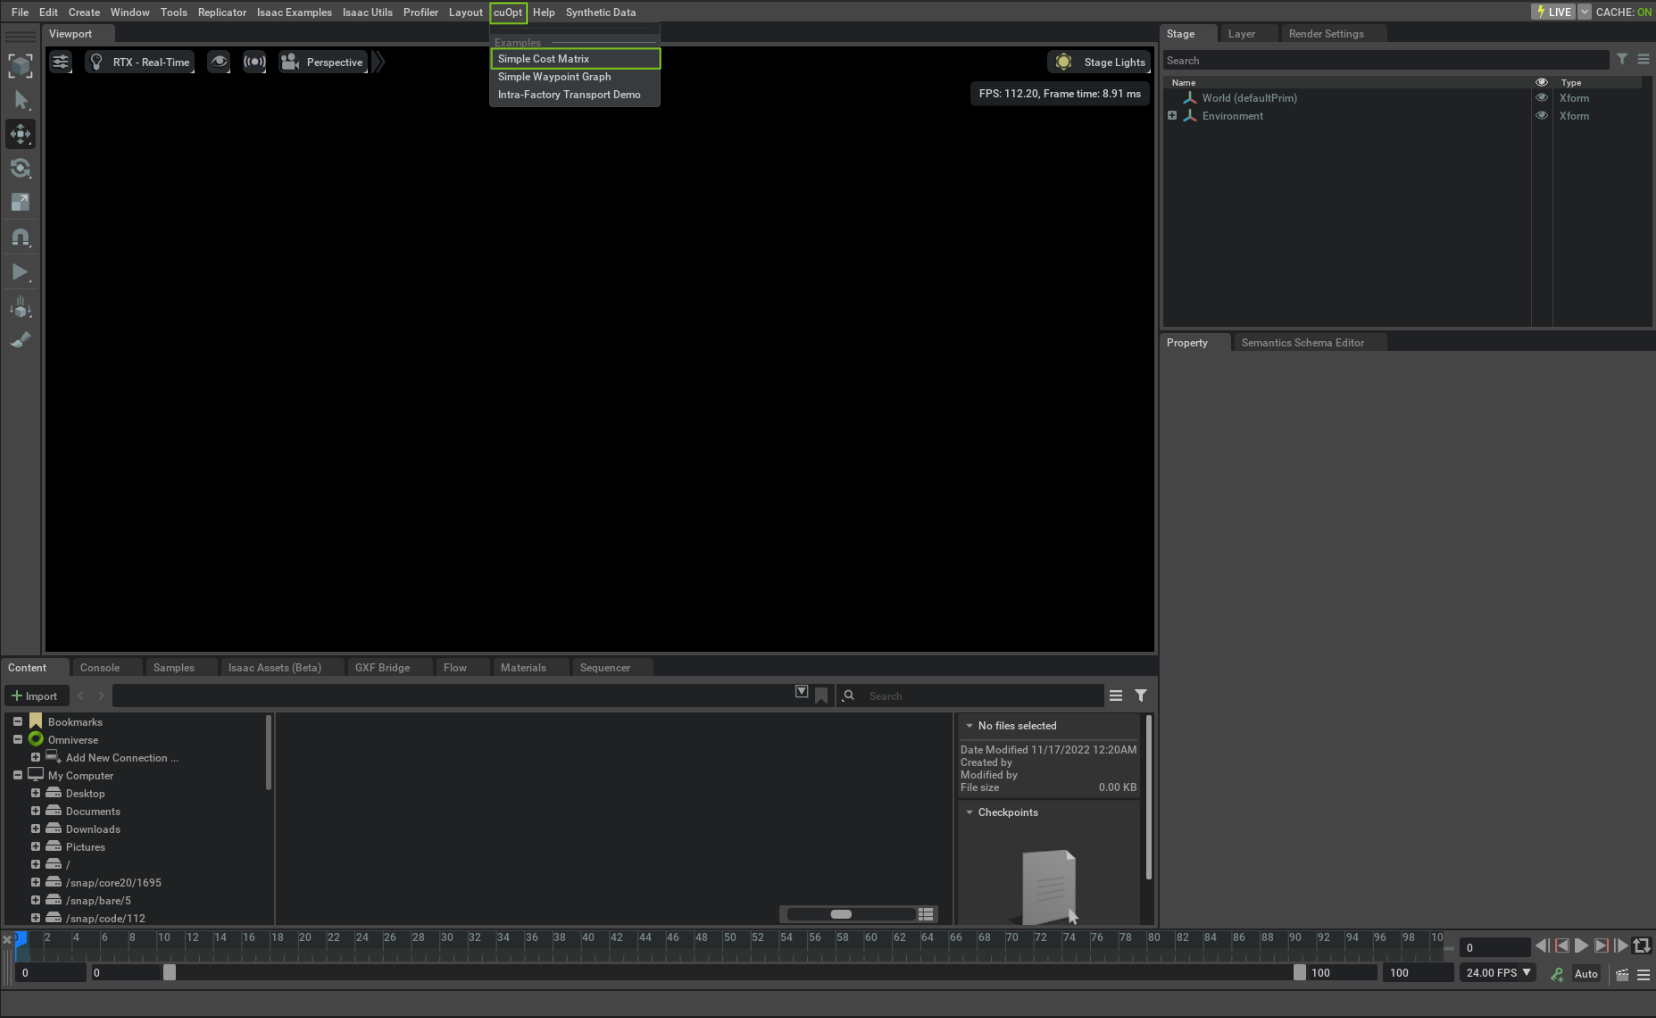
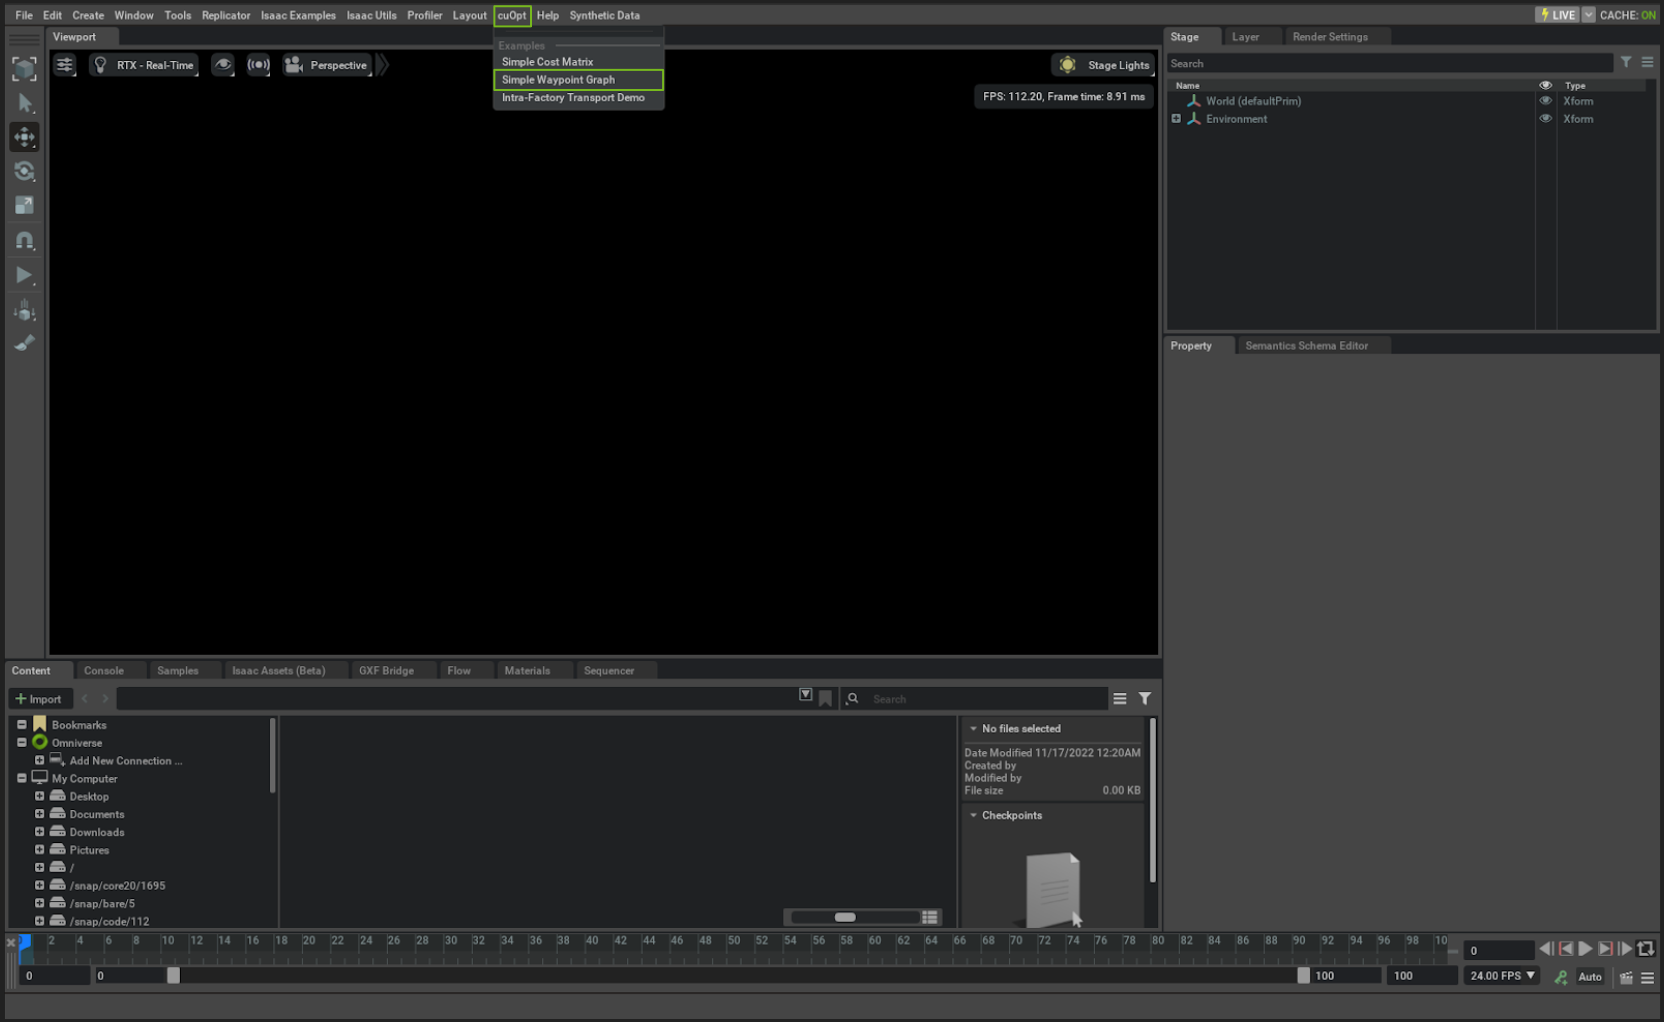
CTRL + N) navigate to the cuOpt menu item now present in the Isaac Sim interface and select Simple Cost Matrix.Enter the credentials assigned to you for the NVIDIA cuOpt managed service.
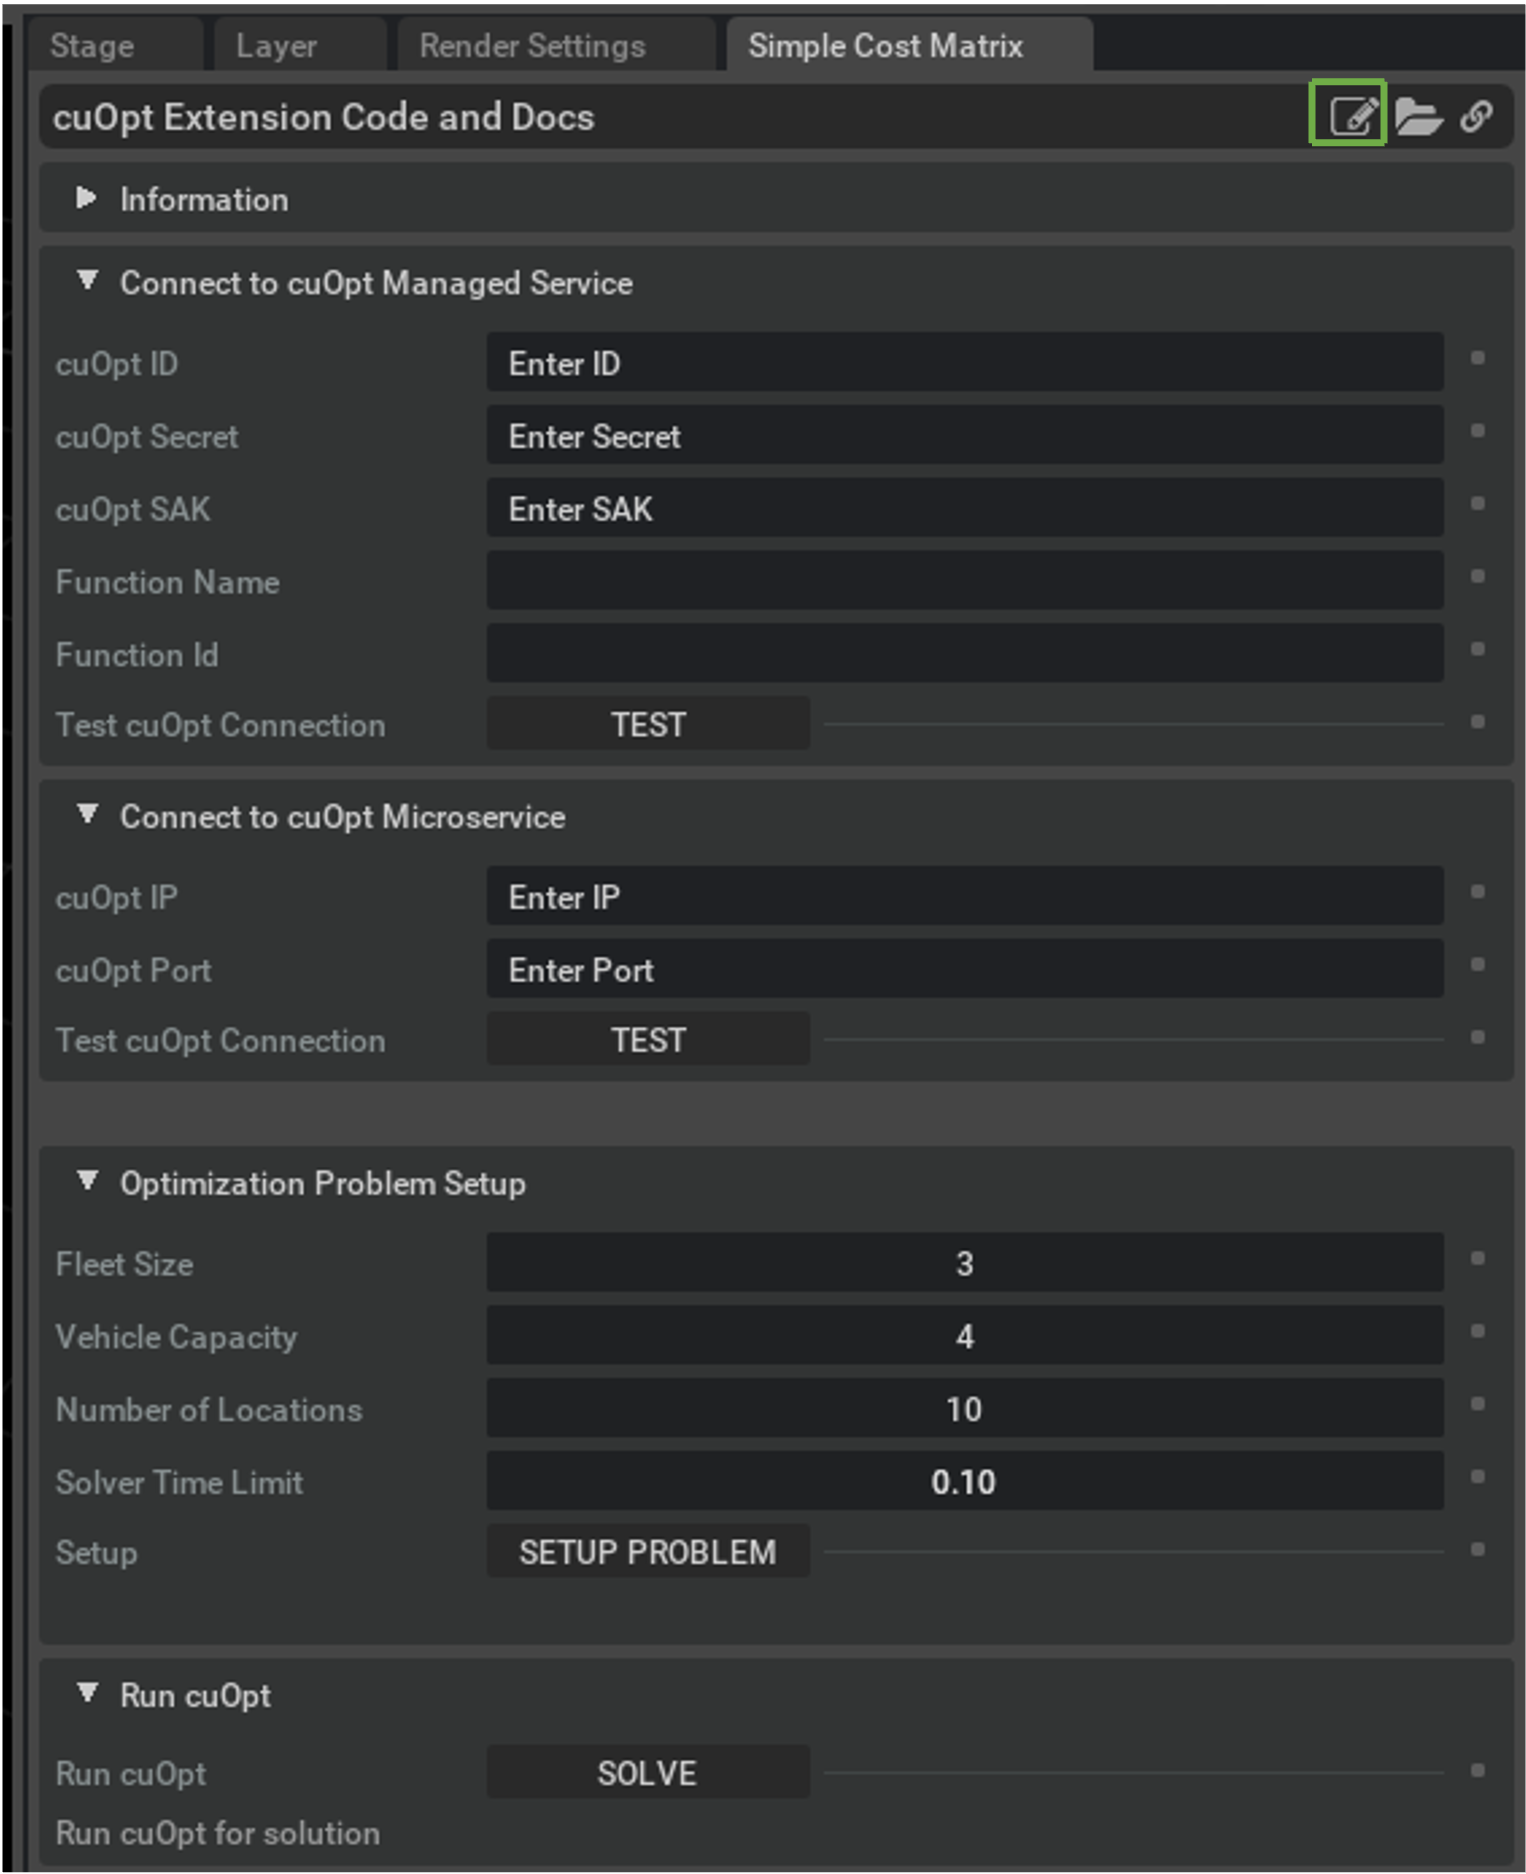
In the Optimization Problem Setup section, select values (or use defaults) for the following, then click SETUP PROBLEM:
Fleet Size: The maximum number of vehicles available. Note If a solution can be found using fewer vehicles that solution will be returned.
Vehicle Capacity: The number of stops (of demand=1) each vehicle can visit.
Number of Locations: The number of non-depot locations that must be visited.
Solver Time Limit: The amount of time the cuOpt solver is given to find an optimized solution. Note To maintain solution quality additional time should be given for larger problems.
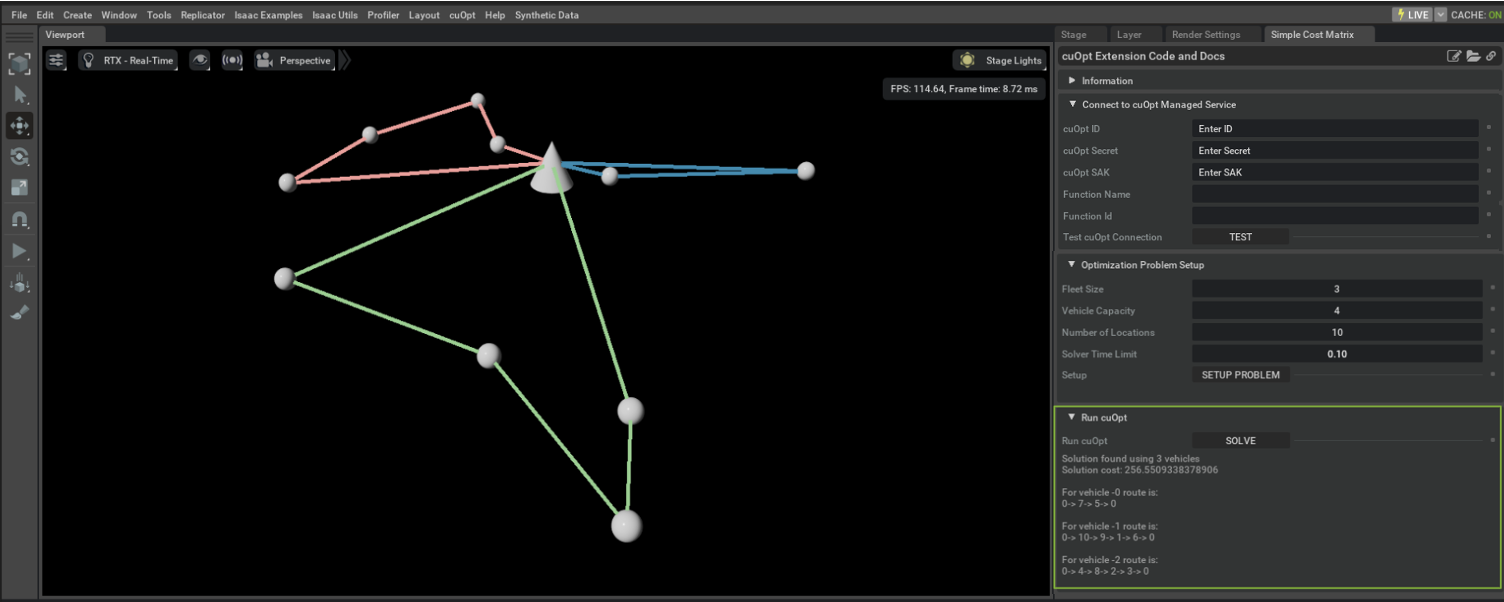
In the Run cuOpt section, click SOLVE to return optimized routes. A text representation of the routes is displayed in the UI and results are also shown in the viewport.
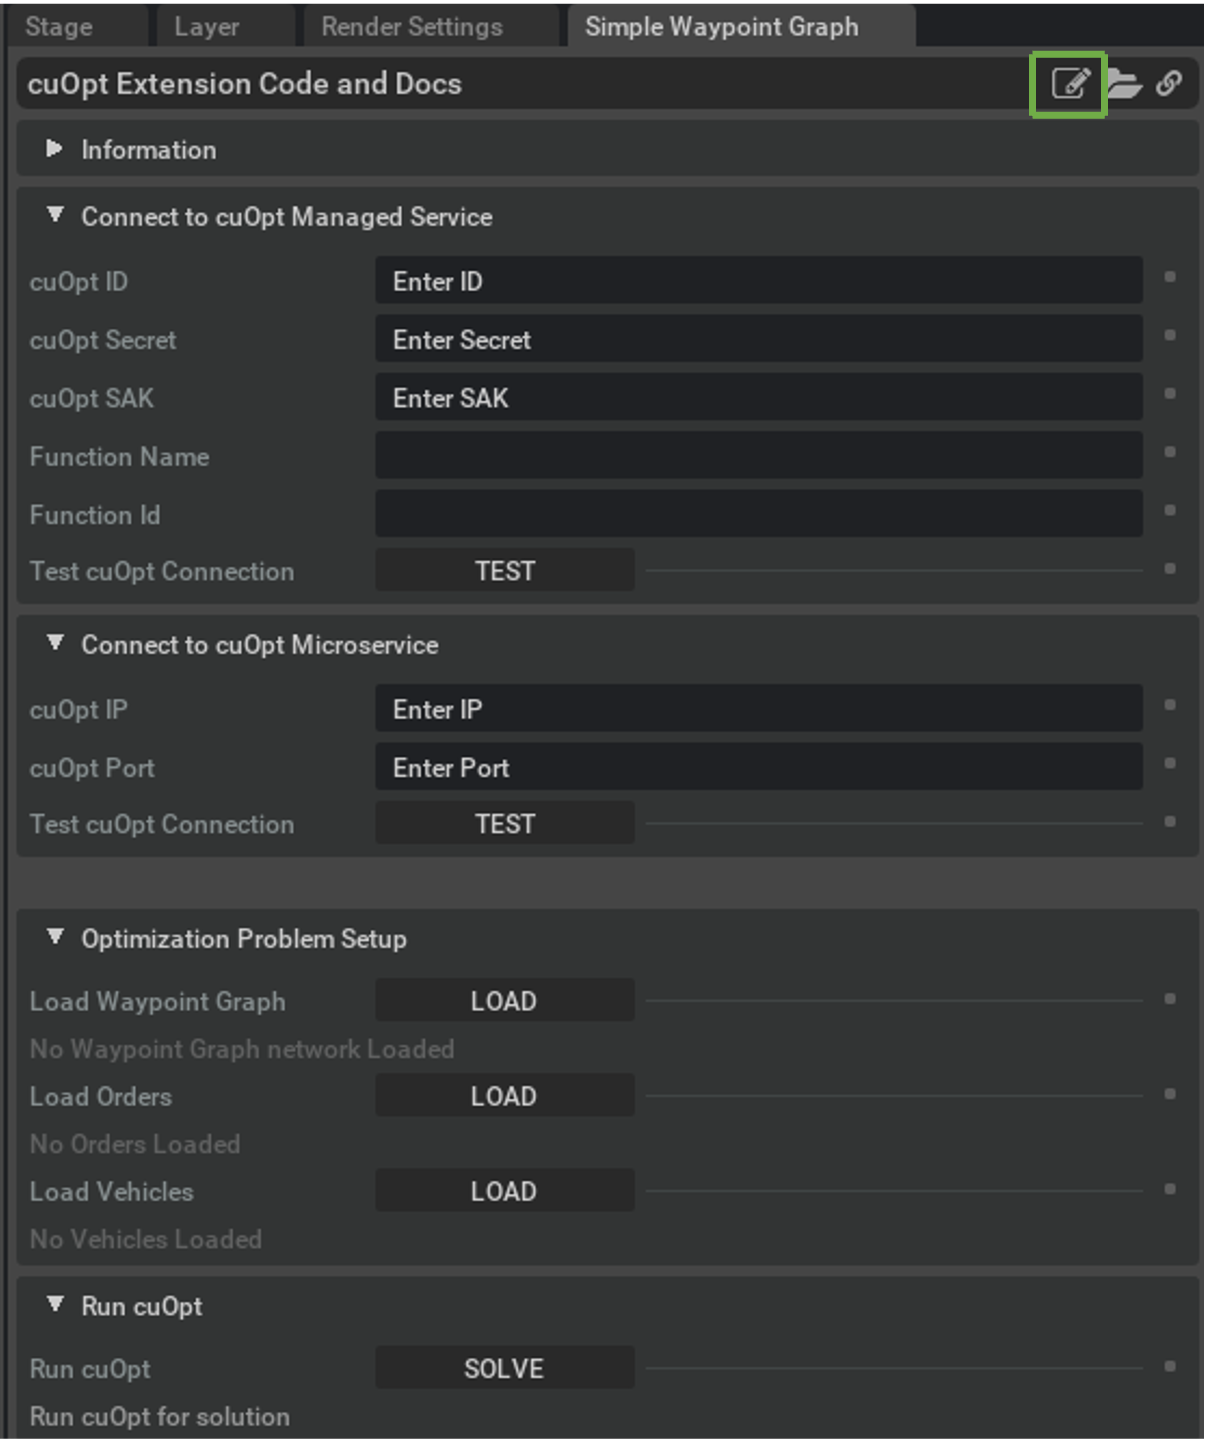
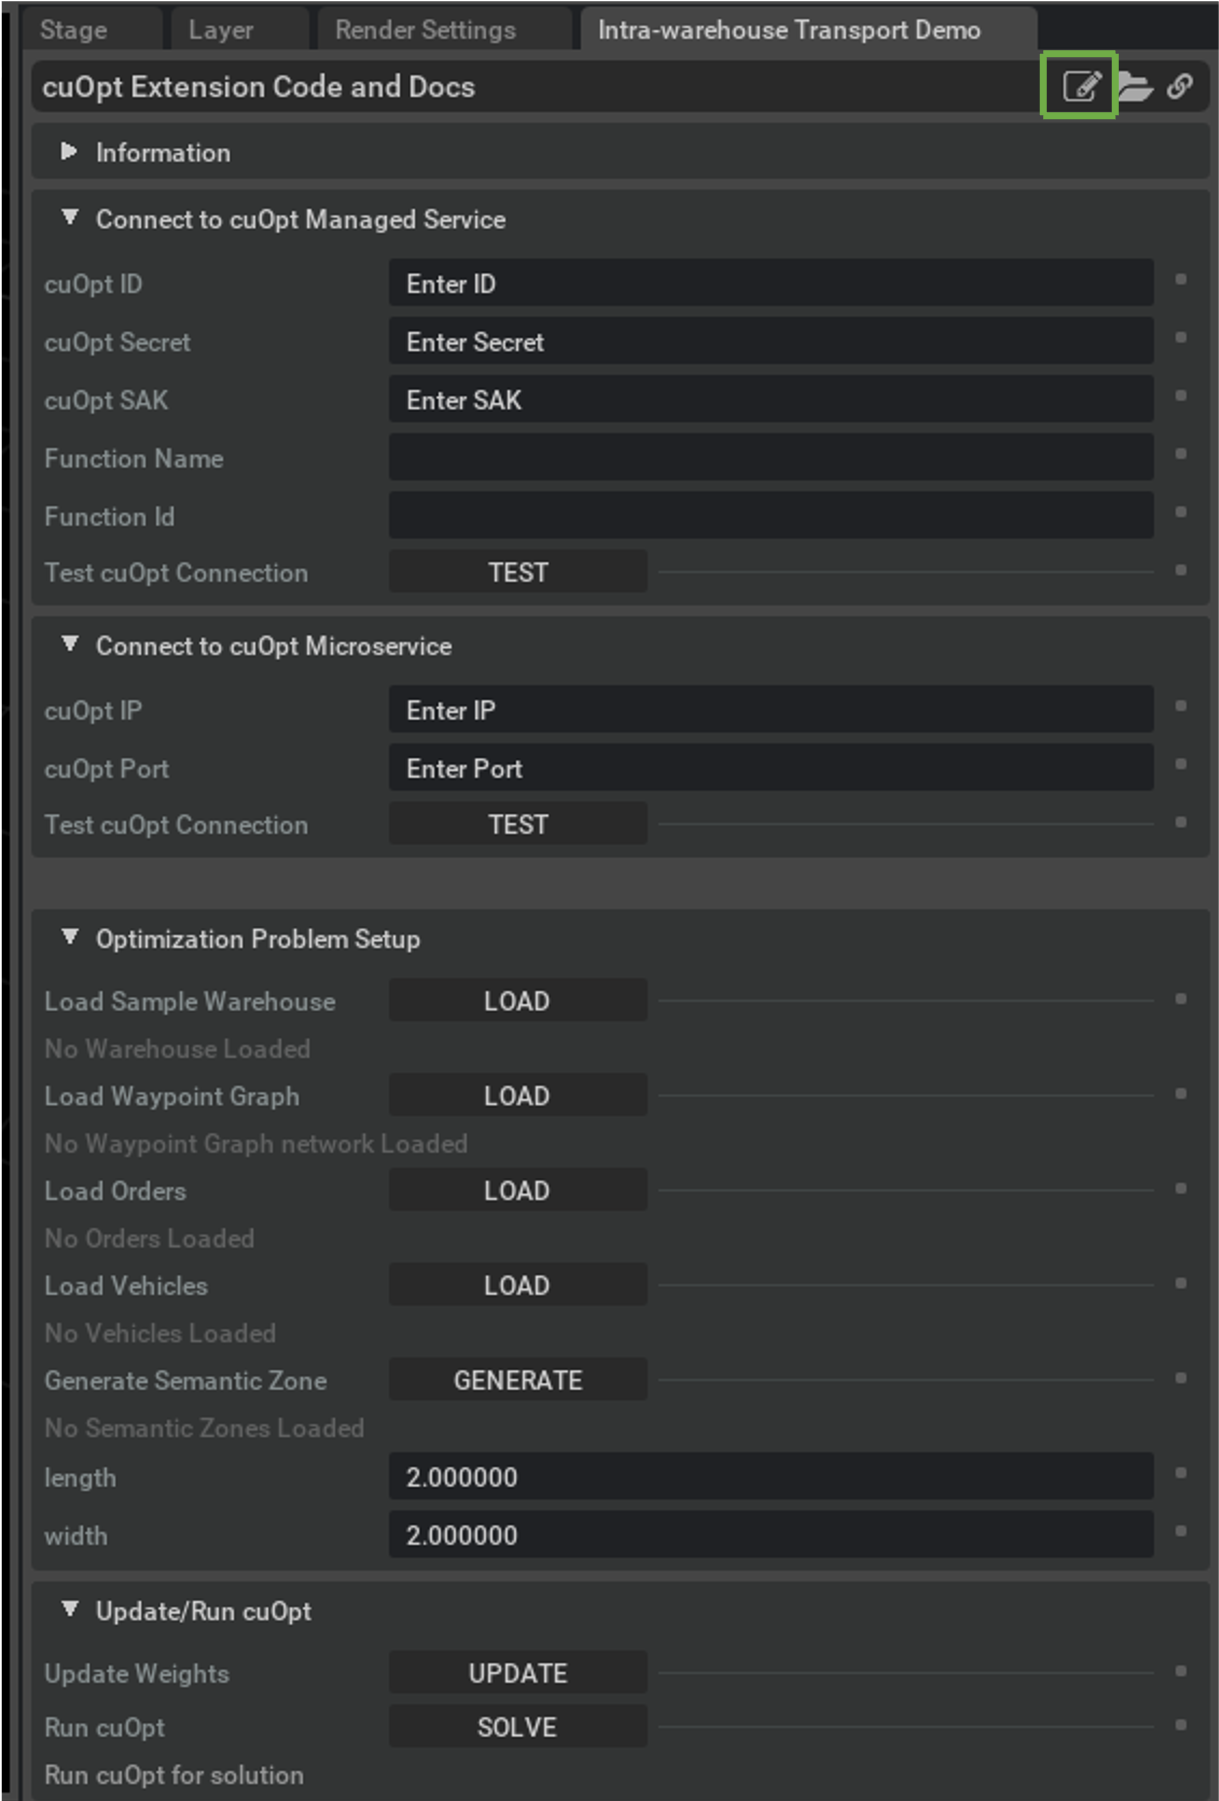
Click Open Source Code to view the reference implementation.
Simple Waypoint Graph#
Starting from a New Isaac Sim Session (
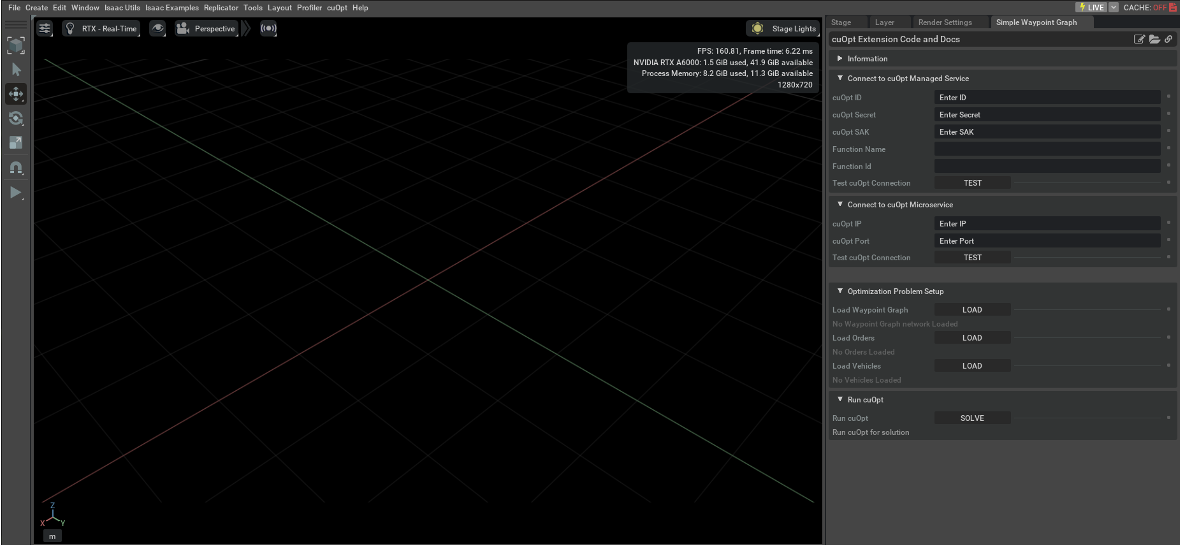
CTRL + N) navigate to the cuOpt menu item now present in the Isaac Sim interface and select Simple Waypoint Graph.Enter the credentials assigned to you for the NVIDIA cuOpt managed service.
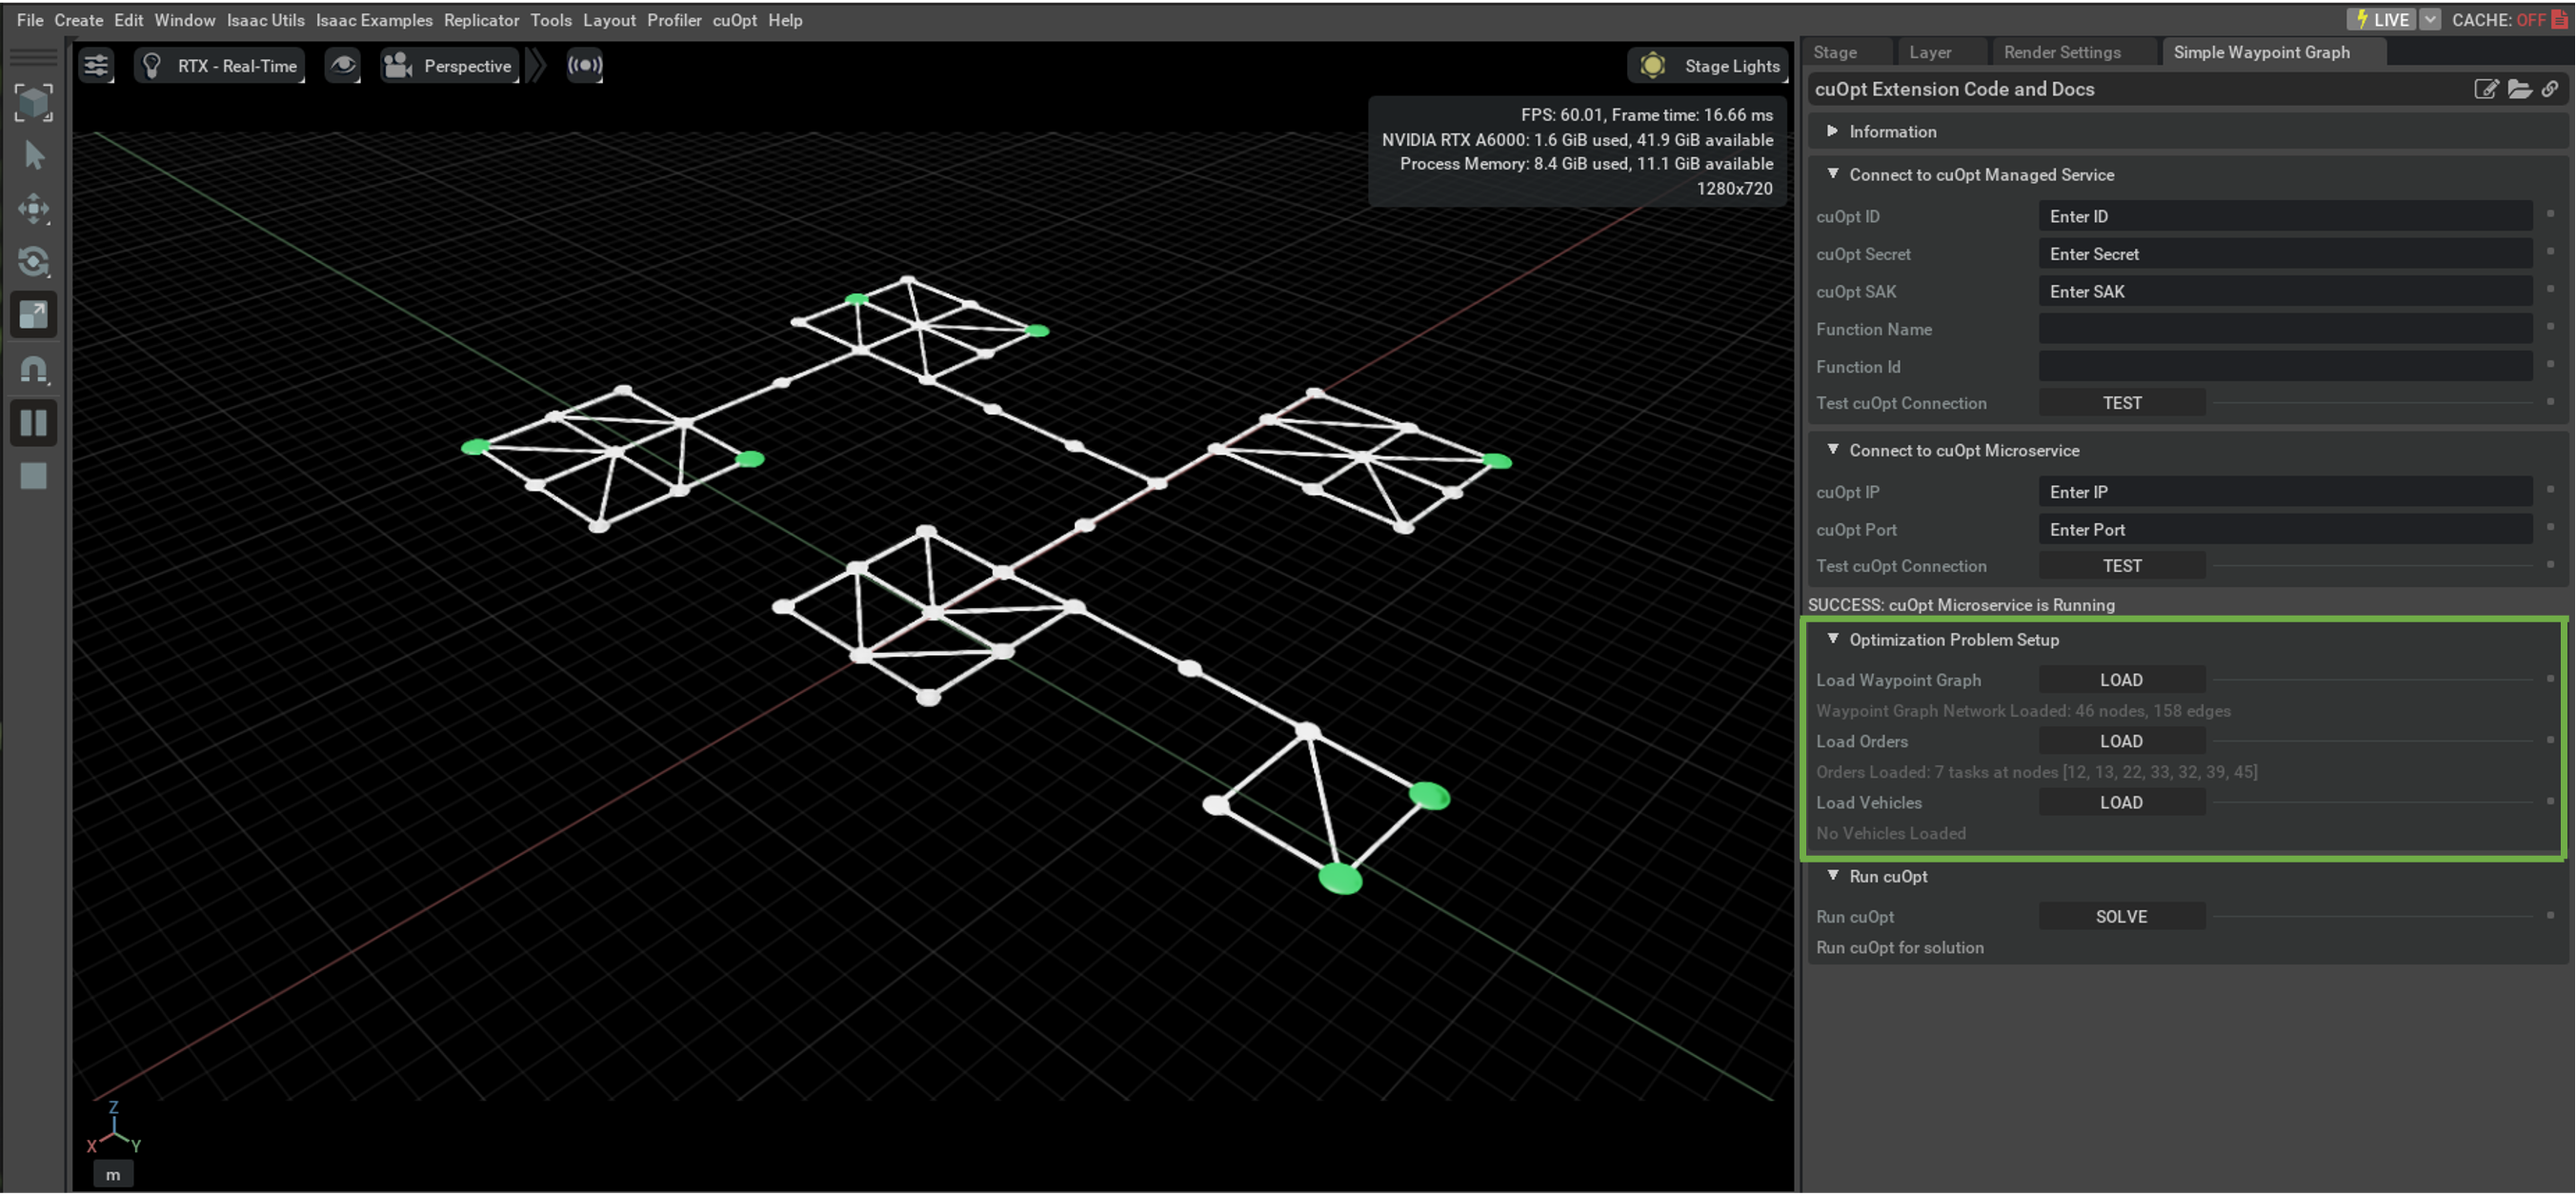
In the Optimization Problem Setup section, click the LOAD buttons from top to bottom (Waypoint Graph, Orders, Vehicles) to setup the problem:
Load Waypoint Graph loads a sample waypoint graph from
/extension_data/waypoint_graph.json, which exists alongside the source code for this example.Load Orders loads sample order data from
/extension_data/order_data.json, which exists alongside the source code for this example. Order locations now appear in green.Load Vehicles loads sample vehicle data from
/extension_data/vehicle_data.json, which exists alongside the source code for this example. Note Vehicles are assigned to start from Node_0 position, but are not shown in the viewport.
In the Run cuOpt section, click SOLVE to return optimized routes. A text representation of the routes is displayed in the UI and results are also shown in the viewport.
Click Open Source Code to view the reference implementation.
Intra-warehouse Transport Demo#
Starting from a New Isaac Sim Session (
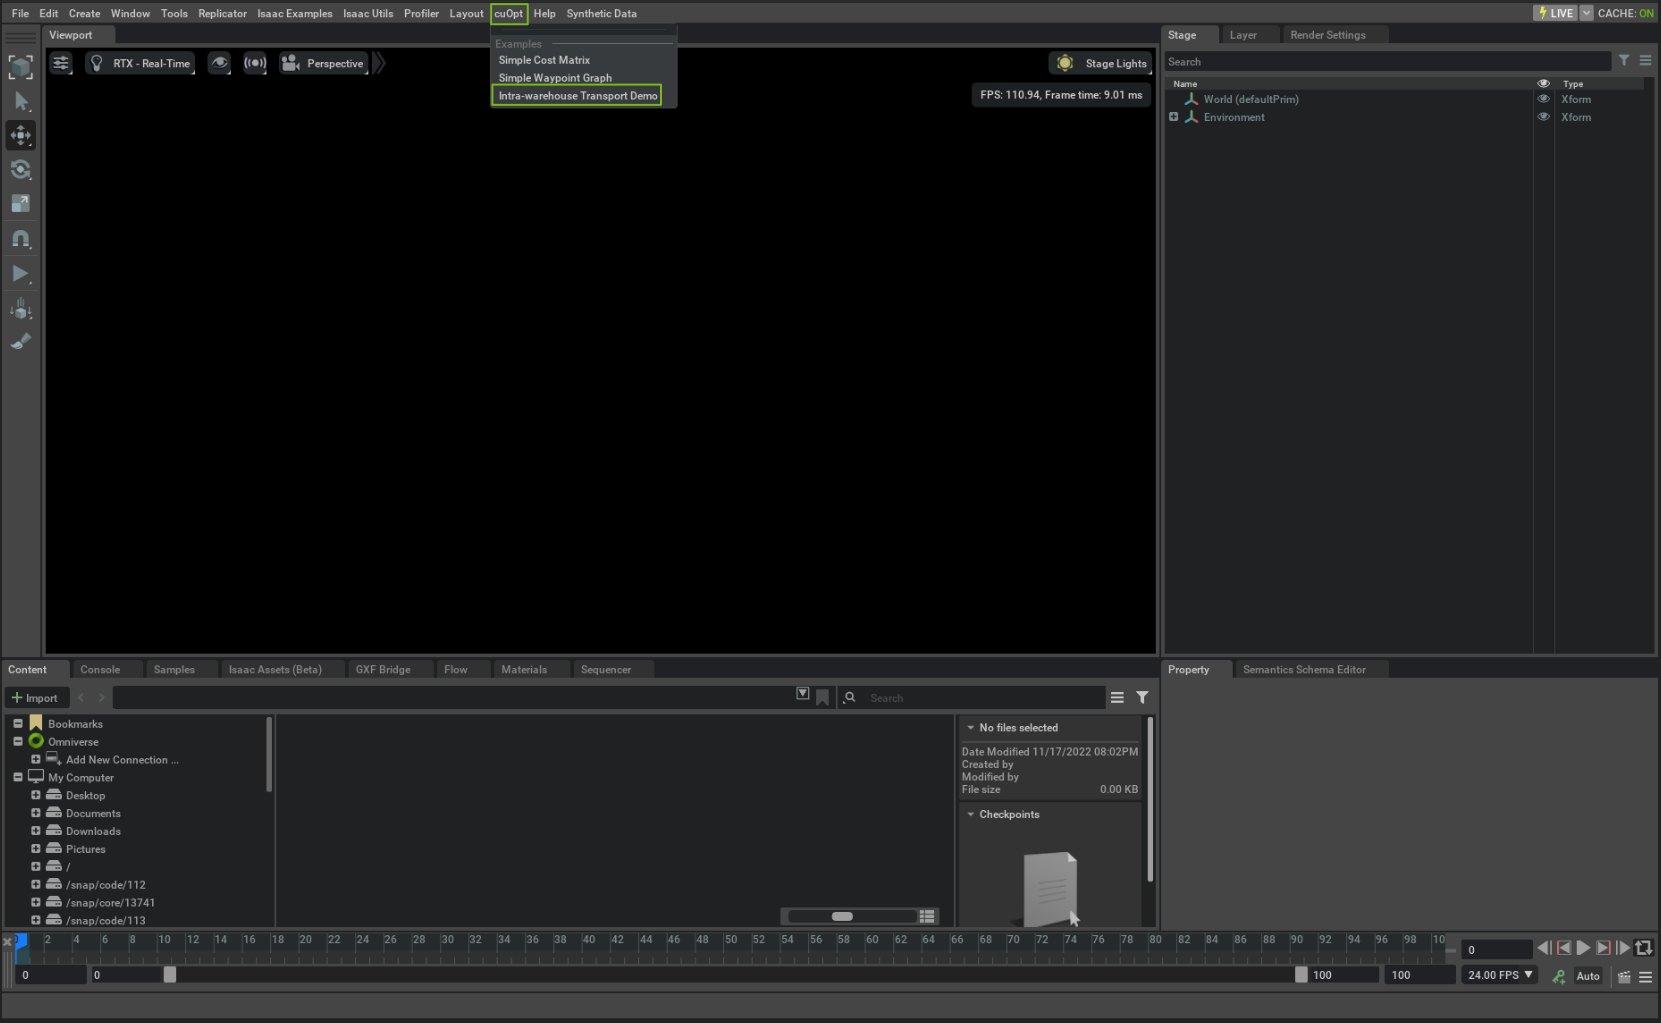
CTRL + N), navigate to the cuOpt menu item now present in the Isaac Sim interface and select Intra-warehouse Transport Demo.Enter the credentials assigned to you for the NVIDIA cuOpt managed service.
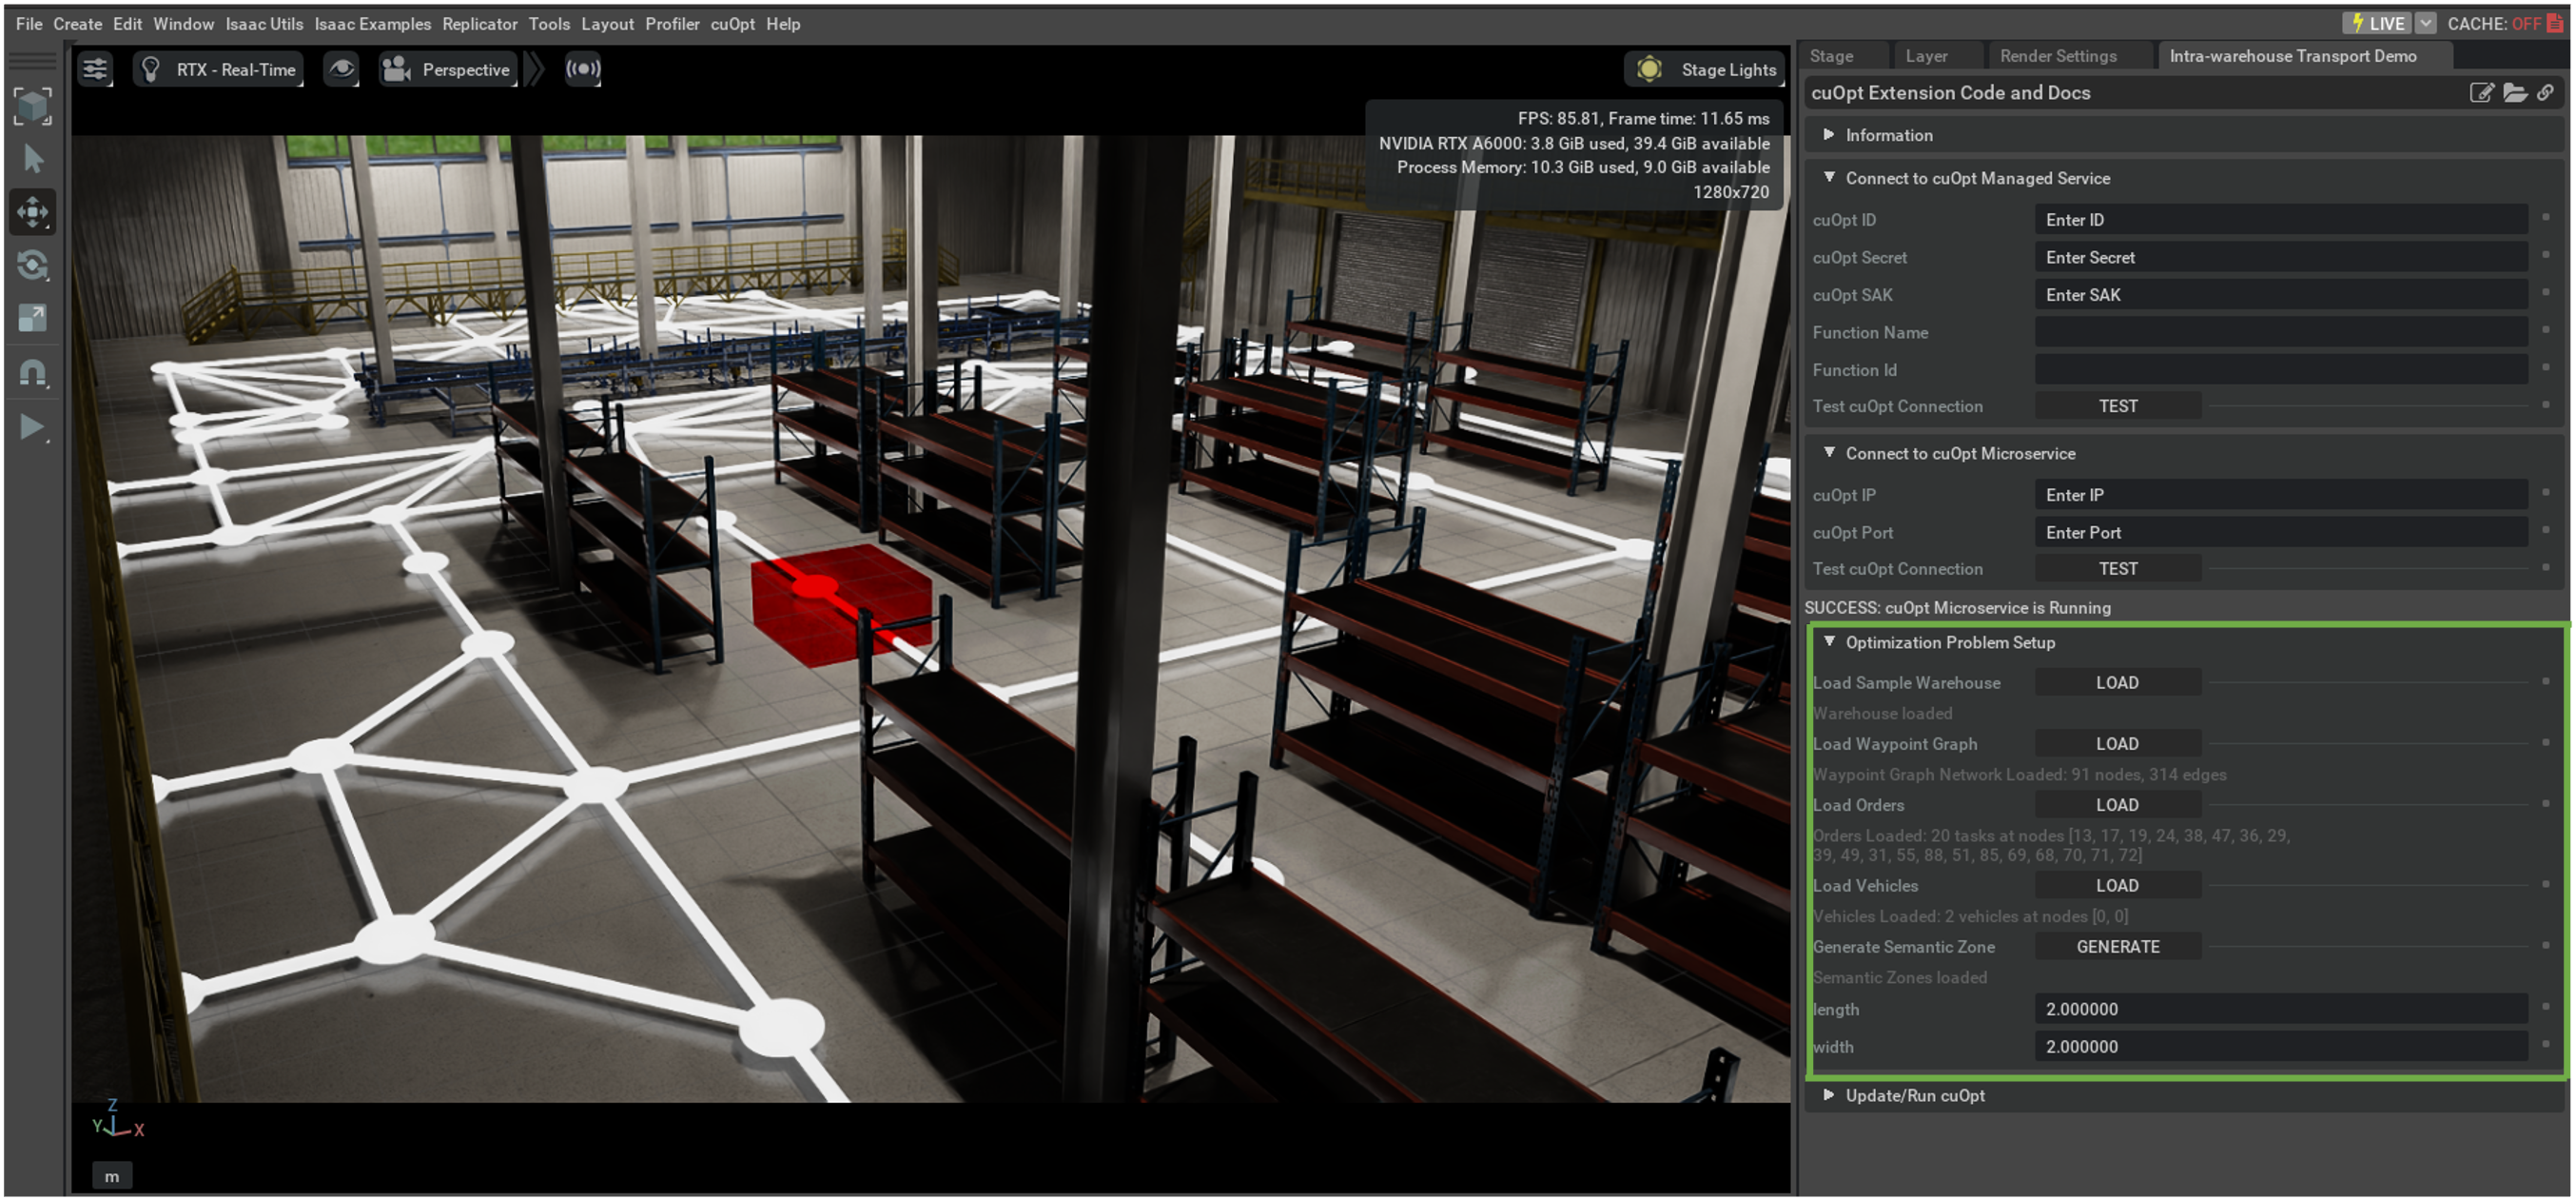
In the Optimization Problem Setup section, click the LOAD buttons from top to bottom (Sample Warehouse, Waypoint Graph, Orders, Vehicles, Semantic Zone) to setup the problem:
Load Sample Warehouse loads a sample warehouse defined by
/extension_data/warehouse_building_data.json, conveyors defined by/extension_data/warehouse_conveyors_data.jsonand shelves defined by/extension_data/warehouse_shelves_data.json. All JSON files can be found alongside the source code for this example.Load Waypoint Graph loads a sample waypoint graph from
/extension_data/waypoint_graph.json, which exists alongside the source code for this example.Load Orders loads sample order data from
/extension_data/order_data.json, which exists alongside the source code for this example. Order locations now appear in green.Load Vehicles loads sample vehicle data from
/extension_data/vehicle_data.json, which exists alongside the source code for this example. Note Vehicles are assigned to start from Node_0 position but are not shown in the viewport.(OPTIONAL) Create Semantic Zone creates a semantic zone of user defined size starting at location
(0,0,0). If the generated semantic zone is placed over one or more edges in the waypoint graph, the edge within that semantic zone is assigned a very high travel cost. cuOpt attempts to avoid these edges if possible in the optimized solution. Note Each time the Generate button is clicked a new semantic zone is created.
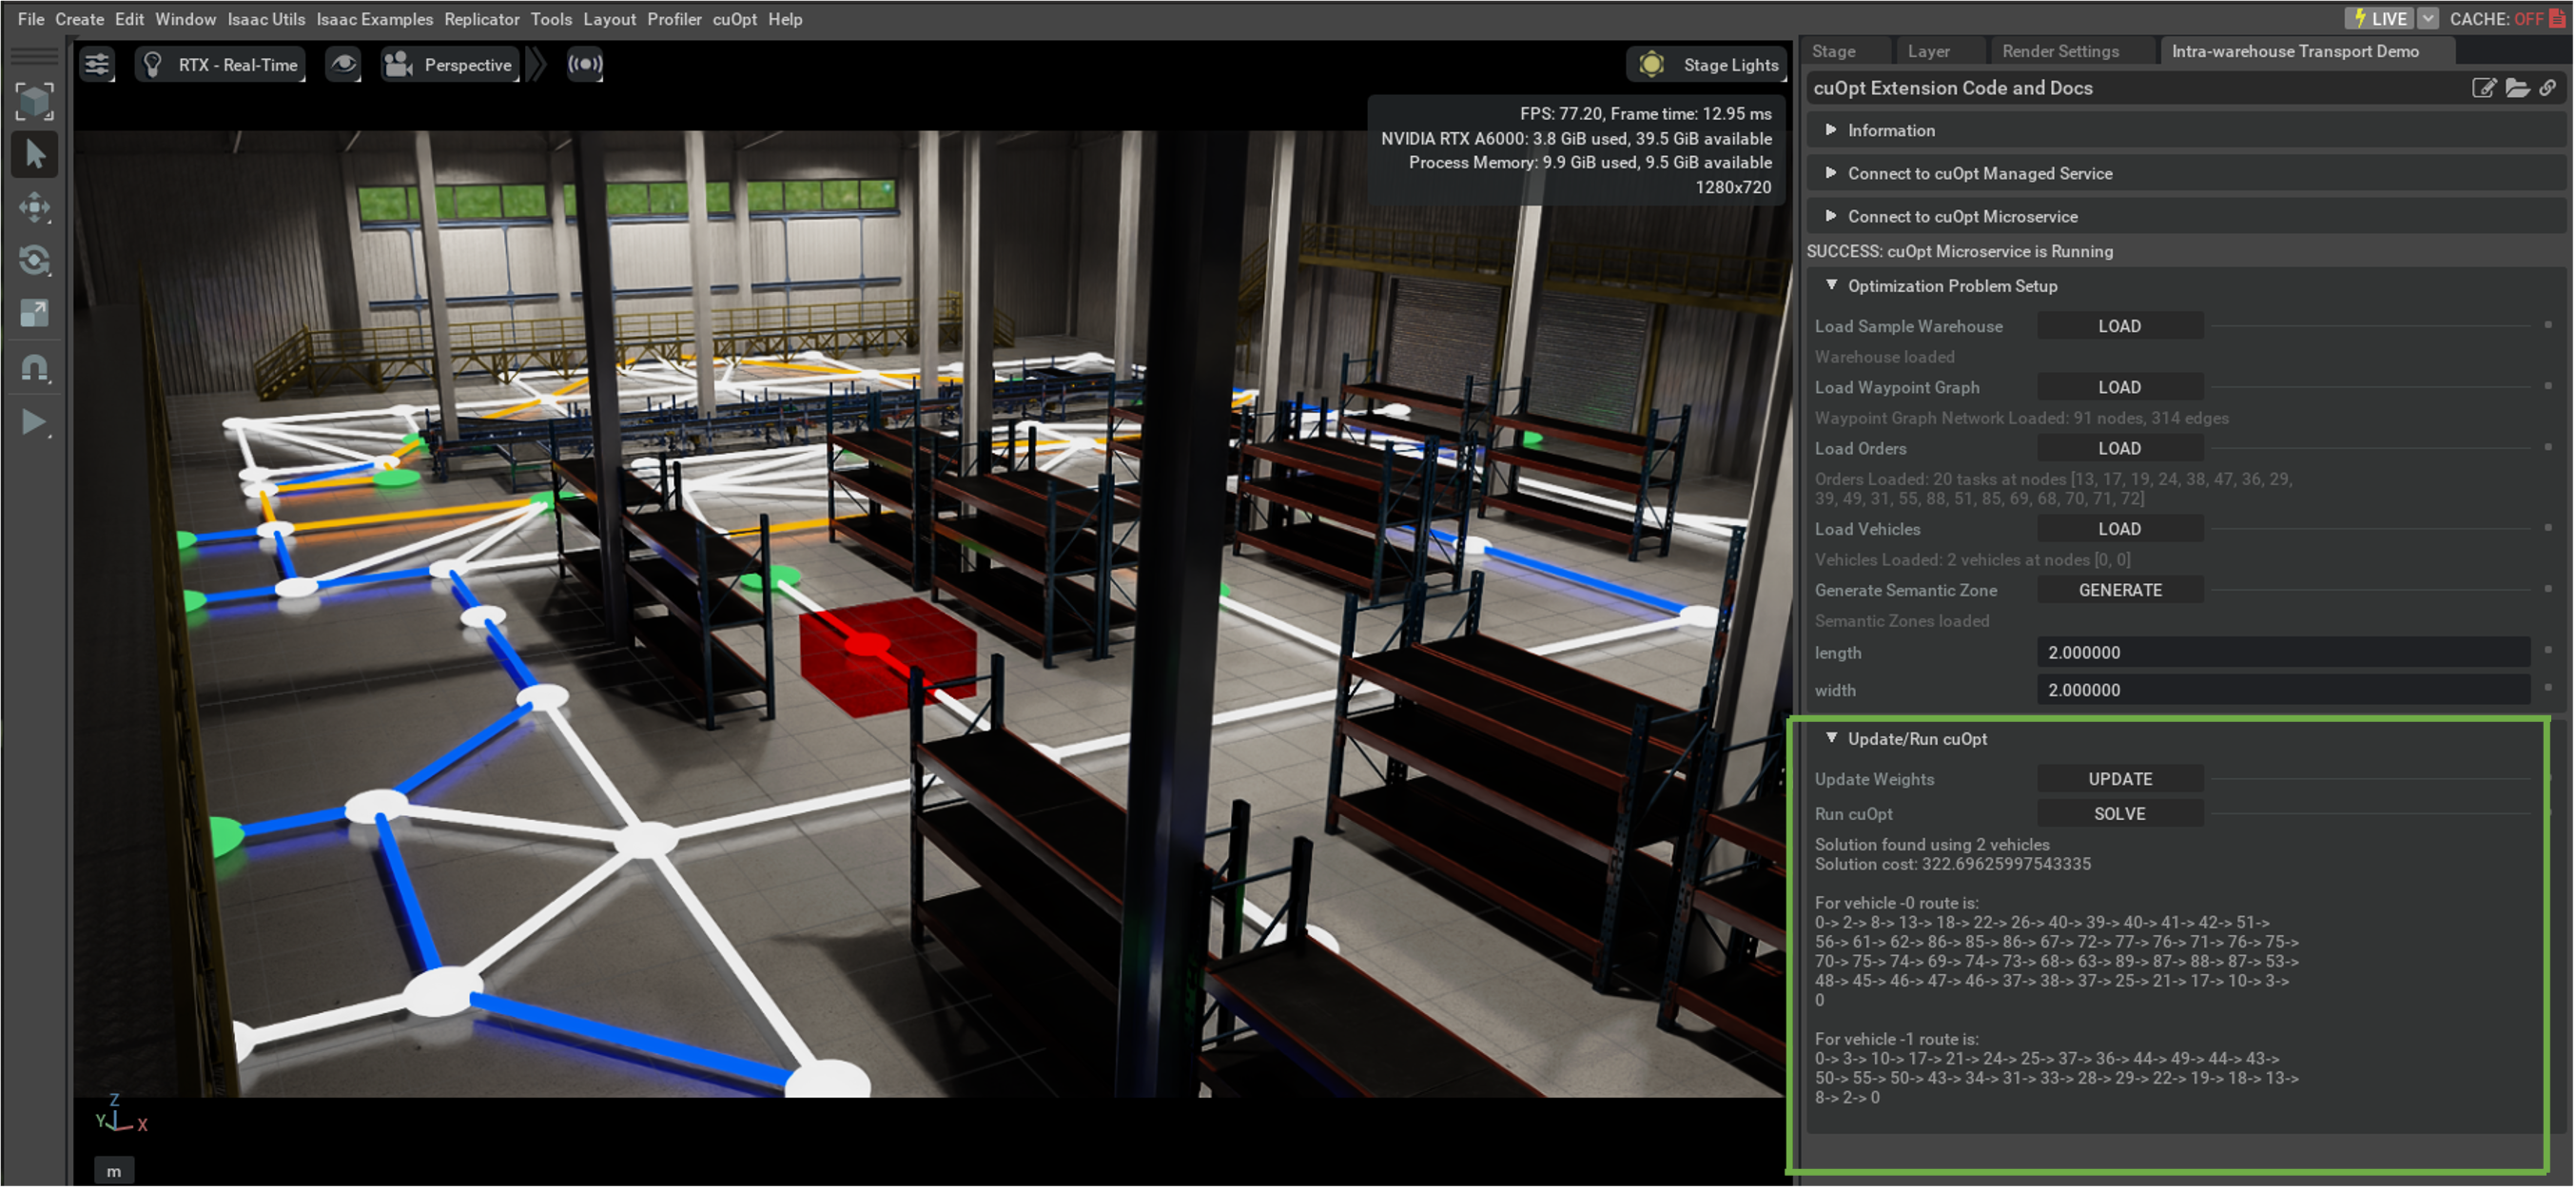
In the Run cuOpt section, if a semantic zone has been created or moved, click UPDATE to capture the current weights. Then click SOLVE to return optimized routes. A text representation of the routes is displayed in the UI and results is also shown in the viewport.
Click Open Source Code to view the reference implementation.
Additional Information#
The examples shown here demonstrate only a small subset of cuOpt functionality. For additional features and advanced usage see the cuOpt Documentation and the cuOpt-Resources Repository.

