Live Sync
The current Omniverse Unity Connector allows unidirectional Live Sync from the Unity Editor to the Omniverse App.
Functions available with Live Sync
Pass unidirectional processing from the Unity Editor to the Omniverse App using Live Sync.
Live Session Notification (Join/Left/Merge)
Real-time editing with Live Sync
Create GameObject
Delete GameObject
Change GameObject transform
Change GameObject parameters (Rename, Change visibility)
Change Material parameters
Bind material to mesh
Move GameObjects between hierarchies
Bind material to mesh
Light placement and editing
Camera placement and editing
How to use Live Sync
The following conditions must be met to use Live Sync.
In Live Sync, USD file formats usd/usdc/usda can be used.
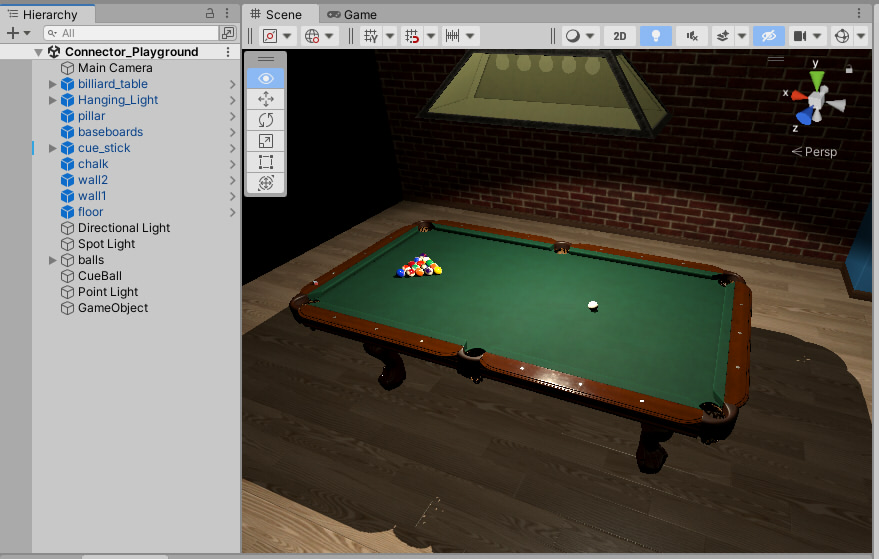
Export USD file
Select [Omniverse]-[Export] from the menu to export usd to Nucleus.
Create a session and join a Live Session
Select [Omniverse]-
Live Sync from the menu to display the Omniverse Live Sync window.
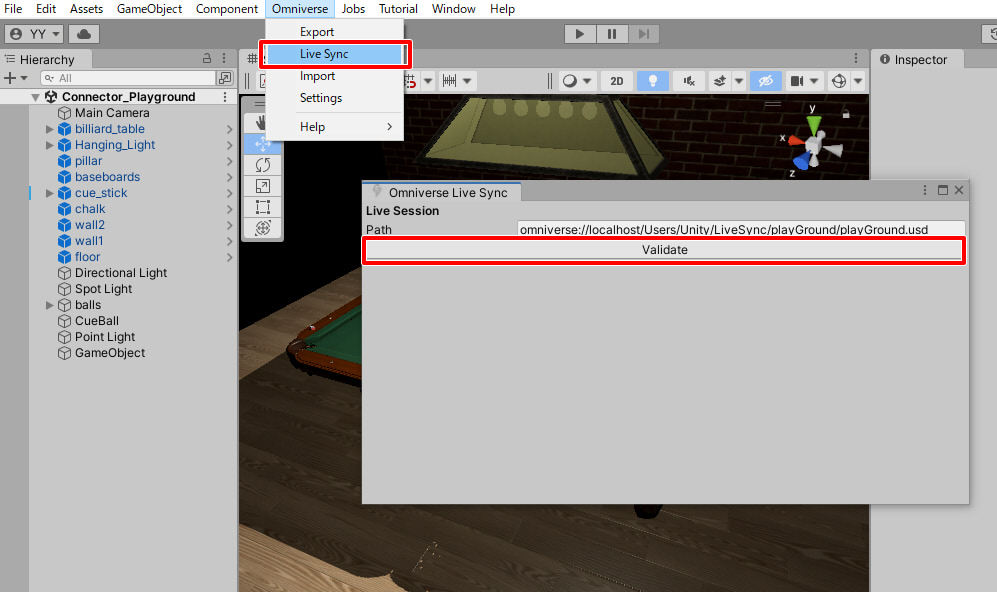
Pressing the Validate button will confirm for Live Sync from the usd file on the specified Nucleus.
Note that usd files exported after the Unity Editor has been launched are the target file.
It is currently not possible to perform Live Sync without exporting after launching the Unity Editor.
Specify any session name in Create New Session and press the Create Session button.
Here we have specified a session name of “test”.
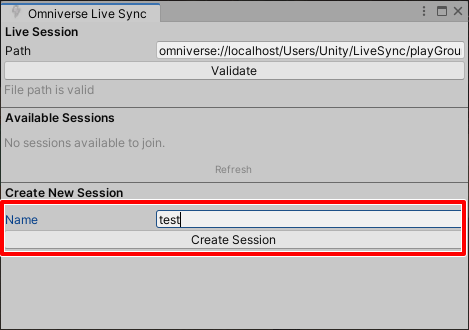
Available Sessions displays the name of the session you created.
It also shows [Connected to session “test”] in green.
![[Connected to session "test"] in green.](../../_images/LiveSync_HowTo_04.png)
Open usd file in USD Composer
Launch USD Composer and open the usd file on Nucleus that you exported in the Unity Editor.
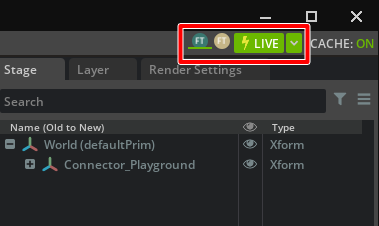
Click “LIVE” in the upper right corner to open the menu and select “Join Session”.
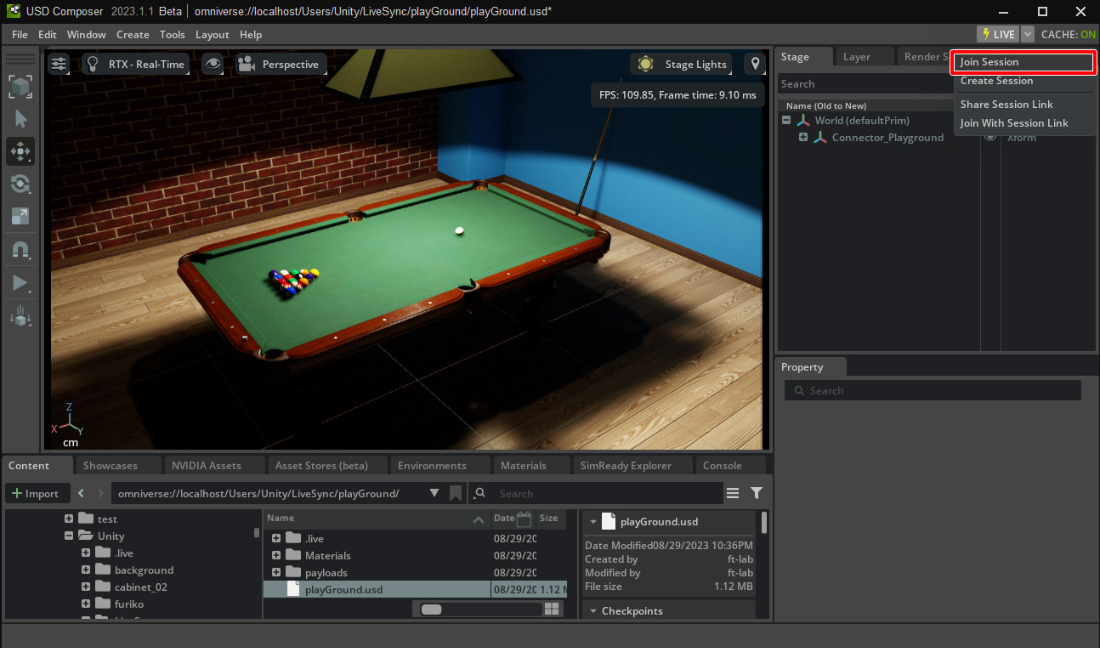
In the Live Session window, select “Join Session” and then “test”.
Push the “JOIN” button.
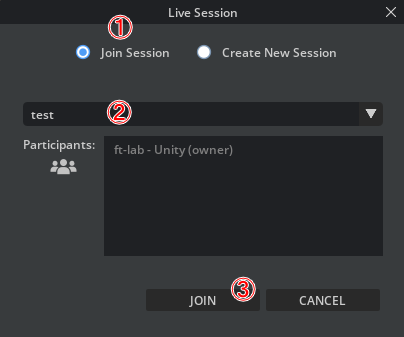
USD Composer has now joined the “test” session.
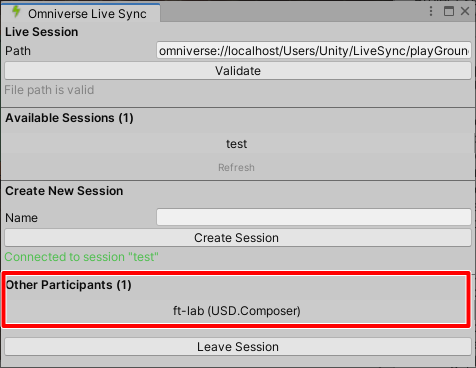
Check session participation in Unity Editor
In the Omniverse Live Sync window of the Unity Editor, we could see that USD Composer had joined the session.
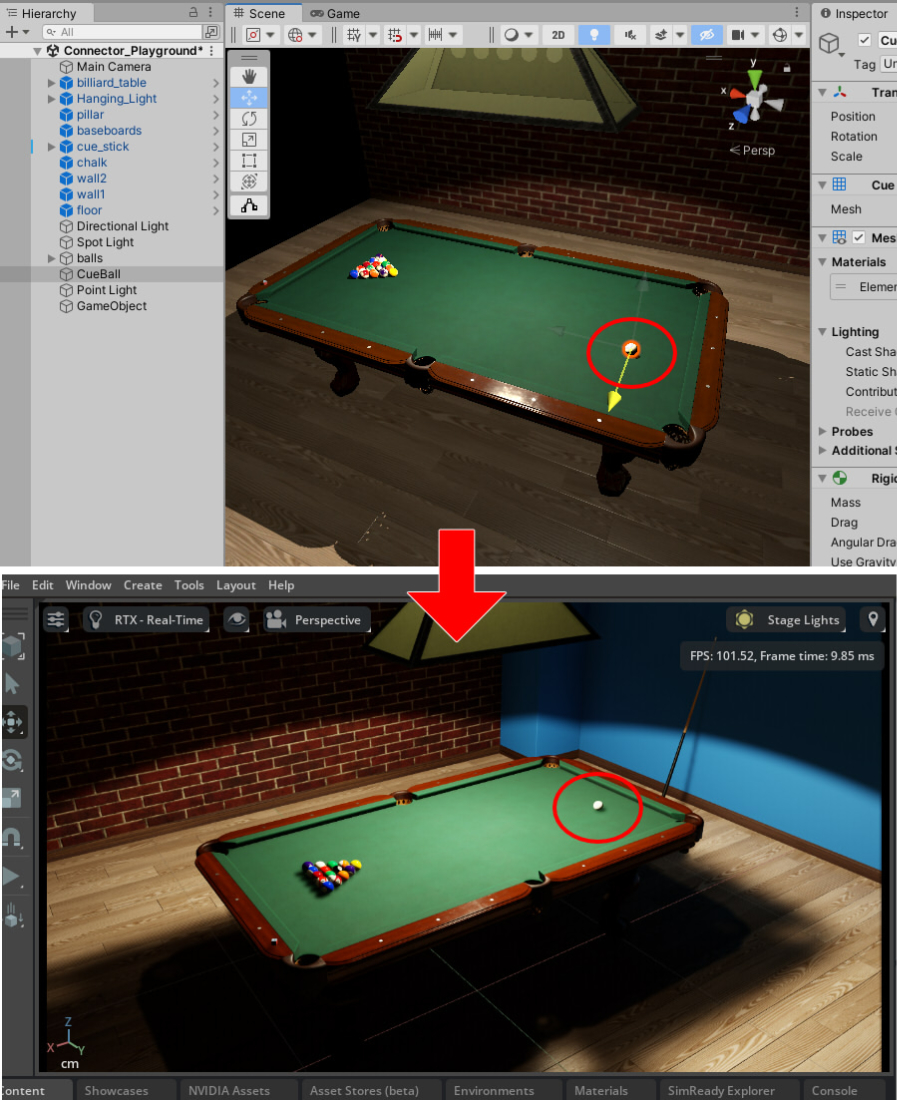
By moving the GameObject, make sure that the USD Composer participating in the Live Session is also updated in real time.
Leave a session
Press the “Leave Session” button in the Omniverse Live Sync window to leave the Live Session.
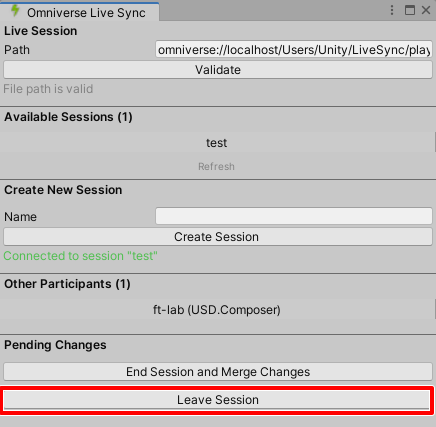
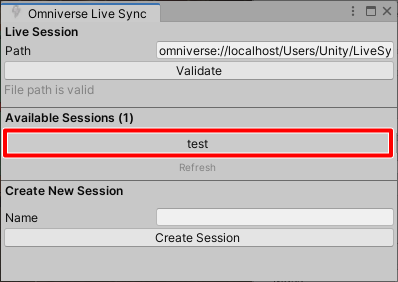
Join an already existing session
In the Omniverse Live Sync window, you can join a session by selecting the session name in the Available Sessions list.
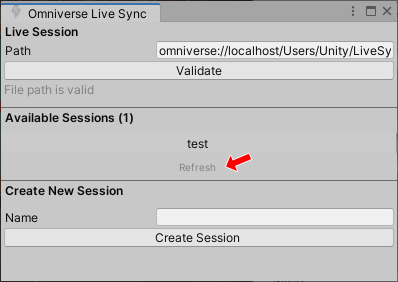
You can also refresh the session list to the latest by clicking on the gray Refresh text.
Merge session into root usd
Pressing the “End Session and Merge Changes” button in the Omniverse Live Sync window will merge the active session into the root usd.
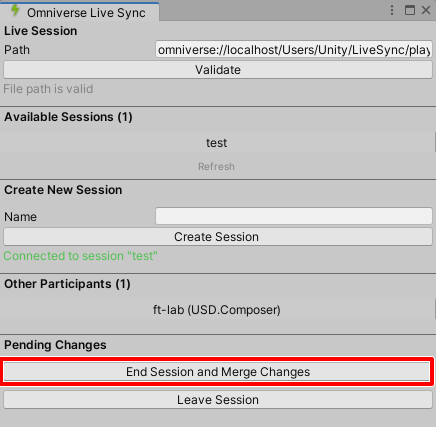
Leave active session before merging.
Notification
The Omniverse Unity Connector receives Live Session notifications from other Omniverse Apps and tools using the Omniverse Connector.
When using Live Sync, three events are acquired from outside.
You will be notified which of the users participating in the Live Session is trying to do what.
Notifications are displayed in the Scene viewport of the Unity Editor.
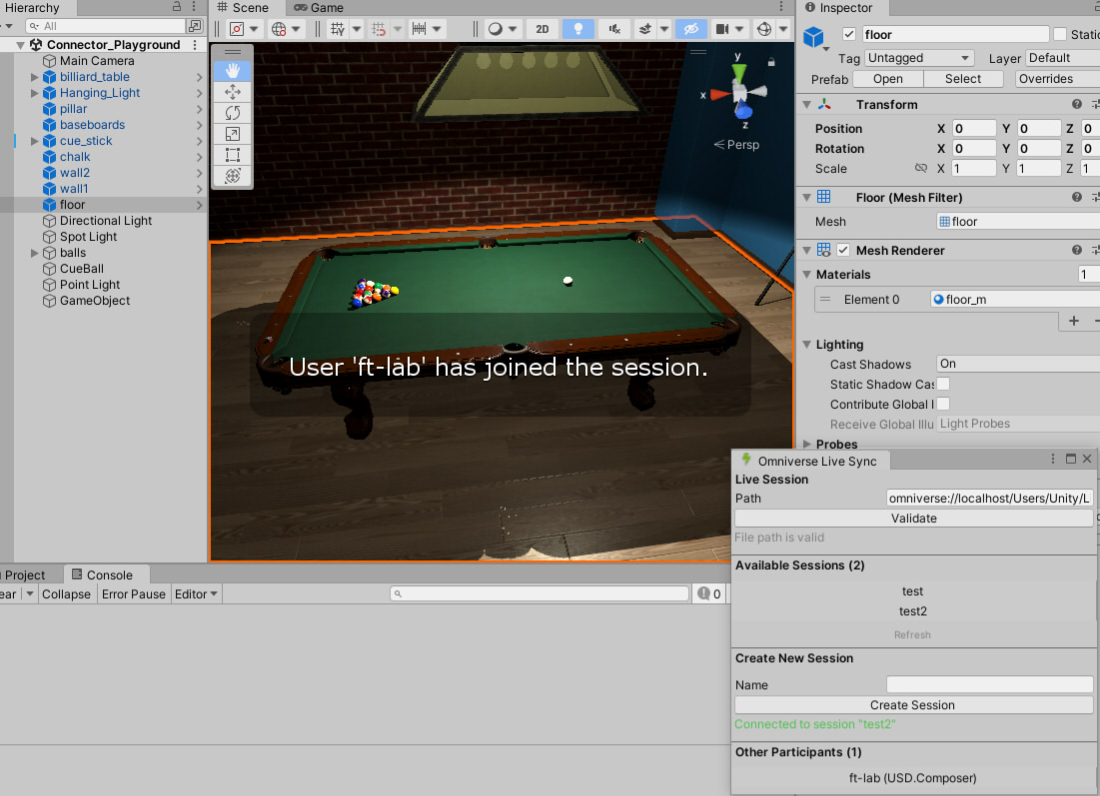
When notified of a merge process
When an external user participating in a Live Session performs a merge, the Omniverse Unity Editor displays a message box prompting the user to leave the session.
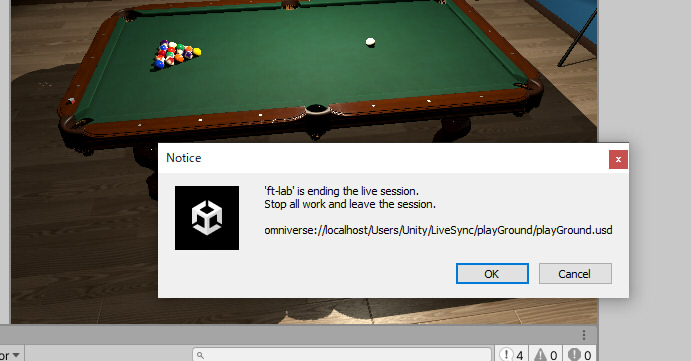
Press OK button to leave the session.
If merged in Live Session, the session diff is merged against the root usd.
Therefore, the session itself will be discarded.
Live Sync when using prefab
If you export with the “Prefab to Payload” checkbox checked in Settings, the prefab will be exported in multiple usd files.
The root usd references these from payload.
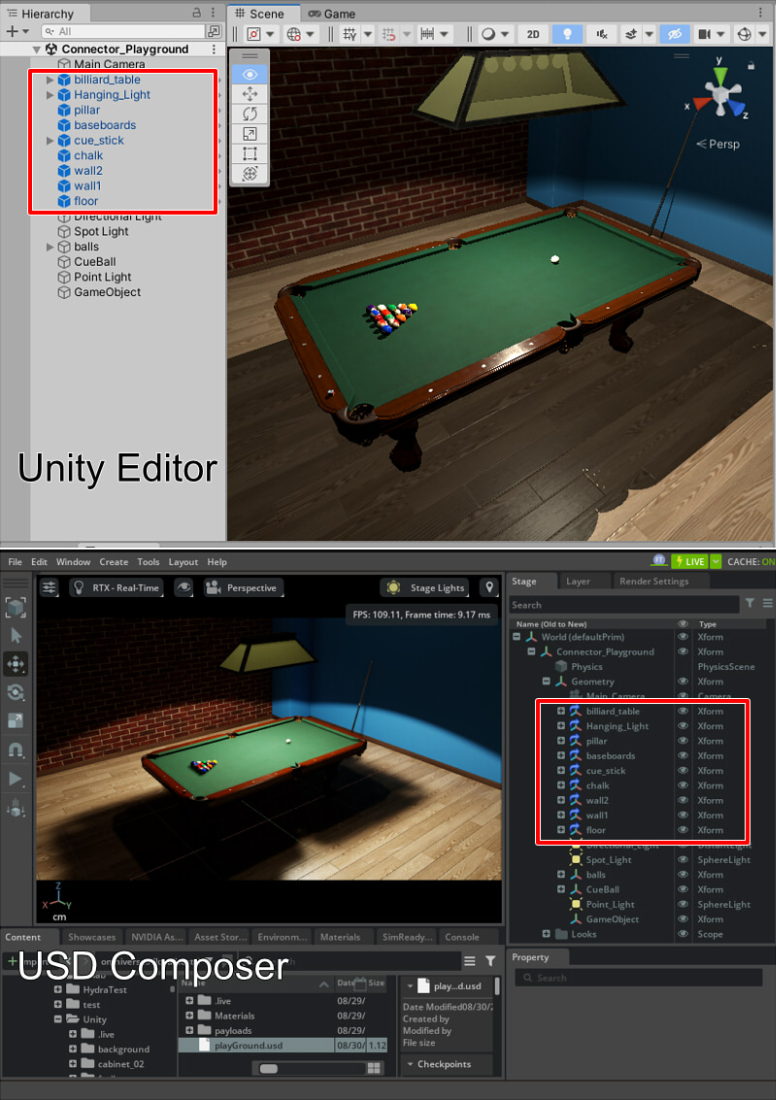
Updates to payloads during Live Sync are reflected in the current session with an override.
The original usd file referenced by payload is not updated.
Also, if a GameObject or material is added during Live Sync, the information is added to the current session.
During Live Sync, if you add new assets or prefabs to the scene on the Unity Editor side, they are not exported as usd as payload.
Limitations
Currently, it is a one-way Live Sync from the Unity Editor to the Omniverse App and other Omniverse Connectors.
You must export once in the Unity Editor and then use Live Sync.
Physics does not support Live Sync.
Note
You must first Export a .usd from Unity to a Nucleus server and then Create a Live Sync Session from the recent export of the open Unity scene. Share the Omniverse URL with those that want to join the session. When in Live Sync changes to a scene in Omniverse will not apply to Unity, but changes in Unity will apply to Omniverse.


![[Connected to session "test"] in green.](../../_images/LiveSync_HowTo_04.png)


