Deploying Omniverse Farm Using Omniverse Launcher#
1. Introduction#
Farm can be easily deployed using the Omniverse Launcher to install Farm Queue and Farm Agent. This document will work for the deployment across a few nodes but for anything at a larger scale we’d recommend using a solution like Ansible to help with the orchestration of the nodes. If baremetal and/or VMs are not a hard requirement we’d recommend running OV Farm in a Kubernetes environment as it allows for better control and scalability.
At the end of this guide there is some information on how to add some scalability and persistence by deploying a SQL database and Redis instance.
Note
It is recommended to match the version of Farm to the version of Kit used by Omniverse Kit applications, such as USD Composer. For more information refer to USD Composer Version Compatibility.
2. Queue installation#
Queue can be installed from the Omniverse Launcher, by navigating to the Exchange header menu, then selecting Queue from the Apps section of the left-hand sidebar.
After first installing Queue, the Install button will then allow you to launch it and send you on your journey to automation.
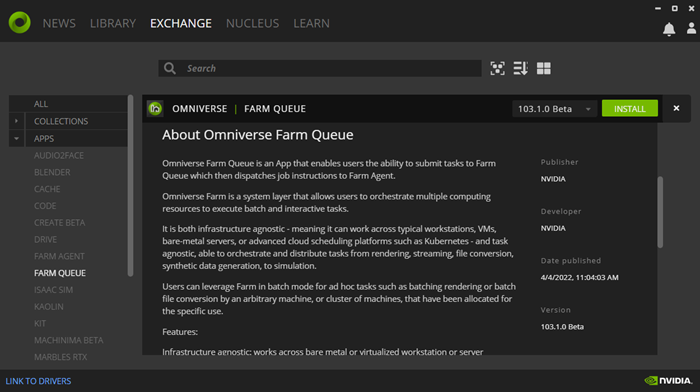
Note
By default, the Queue will need a GPU to be able to run in order to display a small management UI. If this is not required it is possible to run the Queue in headless mode from the commandline.
3. Agent installation#
Agent can be installed from the Omniverse Launcher, by navigating to the Exchange header menu, then selecting Agent from the Apps section of the left-hand sidebar.
After first installing Agent, the Install button then allows you to launch it and start processing content.
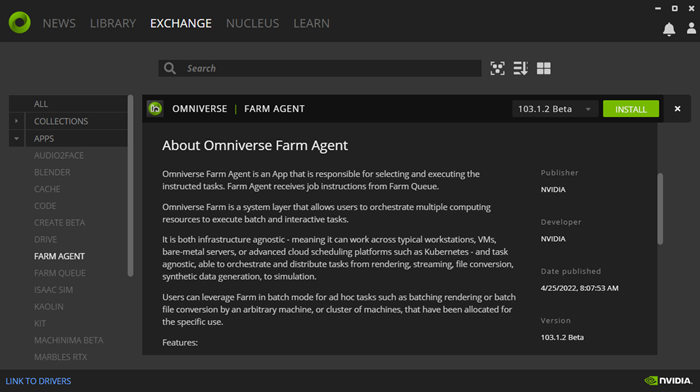
Note
By default, the Agent will need a GPU to be able to run in order to display a small management UI. If this is not required it is possible to run the Agent in headless mode from the commandline.
Additional resources#
Farm Queue user manual
Farm Agent user manual