Gradient Style Window#
In this tutorial we will cover how we can create a gradient style that will be used in various widgets. This tutorial will cover how to create a gradient image / style that can be applied to UI.
Learning Objectives#
How to use
ImageWithProvider`to create Image WidgetsCreate functions to interpolate between colors
Apply custom styles to widgets
Prerequisites#
Omniverse Code version 2022.1.2 or higher
Step 1: Add the Extension#
Step 1.1: Clone the repository#
Clone the gradient-tutorial-start branch of the kit-extension-sample-ui-window GitHub repository:
git clone -b gradient-tutorial-start https://github.com/NVIDIA-Omniverse/kit-extension-sample-ui-window.git
This repository contains the assets you use in this tutorial.
Step 1.2: Open Extension Search Paths#
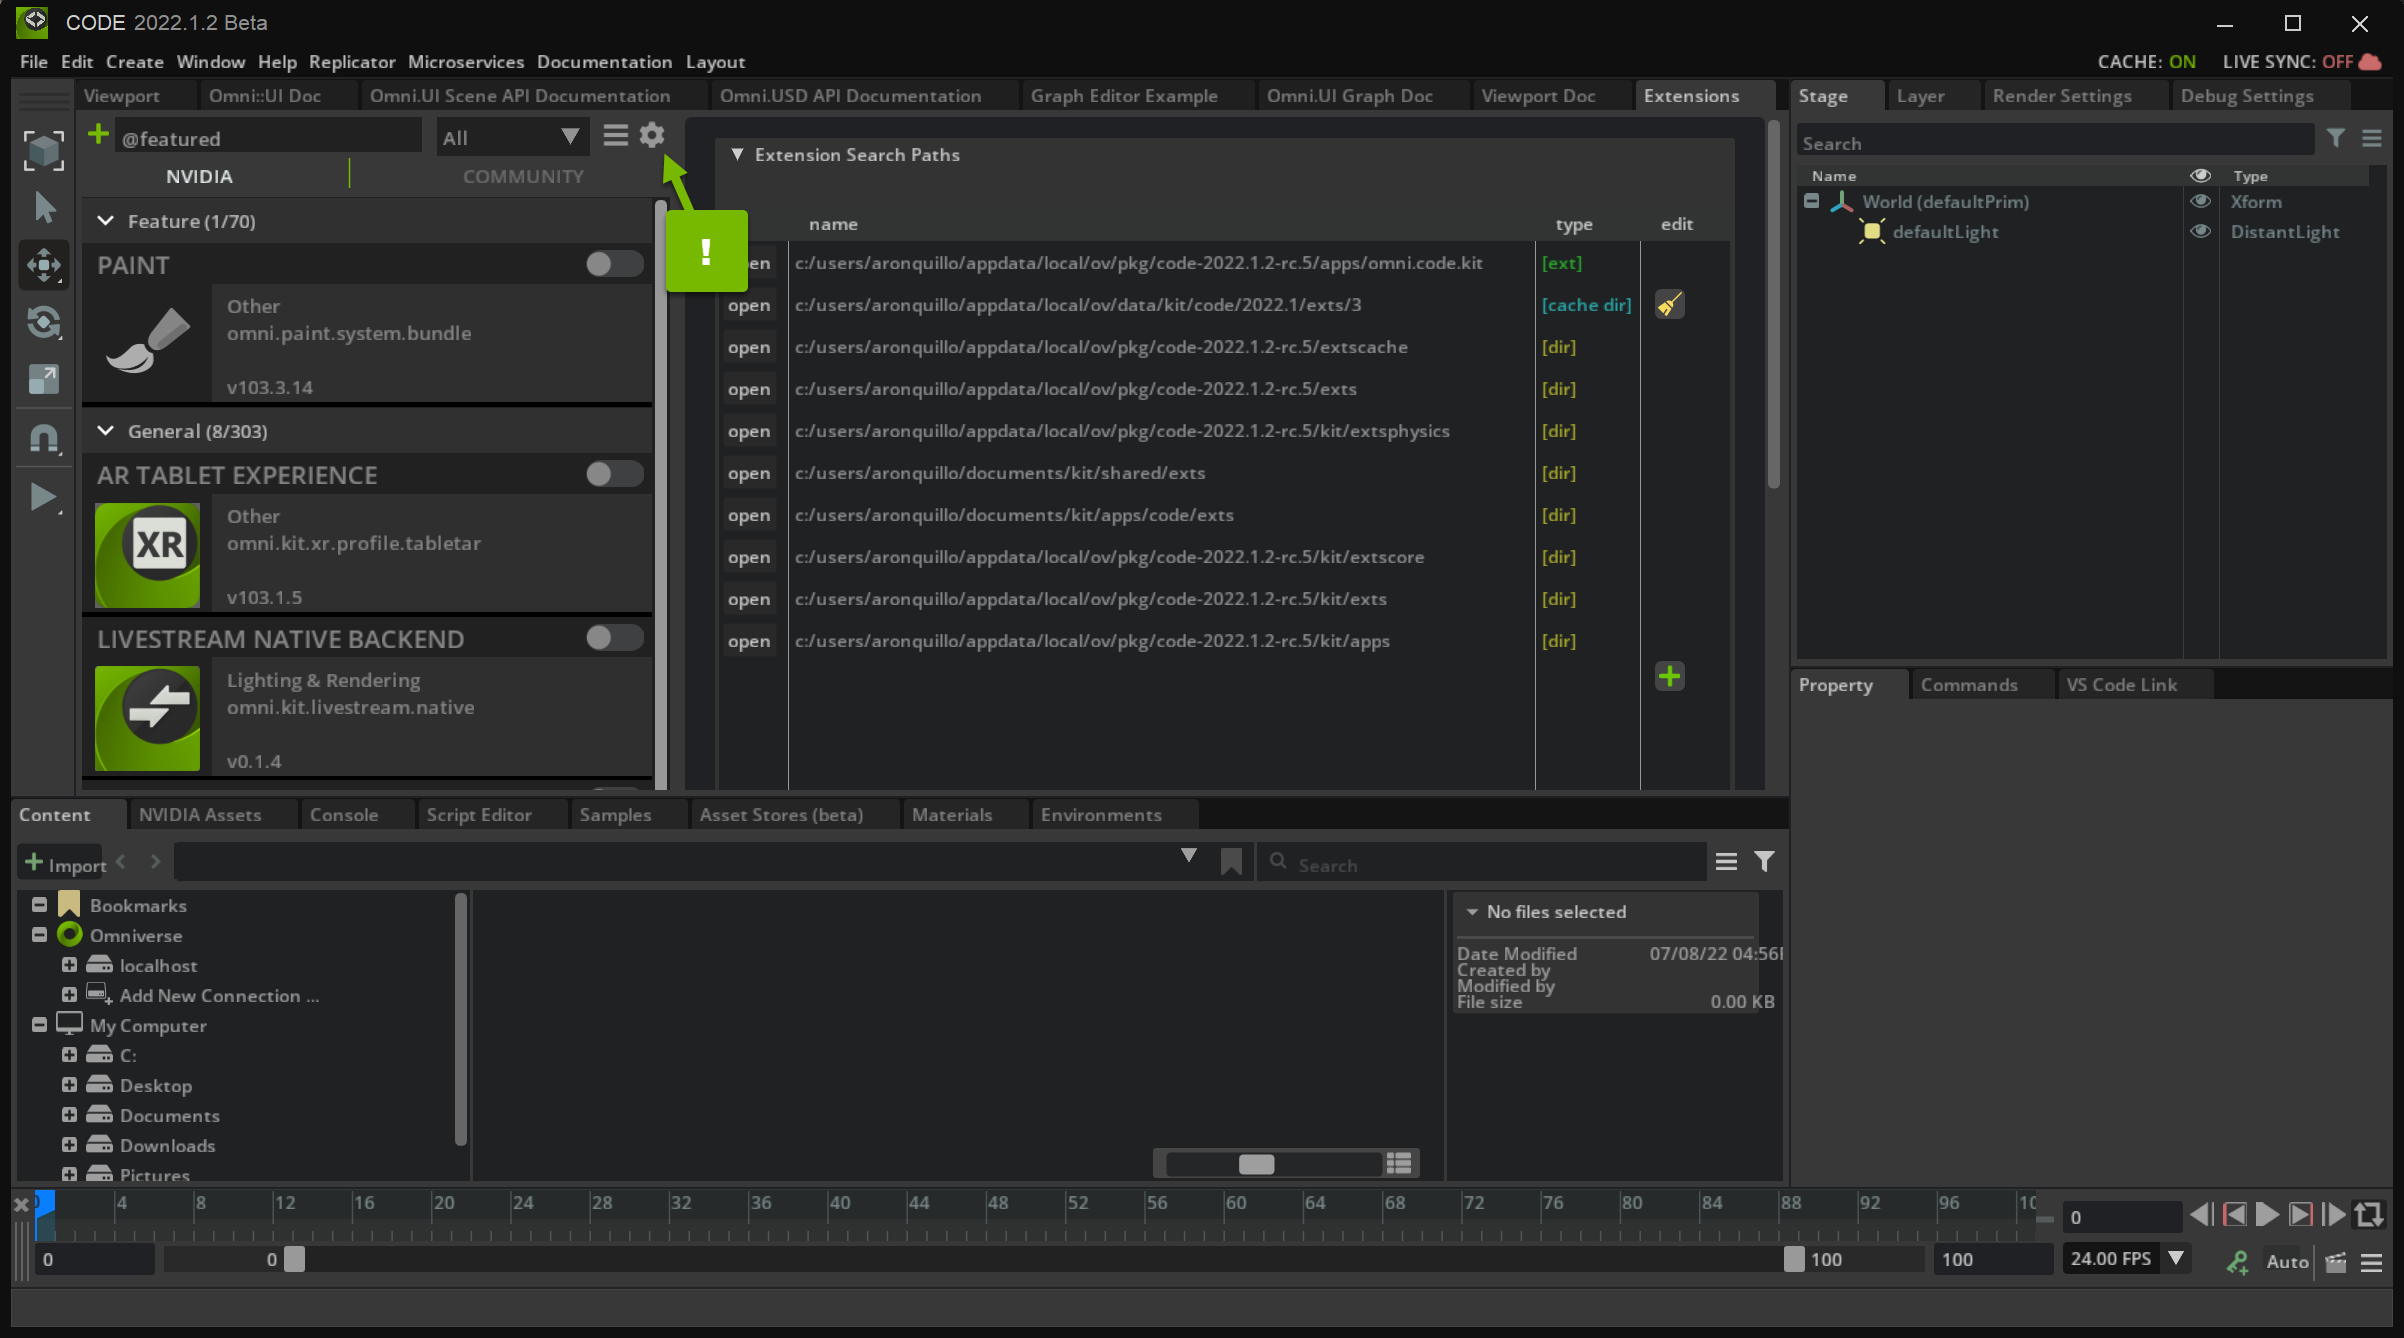
Go to Extension Manager -> Gear Icon -> Extension Search Path:
Step 1.3: Add the Path#
Create a new search path to the exts directory of your Extension by clicking the green plus icon and double-clicking on the path field:
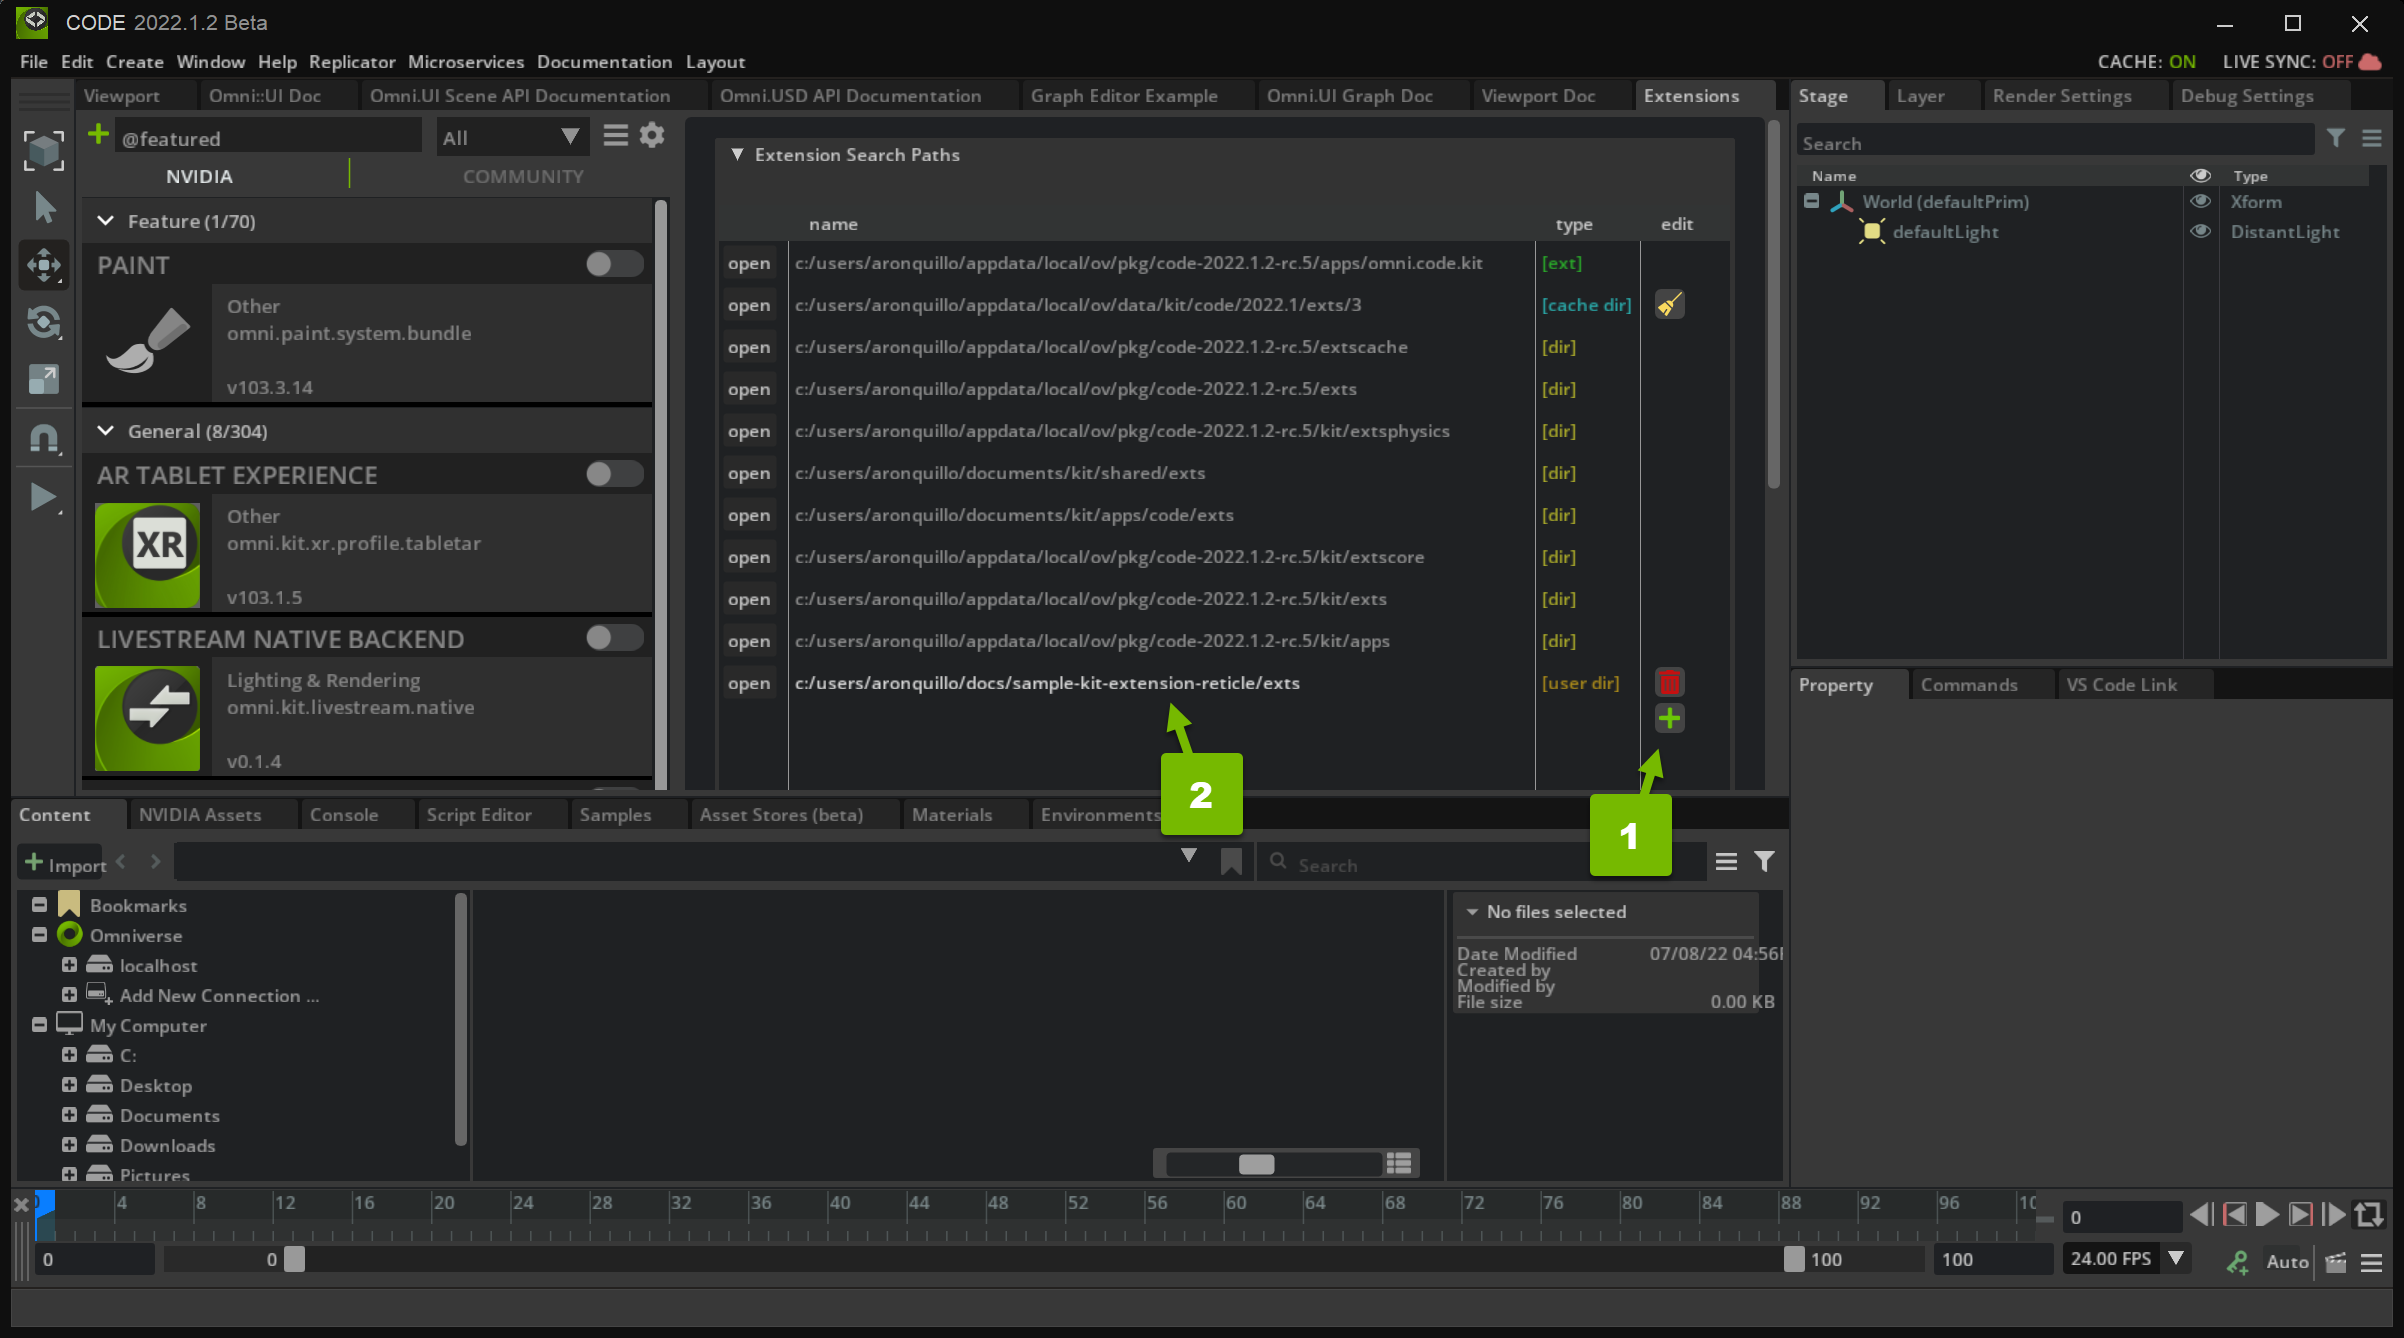
When you submit your new search path, you should be able to find your extension in the Extensions list.
Step 1.4: Enable the Extension#
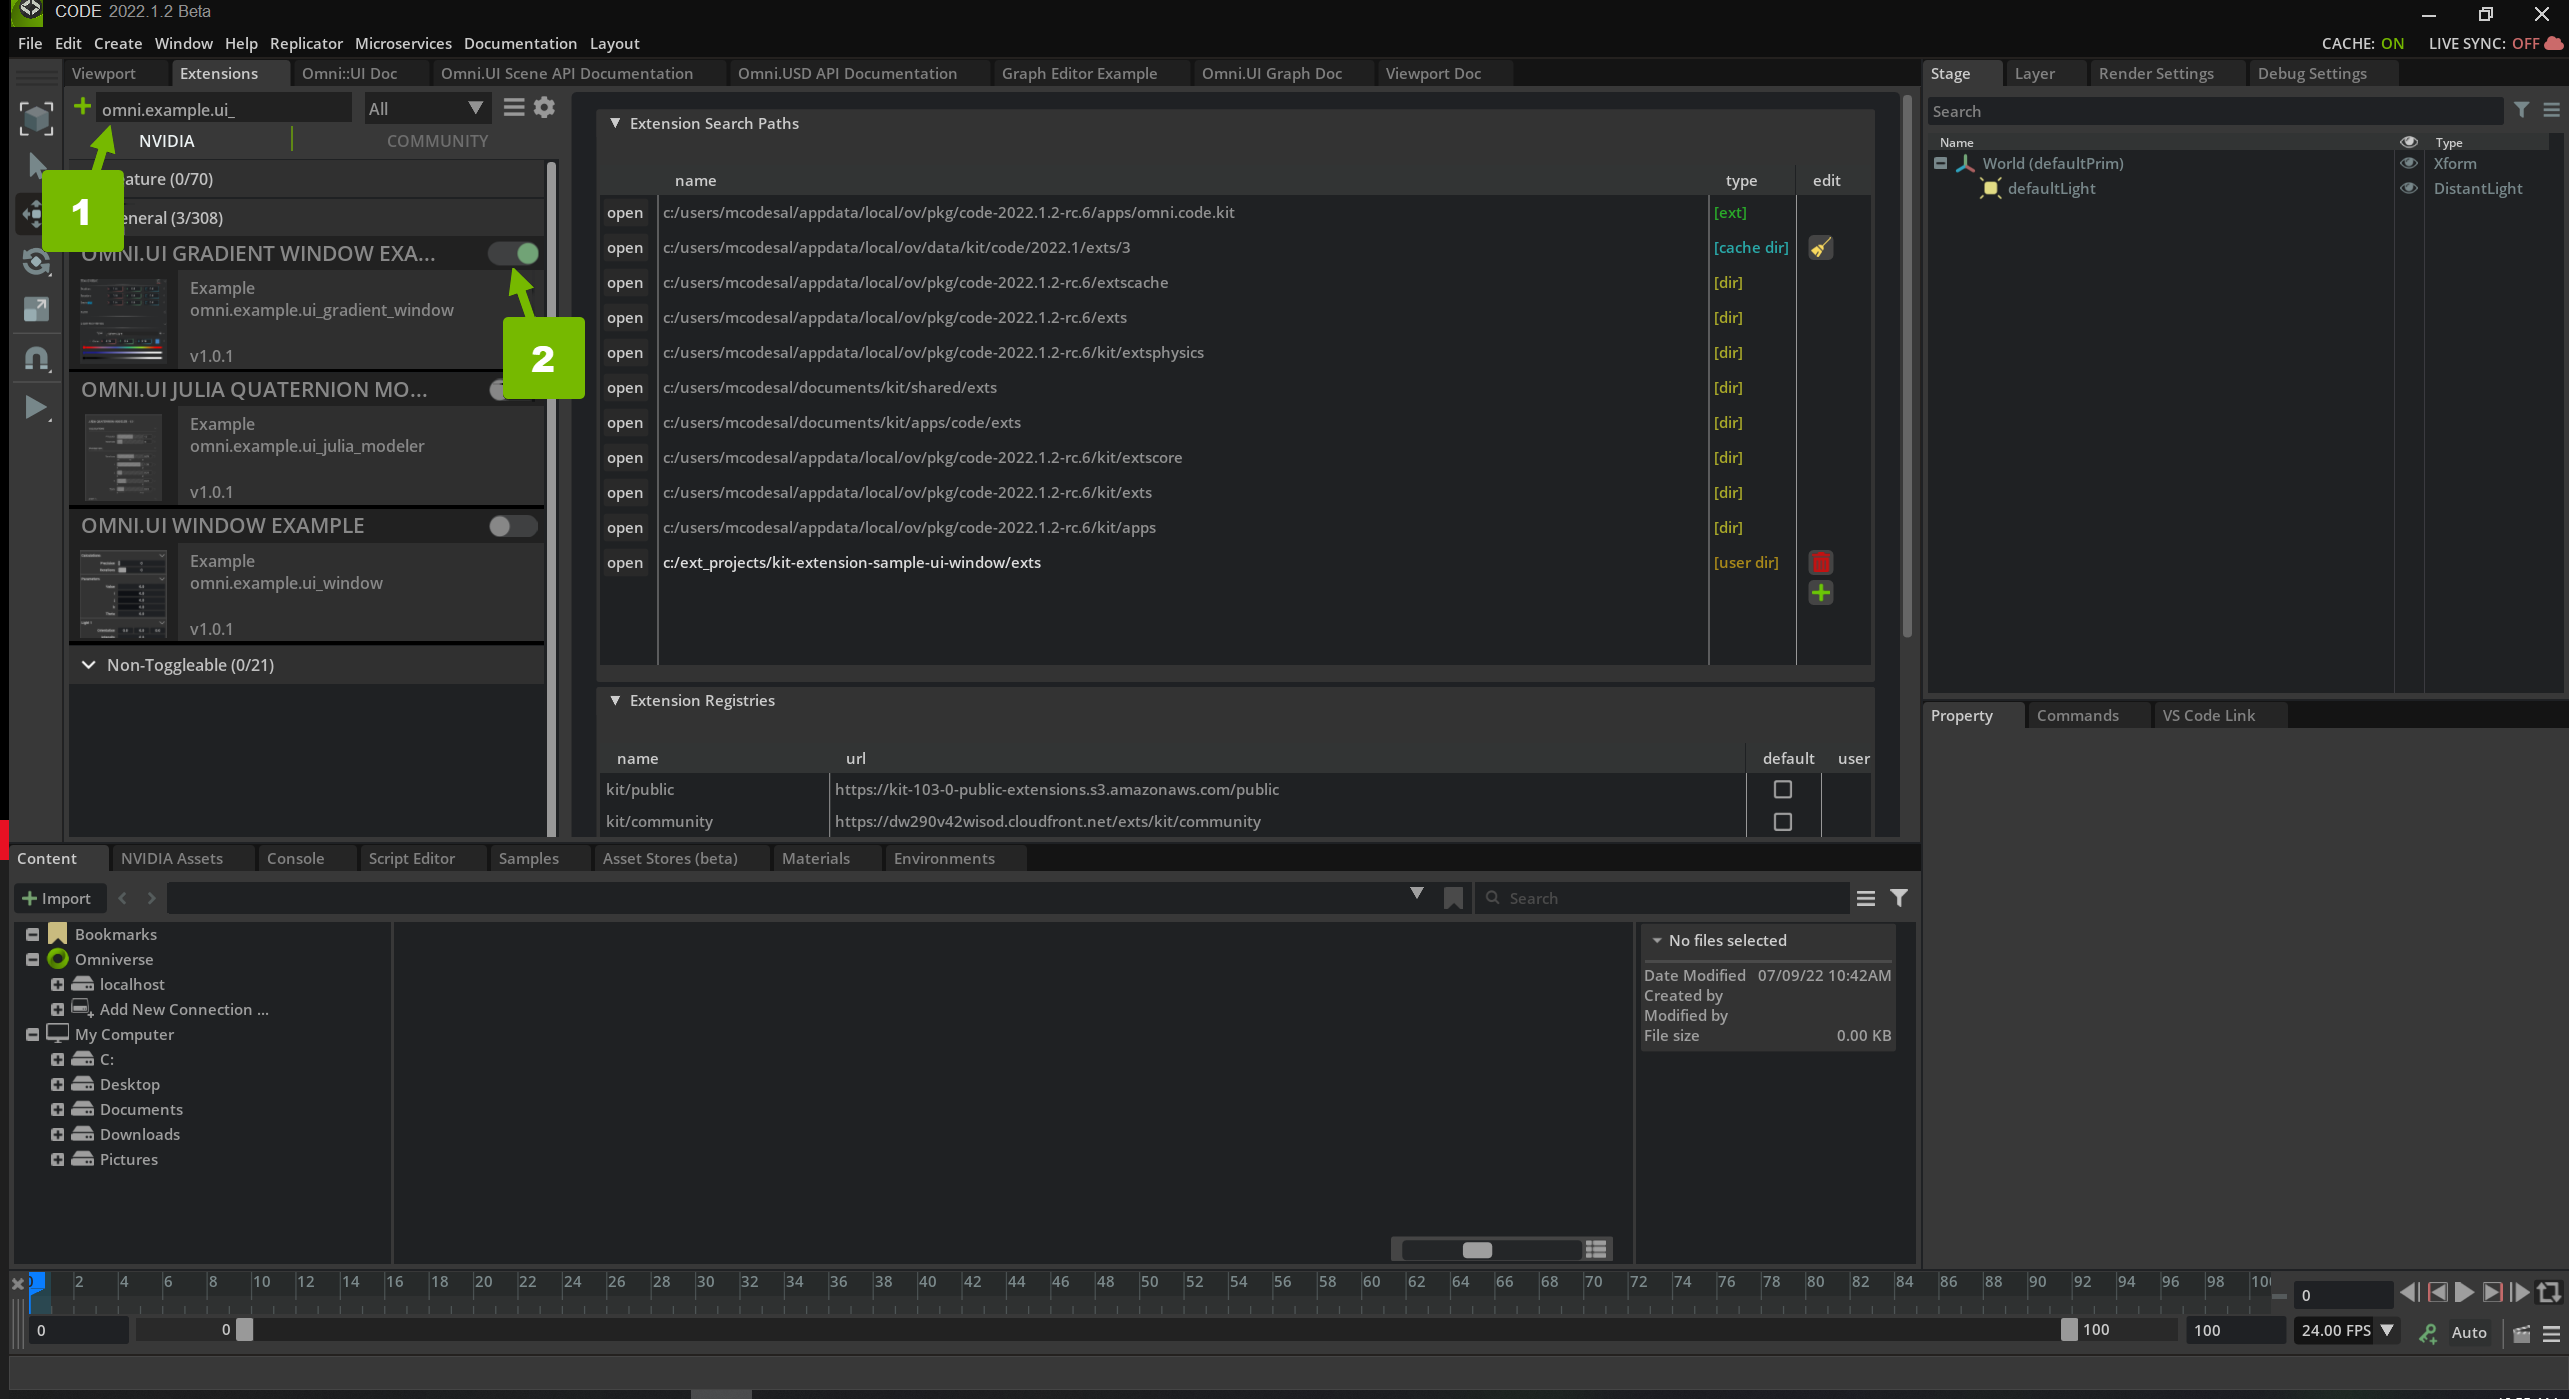
After Enabling the extension the following window will appear:
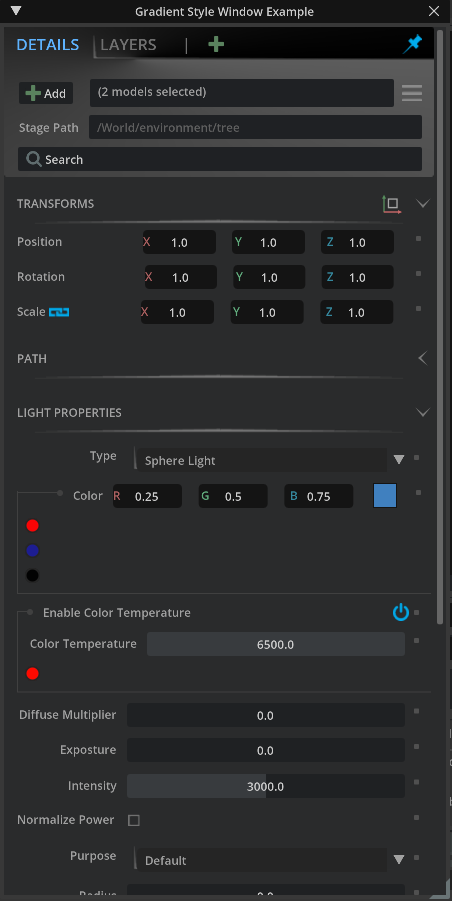
Unlike the main repo, this extension is missing quite a few things that we will need to add, mainly the gradient. Moving forward we will go into detail on how to create the gradient style and apply it to our UI Window.
Step 2: Familiarize Yourself with Interpolation#
What is interpolation? Interpolation a way to find or estimate a point based on a range of discrete set of known data points. For our case we interpolate between colors to appropriately set the slider handle color.
Let’s say the start point is black and our end point is white. What is a color that is in between black and white? Gray is what most would say. Using interpolation we can get more than just gray. Here is a picture representation of what it looks like to interpolate between black and white:

We can also use blue instead of black. It would then look something like this:

Interpolation can also be used with a spectrum of colors:

Step 3: Set up the Gradients#
Hexadecimal (Hex) is a base 16 numbering system where 0-9 represents their base 10 counterparts and A-F represent the base 10 values 10-15.
A Hex color is written as #RRGGBB where RR is red, GG is green and BB is blue. The hex values have the range 00 - ff which is equivalent to 0 - 255 in base 10. So to write the hex value to a color for red it would be: #ff0000. This is equivalent to saying R=255, G=0, B=0.
To flesh out the hex_to_color function we will use bit shift operations to convert the hex value to color.
Step 3.2: Add Red to hex_to_color#
Replace pass with red = hex & 255:
def hex_to_color(hex: int) -> tuple:
    # convert Value from int
    red = hex & 255
Warning
Don’t save yet! We must return a tuple before our function will run.
Step 3.3: Add Green to hex_to_color#
Underneath where we declared red, add the following line green = (hex >> 8) & 255:
def hex_to_color(hex: int) -> tuple:
    # convert Value from int
    red = hex & 255
    green = (hex >> 8) & 255
Note
255 in binary is 0b11111111 (8 set bits)
Step 3.4: Add the remaining colors to hex_to_color#
Try to fill out the rest of the following code for blue and alpha:
def hex_to_color(hex: int) -> tuple:
    # convert Value from int
    red = hex & 255
    green = (hex >> 8) & 255
    blue = # YOUR CODE
    alpha = # YOUR CODE
    rgba_values = [red, green, blue, alpha]
    return rgba_values
Click here for solution
def hex_to_color(hex: int) -> tuple:
    # convert Value from int
    red = hex & 255
    green = (hex >> 8) & 255
    blue = (hex >> 16) & 255
    alpha = (hex >> 24) & 255
    rgba_values = [red, green, blue, alpha]
    return rgba_values
Step 4: Create generate_byte_data#
We will now be filling out the function generate_byte_data. This function will take our colors and generate byte data that we can use to make an image using ImageWithProvider. Here is the function we will be editing:
def generate_byte_data(colors):
    # YOUR CODE HERE
    pass
Step 4.1: Create an Array for Color Values#
Replace pass with data = []. This will contain the color values:
def generate_byte_data(colors):
    data = []
Step 4.2: Loop Through the Colors#
Next we will loop through all provided colors in hex form to color form and add it to data. This will use hex_to_color created previously:
def generate_byte_data(colors):
    data = []
    for color in colors:
        data += hex_to_color(color)
Step 4.3: Loop Through the Colors#
Use ByteImageProvider to set the sequence as byte data that will be used later to generate the image:
def generate_byte_data(colors):
    data = []
    for color in colors:
        data += hex_to_color(color)

    _byte_provider = ui.ByteImageProvider()
    _byte_provider.set_bytes_data(data [len(colors), 1])
    return _byte_provider
Step 5: Build the Image#
Now that we have our data we can use it to create our image.
Step 5.1: Locate build_gradient_image()#
In style.py, navigate to build_gradient_image():
def build_gradient_image(colors, height, style_name):
    # YOUR CODE HERE
    pass
Step 5.2: Create Byte Sequence#
Replace pass with byte_provider = generate_byte_data(colors):
def build_gradient_image(colors, height, style_name):
    byte_provider = generate_byte_data(colors)
Step 5.3: Transform Bytes into the Gradient Image#
Use ImageWithProvider to transform our sequence of bytes to an image.
def build_gradient_image(colors, height, style_name):
    byte_provider = generate_byte_data(colors)
    ui.ImageWithProvider(byte_provider,fill_policy=omni.ui.IwpFillPolicy.IWP_STRETCH, height=height, name=style_name)
    return byte_provider
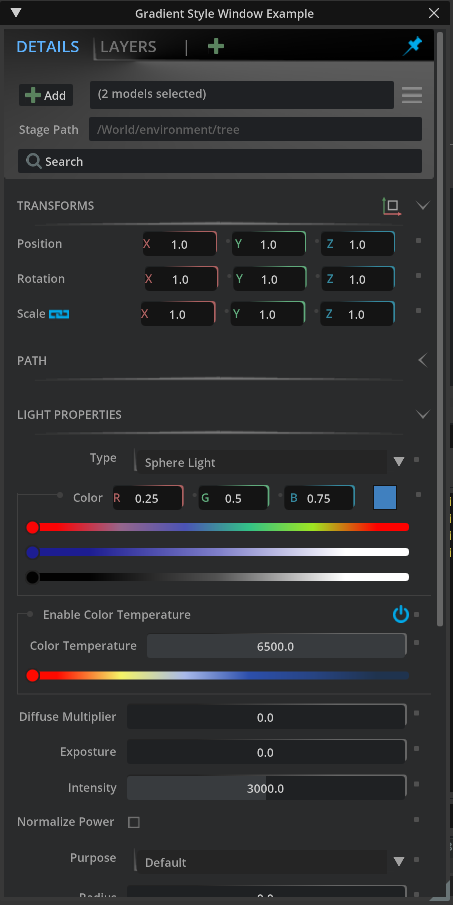
Save style.py and take a look at our window. It should look like the following:
Note
If the extension does not look like the following, close down Code and try to relaunch.
Step 5.4: How are the Gradients Used?#
Head over to color_widget.py, then scroll to around line 90:
self.color_button_gradient_R = build_gradient_image([cl_attribute_dark, cl_attribute_red], 22, "button_background_gradient")
                        ui.Spacer(width=9)
                        with ui.VStack(width=6):
                            ui.Spacer(height=8)
                            ui.Circle(name="group_circle", width=4, height=4)
                        self.color_button_gradient_G = build_gradient_image([cl_attribute_dark, cl_attribute_green], 22, "button_background_gradient")
                        ui.Spacer(width=9)
                        with ui.VStack(width=6):
                            ui.Spacer(height=8)
                            ui.Circle(name="group_circle", width=4, height=4)
                        self.color_button_gradient_B = build_gradient_image([cl_attribute_dark, cl_attribute_blue], 22, "button_background_gradient")
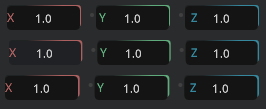
This corresponds to the widgets that look like this:
Step 5.5: Experiment - Change the red to pink#
Go to style.py, locate the pre-defined constants, change cl_attribute_red’s value to cl("#fc03be")
# Pre-defined constants. It's possible to change them runtime.
fl_attr_hspacing = 10
fl_attr_spacing = 1
fl_group_spacing = 5

cl_attribute_dark = cl("#202324")
cl_attribute_red = cl("#fc03be") # previously was cl("#ac6060")
cl_attribute_green = cl("#60ab7c")
cl_attribute_blue = cl("#35889e")
cl_line = cl("#404040")
cl_text_blue = cl("#5eb3ff")
cl_text_gray = cl("#707070")
cl_text = cl("#a1a1a1")
cl_text_hovered = cl("#ffffff")
cl_field_text = cl("#5f5f5f")
cl_widget_background = cl("#1f2123")
cl_attribute_default = cl("#505050")
cl_attribute_changed = cl("#55a5e2")
cl_slider = cl("#383b3e")
cl_combobox_background = cl("#252525")
cl_main_background = cl("#2a2b2c")

cls_temperature_gradient = [cl("#fe0a00"), cl("#f4f467"), cl("#a8b9ea"), cl("#2c4fac"), cl("#274483"), cl("#1f334e")]
cls_color_gradient = [cl("#fa0405"), cl("#95668C"), cl("#4b53B4"), cl("#33C287"), cl("#9fE521"), cl("#ff0200")]
cls_tint_gradient = [cl("#1D1D92"), cl("#7E7EC9"), cl("#FFFFFF")]
cls_grey_gradient = [cl("#020202"), cl("#525252"), cl("#FFFFFF")]
cls_button_gradient = [cl("#232323"), cl("#656565")]
Tip
Storing colors inside of the style.py file will help with reusing those values for other widgets. The value only has to change in one location, inside of style.py, rather than everywhere that the hex value was hard coded.
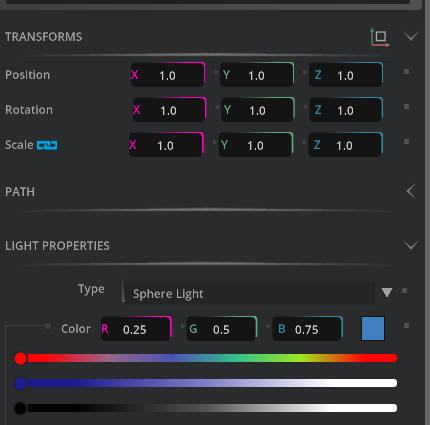
The colors for the sliders can be changed the same way.
Step 6: Get the Handle of the Slider to Show the Color as it’s Moved#
Currently, the handle on the slider turns to black when interacting with it.
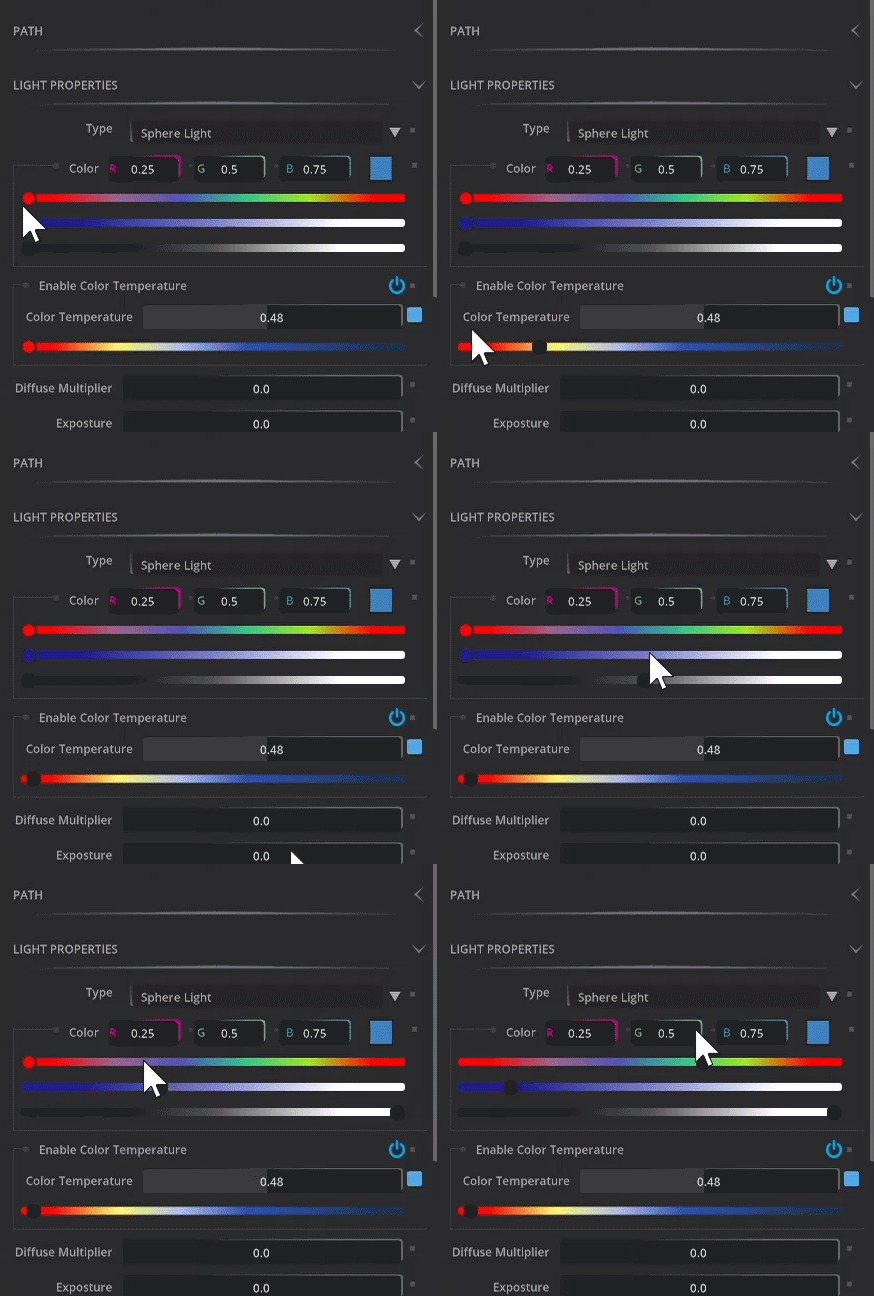
This is because we need to let it know what color we are on. This can be a bit tricky since the sliders are simple images. However, using interpolation we can approximate the color we are on.
During this step we will be filling out _interpolate_color function inside of style.py.
def _interpolate_color(hex_min: int, hex_max: int, intep):
    pass
Step 6.1: Set the color range#
Define max_color and min_color. Then remove pass.
def _interpolate_color(hex_min: int, hex_max: int, intep):
    max_color = hex_to_color(hex_max)
    min_color = hex_to_color(hex_min)
Step 6.2: Calculate the color#
def _interpolate_color(hex_min: int, hex_max: int, intep):
    max_color = hex_to_color(hex_max)
    min_color = hex_to_color(hex_min)
    color = [int((max - min) * intep) + min for max, min in zip(max_color, min_color)]
Step 6.3: Return the interpolated color#
def _interpolate_color(hex_min: int, hex_max: int, intep):
    max_color = hex_to_color(hex_max)
    min_color = hex_to_color(hex_min)
    color = [int((max - min) * intep) + min for max, min in zip(max_color, min_color)]
    return (color[3] << 8 * 3) + (color[2] << 8 * 2) + (color[1] << 8 * 1) + color[0]
Step 7: Getting the Gradient Color#
Now that we can interpolate between two colors we can grab the color of the gradient in which the slider is on. To do this we will be using value which is the position of the slider along the gradient image, max being the maximum number the value can be, and a list of all the colors.
After calculating the step size between the colors that made up the gradient image, we can then grab the index to point to the appropriate color in our list of colors that our slider is closest to. From that we can interpolate between the first color reference in the list and the next color in the list based on the index.
Step 7.1: Locate get_gradient_color function#
def get_gradient_color(value, max, colors):
    pass
Step 7.2: Declare step_size and step#
def get_gradient_color(value, max, colors):
    step_size = len(colors) - 1
    step = 1.0/float(step_size)
Step 7.3: Declare percentage and idx#
def get_gradient_color(value, max, colors):
    step_size = len(colors) - 1
    step = 1.0/float(step_size)
    percentage = value / float(max)

    idx = (int) (percentage / step)
Step 7.4: Check to see if our index is equal to our step size, to prevent an Index out of bounds exception#
def get_gradient_color(value, max, colors):
    step_size = len(colors) - 1
    step = 1.0/float(step_size)
    percentage = value / float(max)

    idx = (int) (percentage / step)
    if idx == step_size:
        color = colors[-1]
Step 7.5: Else interpolate between the current index color and the next color in the list. Return the result afterwards.#
def get_gradient_color(value, max, colors):
    step_size = len(colors) - 1
    step = 1.0/float(step_size)
    percentage = value / float(max)

    idx = (int) (percentage / step)
    if idx == step_size:
        color = colors[-1]
    else:
        color = _interpolate_color(colors[idx], colors[idx+1], percentage)
    return color
Save the file and head back into Omniverse to test out the slider.
Now when moving the slider it will update to the closest color within the color list.

Conclusion#
This was a tutorial about how to create gradient styles in the Window. Check out the complete code in the main branch to see how other styles were created. To learn more about how to create custom widgets check out the Julia Modeler example.
As a challenge, try to use the color that gets set by the slider to update something in the scene.