Aggregate 3D Models and Datasets#
Aggregating 3D models and datasets within Omniverse is straightforward. In this tutorial, we cover three main approaches:
Importing Assets from Libraries
Using custom 3D tools to import assets from external software.
Point Cloud Data
Importing Assets from Libraries#
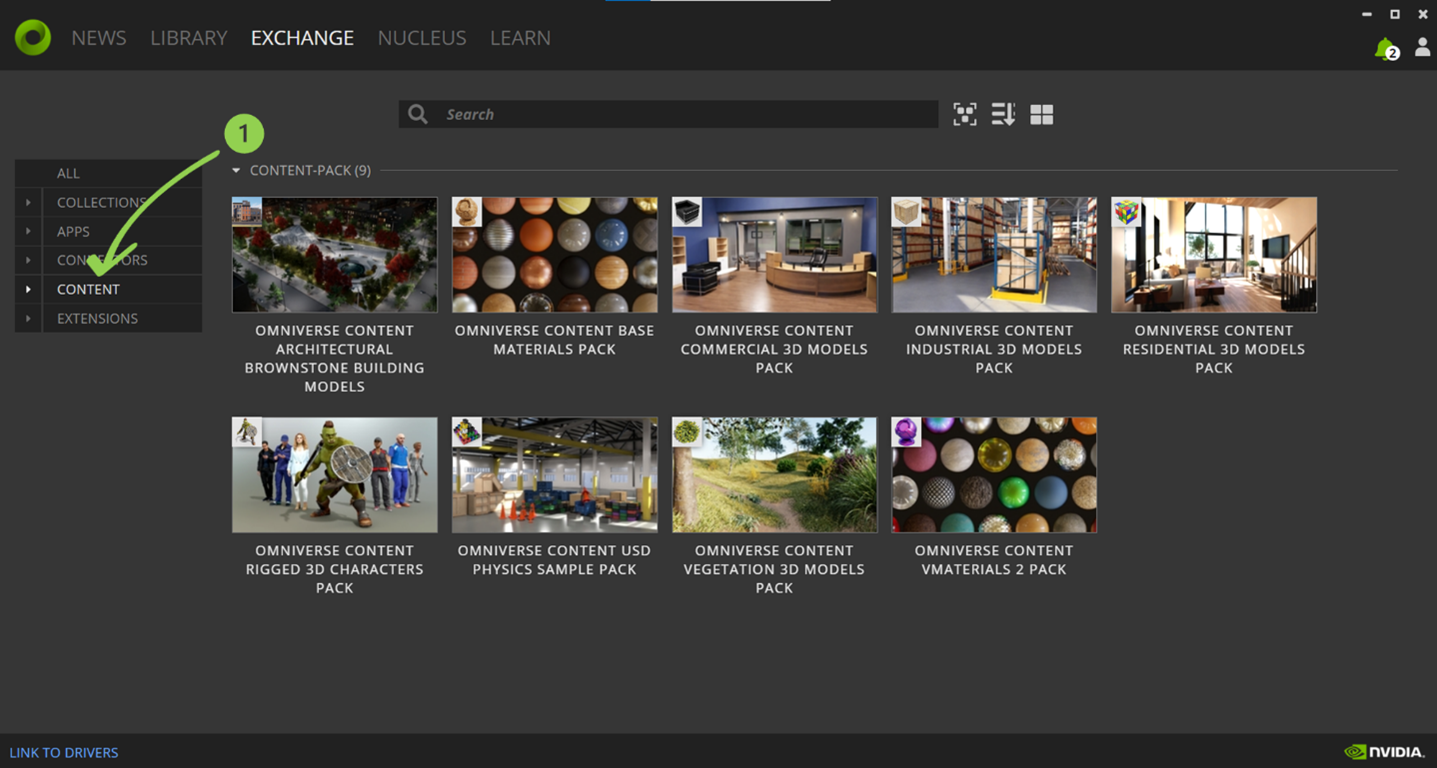
Omniverse Launcher allows users to download additional assets via content starter packs to allow for more options outside of the “NVIDIA Assets” and “Asset Stores (beta)” browsers. To get started, open Omniverse Launcher and under Exchange -> Content you will find “Content-Packs” available for download (1).
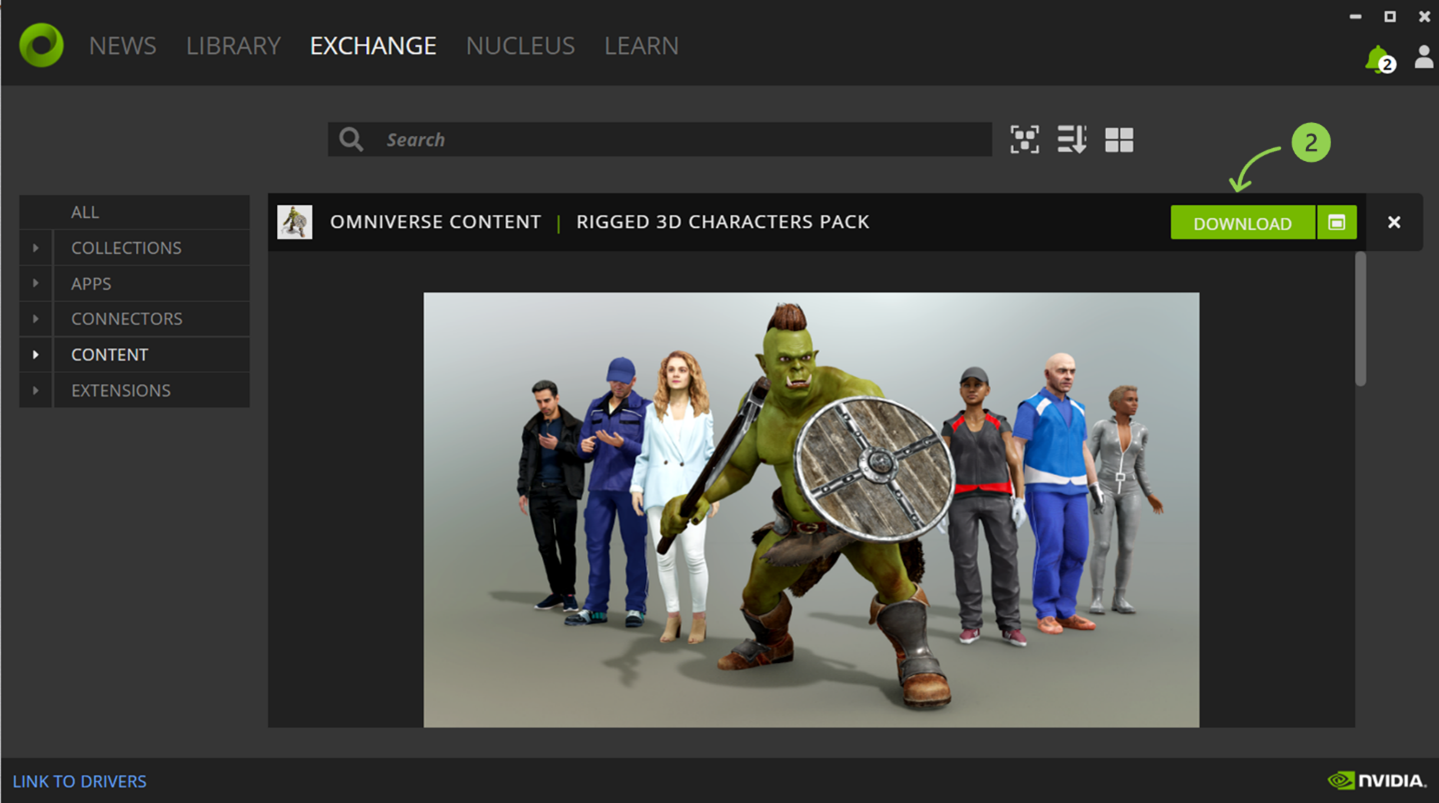
Select the content-pack of interest and click “Download” (2). Once selected, the content pack will download to your PC. Note that the default path is your Window’s “Downloads” folder. This directory can be changed next to the “Download” button (2) prior to choosing to download the content-pack.
Once the download has finished, navigate to your directory using the “Content” browser window (3).
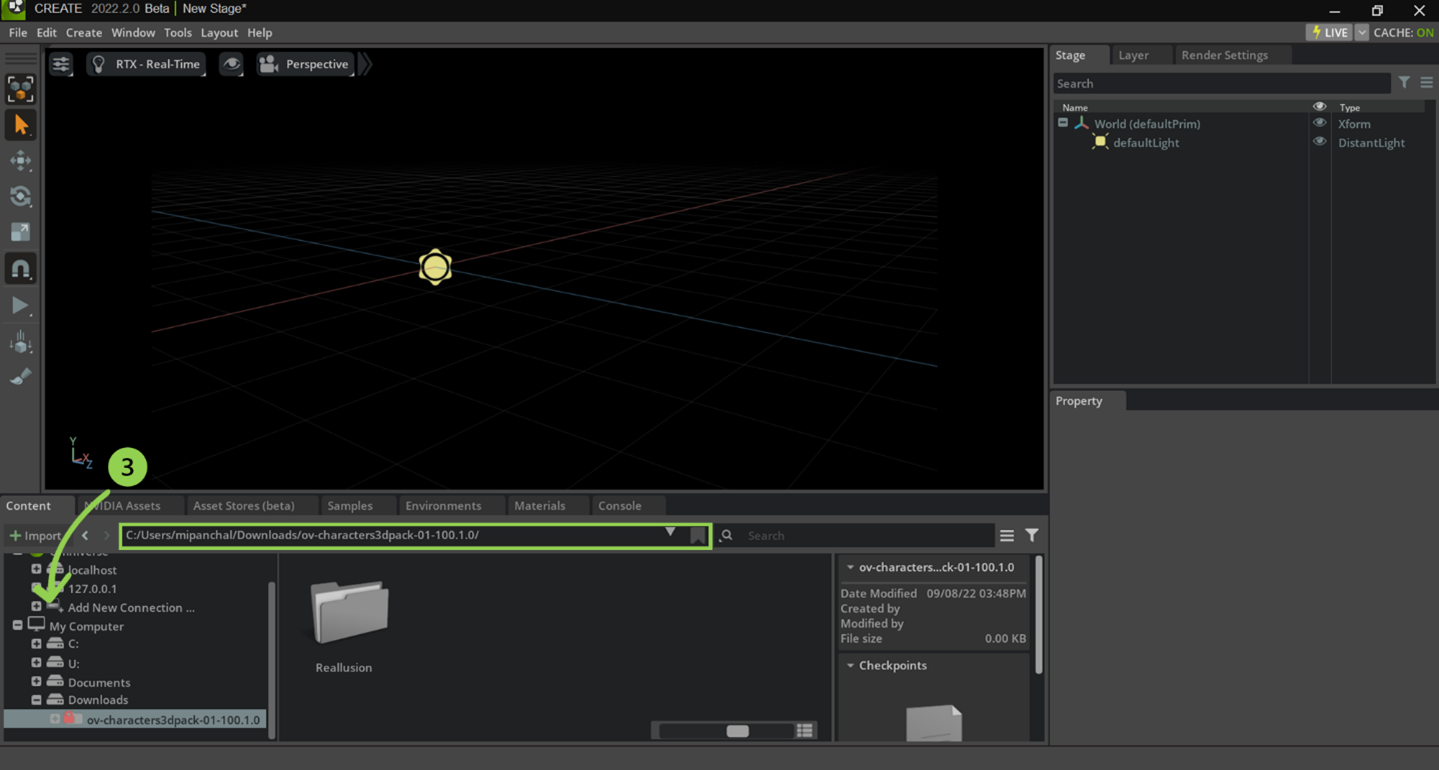
You may navigate to your content-pack using the navigation pane or by typing in the directory path.

After navigating to your newly downloaded content-pack directory, browse your directory for the asset you would like to add to your scene. In this example, we have downloaded the Omniverse “Rigged 3D Characters Pack” and will be importing the “Worker”. Select the asset, then drag and drop it within your scene (4).
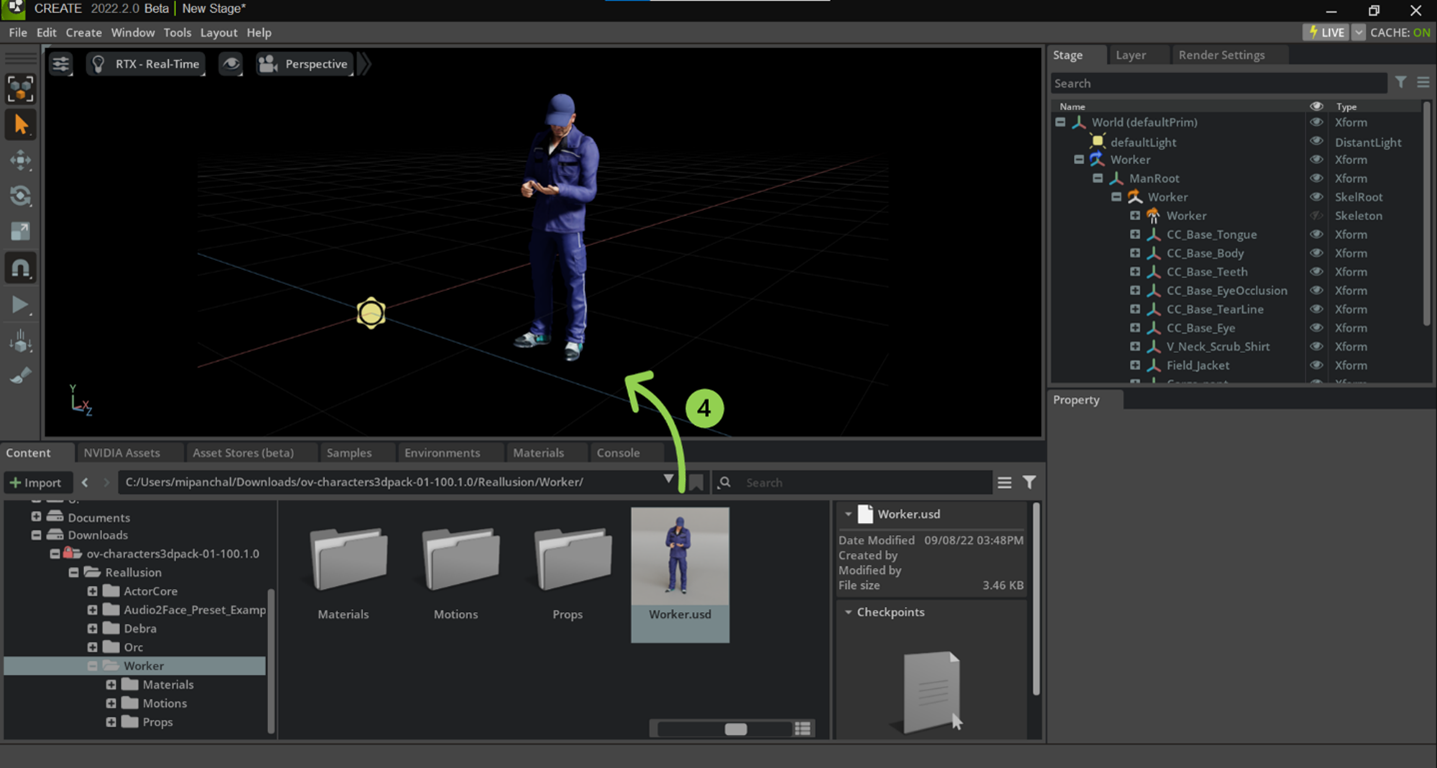
Voila! You have successfully downloaded a content-pack and spawned the asset within your scene.
Custom 3D Tools to Import Assets from External Software#
Import 3D Assets#
You can import assets from external software to build your digital twin. NVIDIA has built extensions and additional software layers on top of the open-source USD distribution that allows digital content creation (DCC) tools and compute services to communicate with each other through the Omniverse Nucleus Database (DB).
USD Data Exchange Types#
There are several types of importers, exporters, converters, and USD file format plug-ins that allow you to interact in multiple ways with a large collection of Digital Content Creation (DCC) tools to import 3D assets into Omniverse. The table below summarizes just a few connectors and the corresponding DCC tools available to aggregate 3D assets to build your digital twin.
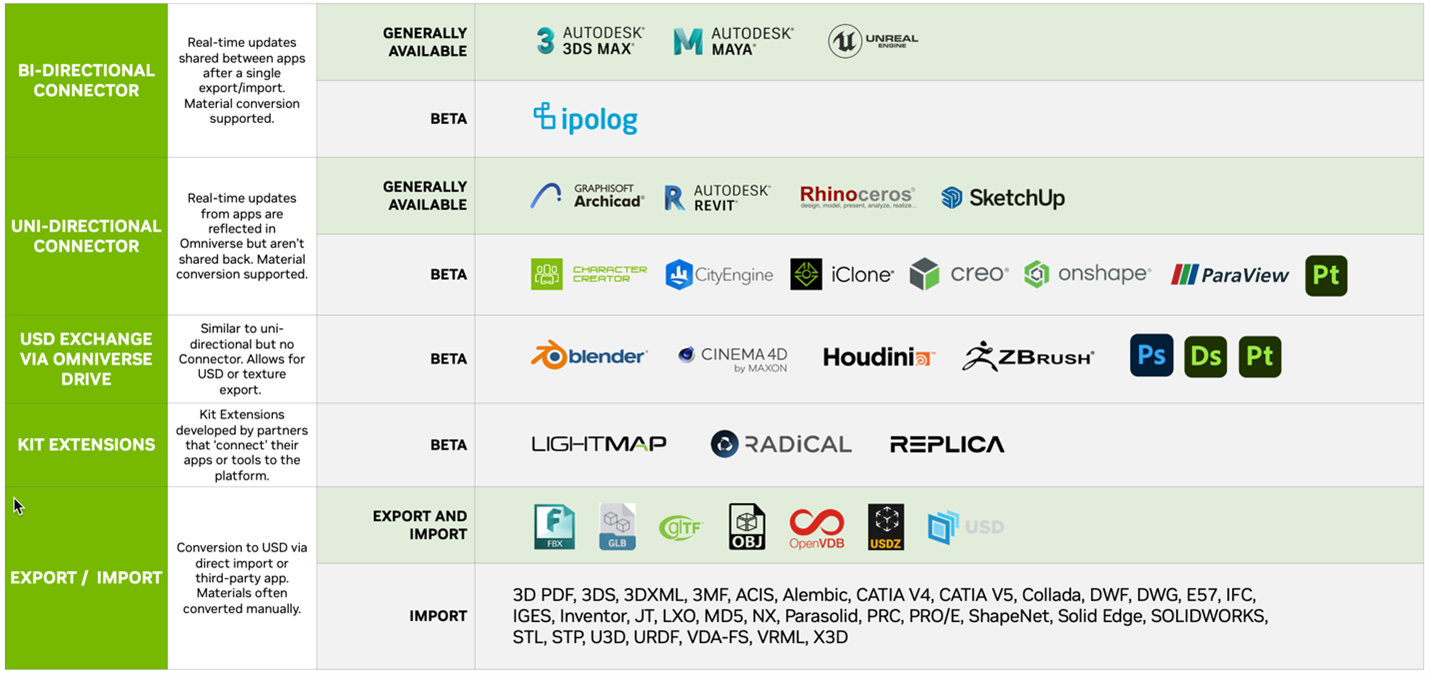
For a more detailed catalog of products, applications, and file formats that support OpenUSD data exchange you can Refer to our OpenUSD Exchange catalog.
Resources for Using Connectors with different DCCs#
Here are some specific connector workflow tutorials for your favorite tools:
Digital Content Creation Tool |
Video |
Documentation |
|---|---|---|
Visual Components |
||
Revit |
||
Ipolog |
||
Creo |
||
Reallusion |
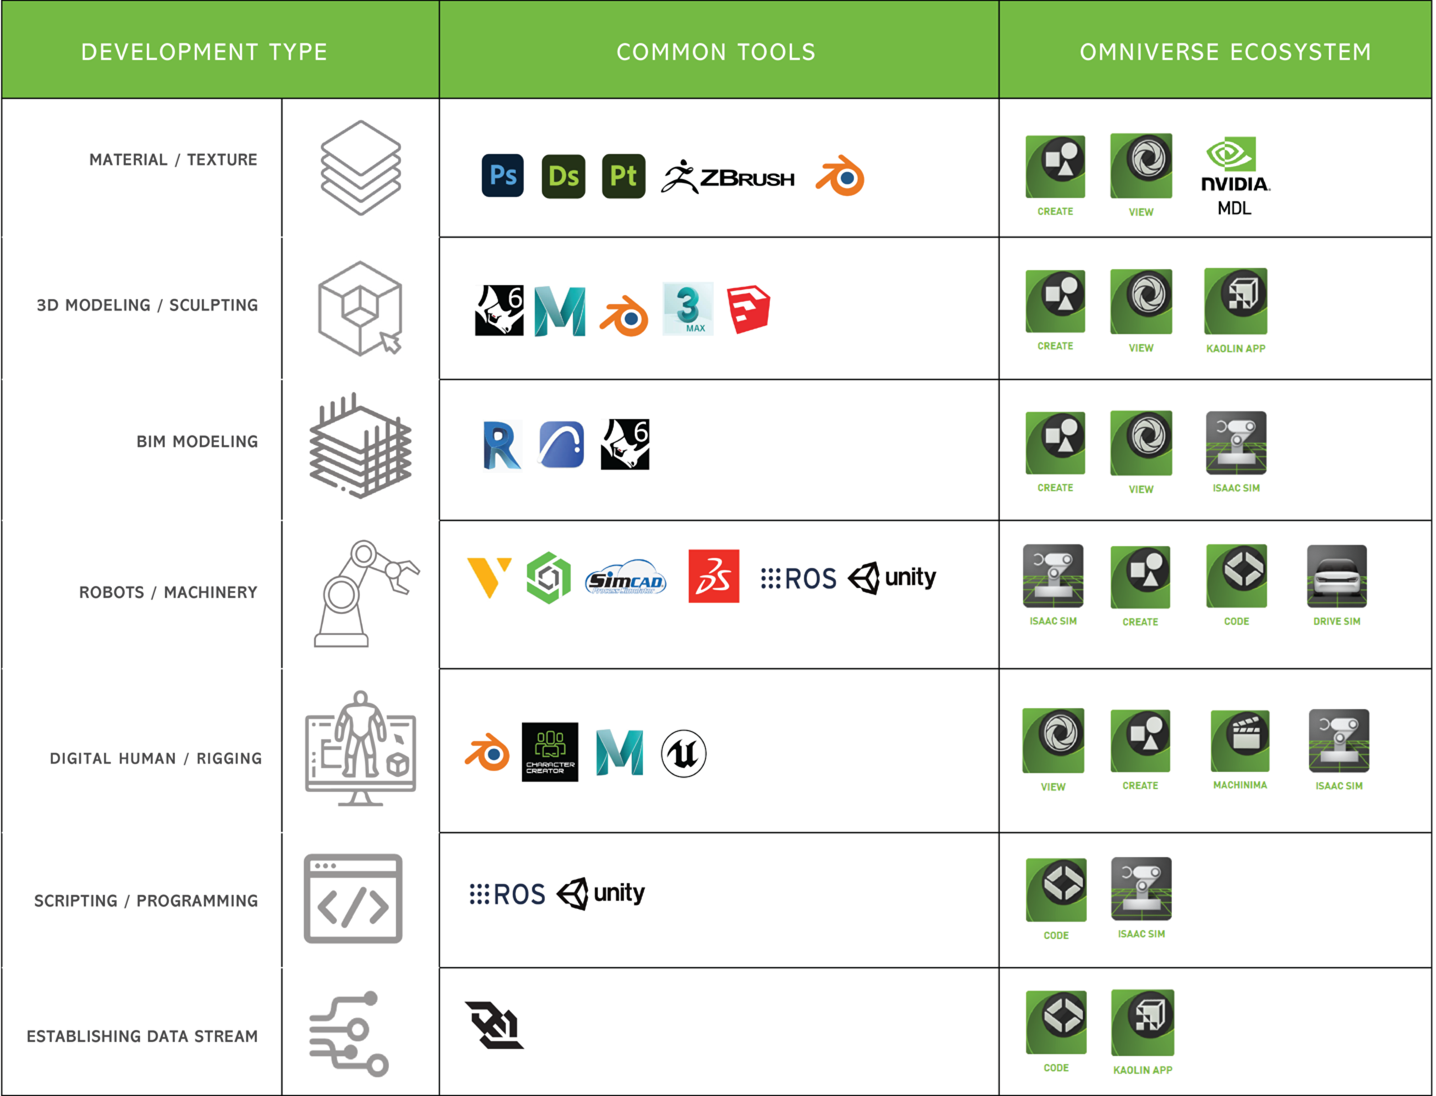
Building and Aggregating data for Warehouse Digital Twins#
In the context of importing warehouse assets, there can be several types of digital content that are to be imported. Some commonly used content development types and associated DCC tools are illustrated in the table below.
How do you create your own USD Exporter, Importer, or Converter?#
The OpenUSD Exchange SDK serves as middleware, helping developers design and develop their own USD I/O solutions that produce consistent and correct USD assets across diverse 3D ecosystems.
It provides higher-level convenience functions on top of lower-level USD concepts, so developers can quickly adopt OpenUSD best practices when mapping their native data sources to OpenUSD-legible data models.
They accelerate the development of using OpenUSD to create functionality for importers, exporters, and converters of 3D assets, data, and models between different workflows and tools through the use of Universal Scene Description (OpenUSD) as the interchange format.
These OpenUSD data exchange solutions are typically developed as a conversion feature or plugin of an existing application. This means that you would not be creating a new project, but instead integrating it into an existing project. Before jumping into integration, it is best to get started by trying the OpenUSD Exchange Samples. These are simple code examples that you can quickly build and experiment. They demonstrate different features and workflows that you can learn from and also modify to experiment with different parts of the OpenUSD Exchange SDK and OpenUSD.
Point Cloud Data#
Point cloud data can be used to visualize existing objects or spaces, previously scanned in the physical world. This can be particularly useful for cases where there are only few or no 3D models available or when the 3D virtual data is outdated, and you need to evaluate current state “as-built”.
Apart from visualization, more advanced use-cases may include:
The creation of digital 3D models based on existing ones.
Measuring distances and space layout for planning.
Training 3D based AI models on real environments.
Omniverse currently has support for e57 data import and rendering.