Developing and Building Apps

Overview
While most base applications developed for desktop purposes can be deployed on Omniverse Cloud PaaS, there are a couple of additional steps to turn them into Omniverse Cloud PaaS consumable applications and this document focuses on these steps. For general application development, build, and packaging, please refer to the Omniverse Developer Guide.
Note
The information contained below is based on building an application using Kit 105.1.2.
To turn your custom application into an Omniverse Cloud PaaS ready one, follow these steps:
Create an Omniverse Cloud PaaS specific version of your application:
Create a OVC Kit application file (e.g.,
my_custom_app.my_usd_explorer.ovc.kit).Import your base application (e.g.,
my_custom_app.my_usd_explorer.kit) into the Omniverse Cloud PaaS specific one as a dependency.Add additional required extensions and settings for Omniverse Cloud PaaS consumption.
Rebuild your application for Linux and pre-caching its extensions.
Create a fat package of your application.
Developing an Omniverse Cloud PaaS version of your Application
To build a version of your application ready for Omniverse Cloud PaaS consumption along with your standard application kit file, an Omniverse Cloud PaaS specific kit file is required to ensure proper functioning and fine-tuned
settings for browser streaming experience. You can name this with an .ovc.kit suffix added to your application name, for clarity and better project organization.
For example, if your application is named my_custom_app.my_usd_explorer, you will use my_custom_app.my_usd_explorer.kit for your main kit file and my_custom_app.my_usd_explorer.ovc.kit for Omniverse Cloud PaaS.
In this guide, we will use the content in this git repository as our foundation.
Creating the .kit File
In this example, we will start using omni.usd_explorer.kit as our base. Copy this file and name it as your custom app:
cp omni.usd_explorer.kit my_custom_app.my_usd_explorer.kit
Your my_custom_app.my_usd_explorer.kit file may be placed into the folder <ROOT>/source/apps/.
You can use your own custom *.kit file if you would prefer not to use the example USD Explorer Kit file. Below, we will use USD Explorer as an example workflow.
Creating the .ovc.kit File
The *.ovc.kit file requires specific extensions to be included to be prepared for OVC. Below is a reference taken from the omni.usd_explorer.ovc.kit file from the kit-app-template repository, annotated for clarity:
[dependencies]
# Items listed in this section are dependencies that this OV application requires.
# This is the main USD Explorer kit file. All of the settings and dependencies in there are also dependencies
# for this cloud based version of the application.
"omni.usd_explorer" = {}

# This extension controls what occurs when a scene is loaded on a streaming instances of USD Explorer
"omni.cloud.open_stage" = {}
"omni.kit.livestream.webrtc" = {}

[settings.app]
livestream.enabled = true

# Allows the client application to determine streaming resolution.
livestream.allowResize = true

livestream.webrtcEtli = true

# Only log errors or critical level issues.
livestream.logLevel = "error"

# Scale the application window to match the size & aspect ratio of the monitor.
window.scaleToMonitor = true

# Informs certain extensions that they are running on a cloud deployment of the application.
ovc_deployment = true

[settings.exts]
# Do not allow connections to new servers when running on OVC.
# Only 1 Nucleus server should be connected to an instance, which is setup during OVC Onboarding.
"omni.kit.window.filepicker".show_add_new_connection = false
Below are simplified steps for customizing the *.ovc.kit file:
Download the omni.usd_explorer.ovc.kit file into your project.
Rename the file based on your application name (e.g.,
my_custom_app.my_usd_explorer.ovc.kit).Review the values and modify any application specific settings as needed. (Additional information below.)
The *.ovc.kit file version should import your base application and add a set of required extensions and settings specific for Omniverse Cloud PaaS usage. Starting with the sample omni.usd_explorer.ovc.kit,
modify lines 13 and 52 that reference the omni.usd_explorer application so they now match your base application my_custom_app.my_usd_explorer.
[dependencies]
# Items listed in this section are dependencies that this OV application requires.
# This is the main My App Kit file. All settings and dependencies in this file are also dependencies
# for this cloud based version of the application.
"my_custom_app.my_usd_explorer" = {}

(…)

[settings.app.extensions]
generateVersionLockExclude = ["my_custom_app.my_usd_explorer"]
Creating a Kit Application Build Target
To go along with your .kit and .ovc.kit files, you need to create a corresponding build target. If you are using the standard repo-tools and project structure, this involves the following steps:
Open
./premake5.luathere (present in the root folder of the Kit App Template repository)Find the section
-- Apps:Verify there is an entry for your main app
define_app("my_custom_app.my_usd_explorer")Add an entry for the .ovc.kit app:
define_app("my_custom_app.my_usd_explorer.ovc").Since we only want to build our custom application, all other applications should be removed.
Below is the default contents of ./premake5.lua content in kit-app-template repo:
-- Apps: for each app generate batch files and a project based on kit files (e.g., my_name.my_app.kit)
define_app("omni.usd_explorer")
define_app("my_name.my_app")
Here is what it should look like to include your new OVC application version:
-- Apps: for each app generate batch files and a project based on kit files (e.g., my_name.my_app.kit)
define_app("my_custom_app.my_usd_explorer")
define_app("my_custom_app.my_usd_explorer.ovc")
Note
The reason you should define two applications is because a dedicated *.ovc app version is required, and this version contains the additional Omniverse Cloud PaaS required extensions and settings that augment the base application previously defined. By defining the *.ovc app here, we will ensure additional extensions are properly pre-cached and dedicated *.ovc batch launch files are automatically generated.
For distributed applications, we lock extension versions and pre-cache them. This step is important to ensure the necessary extension versions are packaged up in the container later. To do so, add my_custom_app.my_usd_explorer.ovc.kit to ./repo.toml:
Open
./repo.toml.Find the section
[repo_precache_exts].Find the apps list.
Ensure the base application
${root}/source/apps/my_custom_app.my_usd_explorer.kitis included.Add an entry for the .ovc.kit app:
${root}/source/apps/my_custom_app.my_usd_explorer.ovc.kitComment out any other applications.
An example of the file default content in kit-app-template repo contains:
[repo_precache_exts]
# Apps to run and precache
apps = [
    "${root}/source/apps/omni.usd_explorer.kit",
    "${root}/source/apps/my_name.my_app.kit",
]
Here is what it should look like to include your my_custom_app.my_usd_explorer.ovc.kit dependencies:
[repo_precache_exts]
 # Apps to run and precache
 apps = [
     "${root}/source/apps/my_custom_app.my_usd_explorer.kit",
     "${root}/source/apps/my_custom_app.my_usd_explorer.ovc.kit",
Performing the Initial Build of the custom Omniverse application
In order to perform a build of your kit application to run on an Omniverse Cloud PaaS Instance, you must perform the build on Linux. To learn more about the Kit application build process, follow the comprehensive docs found here.
Note
If you are a Windows-only developer you might develop and test your application locally. To test locally, this requires an extra build step by your devOps or IT team in a Linux environment, once you pass them your application code. Building and containerizing the application in Windows is NOT supported.
Build your application and verify that it runs correctly:
./repo.sh build
Once the application is built, ensure the application operates as intended, based on your original design. This is performed by using the validation steps listed below. After verification, perform a final clean release build that only includes the applications you want to publish and precache the extensions. The instructions to execute a clean release build are included here:
# cd into the directory where your source code is located
cd ~/kit-app-template-github

# clean the build directory
./repo.sh build -c

# build a release version of usd-viewer
./repo.sh build -r

# precache extensions
./repo.sh precache_exts -u
If the build completed successfully, you will see the following confirmation message:
BUILD (RELEASE) SUCCEEDED (Took XX.YY seconds)
# confirm that you see the above message when the build ends
The build process for my_custom_app.my_usd_explorer uses nearly 20GB when using the omni.usd_explorer.kit and omni.usd_explorer.kit.ovc files as the base.
Note that after you run the pre-caching of the extensions, your *.kit files will also have a new section labeled BEGIN GENERATED PART. This is where extension versions have been locked.
Validating Build of Custom Omniverse Application
After the build completes, you will see a new folder in your root directory called ./_build where the application resides:
~/kit-app-template-github/_build$ ls -al
total 36
drwxrwxr-x  9 horde horde 4096 Jun 27 21:17 .
drwxrwxr-x 12 horde horde 4096 Jun 27 21:17 ..
-rw-r--r--  1 horde root    0 Jun 27 21:13 .lastpippull
drwxr-xr-x  2 horde root  4096 Jun 27 21:17 PACKAGE-LICENSES
drwxr-xr-x  2 horde root  4096 Jun 27 21:17 deps
drwxrwxr-x  4 horde horde 4096 Jun 27 21:17 generated
drwxrwxr-x  2 horde horde 4096 Jun 27 21:17 host-deps
drwxr-xr-x  4 horde root  4096 Jun 27 21:17 linux-aarch64
drwxrwxr-x  4 horde horde 4096 Jun 27 21:17 linux-x86_64
drwxrwxr-x  2 horde horde 4096 Jun 27 21:12 target-deps
To locally test the built application, ensure you have an active desktop session to the system on which you have the build, which requires a desktop environment. Then execute the launch file located in ~/kit-app-template-github/_build/linux-x86_64/release/ using the following commands:
cd _build/linux-x86_64/release/

./my_custom_app.my_usd_explorer.ovc.sh
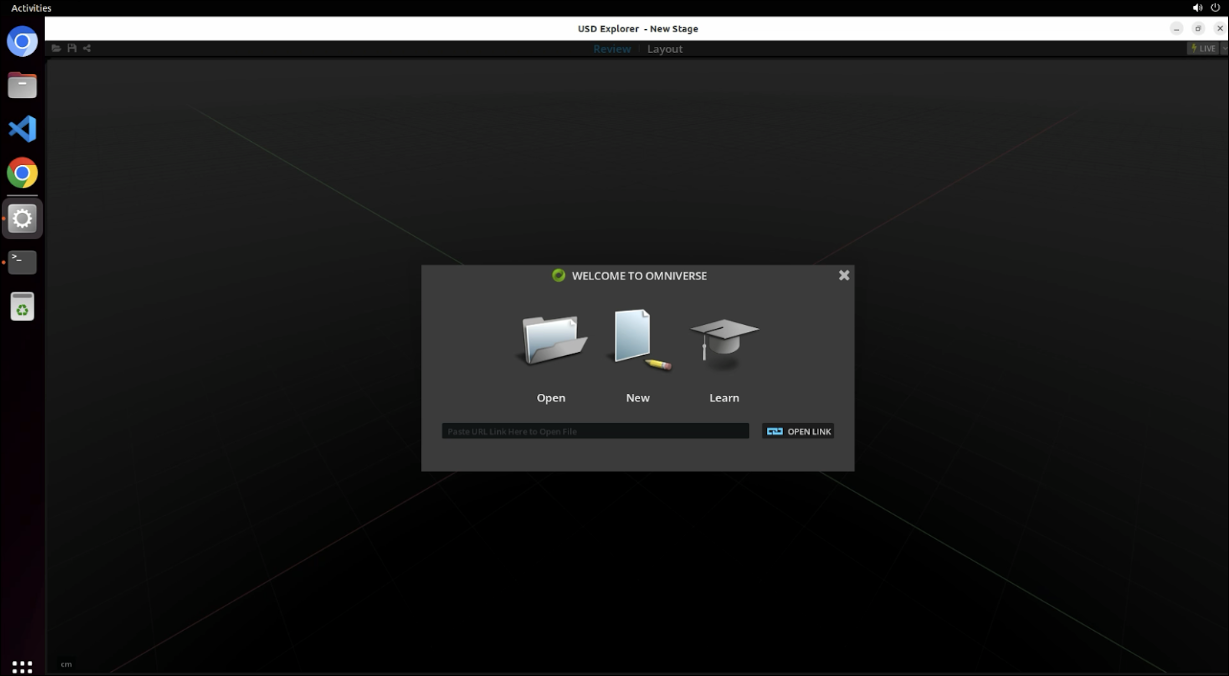
The launched application on a desktop will appear like the following:
Packaging your Application for Omniverse Cloud PaaS Deployment
Packaging for Omniverse Cloud PaaS requires the following steps:
Start from a clean release Linux build of your application with pre-cached extensions (Reference the Performing the Initial Build of the custom Omniverse application section.)
Create a Fat application package (Additional information is provided below.)
For further information on how to package your application, refer to the packaging guide.
Create a Fat Application Package
To create a container image of a kit application, ensure you have all required dependencies. Creating a fat application package leverages the NVIDIA provided repo tool to accomplish this. By doing so, it identifies all dependencies required by the kit application and packages them in a structured way, into a completely contained .zip file.
./repo.sh package
If the package was built successfully, you will see a similar confirmation message:
Packaging app (fat package)...
...
Package Created:
/home/horde/kit-app-template-github/_build/packages/kit-app-template-fat@2023.2.1+usd-viewer.0.92902f4b.local.linux-x86_64.release.zip
(Took 226.32 seconds)
This creates a large .zip file of your application in the _build/packages directory. For reference, the omni.usd_explorer.kit file will create a zip file of size 2.4GB.
du -h /home/horde/kit-app-template-github/_build/packages/

# 2.4G    /home/horde/kit-app-template-github/_build/packages/